# Virtuoso TestRail App

Want to use Virtuoso to run your tests and manually synchronize them with your TestRail account and organize your testing efforts?
The TestRail app solves the issue allowing automated synchronization of projects, goals, journeys, checkpoints, steps, and executions from Virtuoso to TestRail, giving you more time to focus on what is really important.
TestRail is a web-based test case management tool. It is used by testers, developers, and team leads to manage, track, and organize software testing efforts.
For more information about TestRail, visit the product page of TestRail (opens new window)

Requirements
Before using this application, you must have:
- A Virtuoso account;
- A TestRail account with administrative privileges.
To enable integration between Virtuoso and TestRail, some setup is required. Below is a list of steps that will help configure the app.
Current limitations
- The TestRail app assumes that there are no global required custom fields; If you have them, disable or make them not required for the Virtuoso synchronization project(s) in TestRail.
- Data-driven executions are partially synchronized. Specifically, only the first sequence of the journey is synchronized, and the outcome of the test case will be based on that initial sequence.
# Setup TestRail
# Enabling the TestRail API
Virtuoso uses the TestRail API to communicate. Below you will find the necessary steps to enable API in TestRail.
- Login into your TestRail instance (make sure you have administration privileges);
- Click on ADMINISTRATION;

- Click on Site Settings;
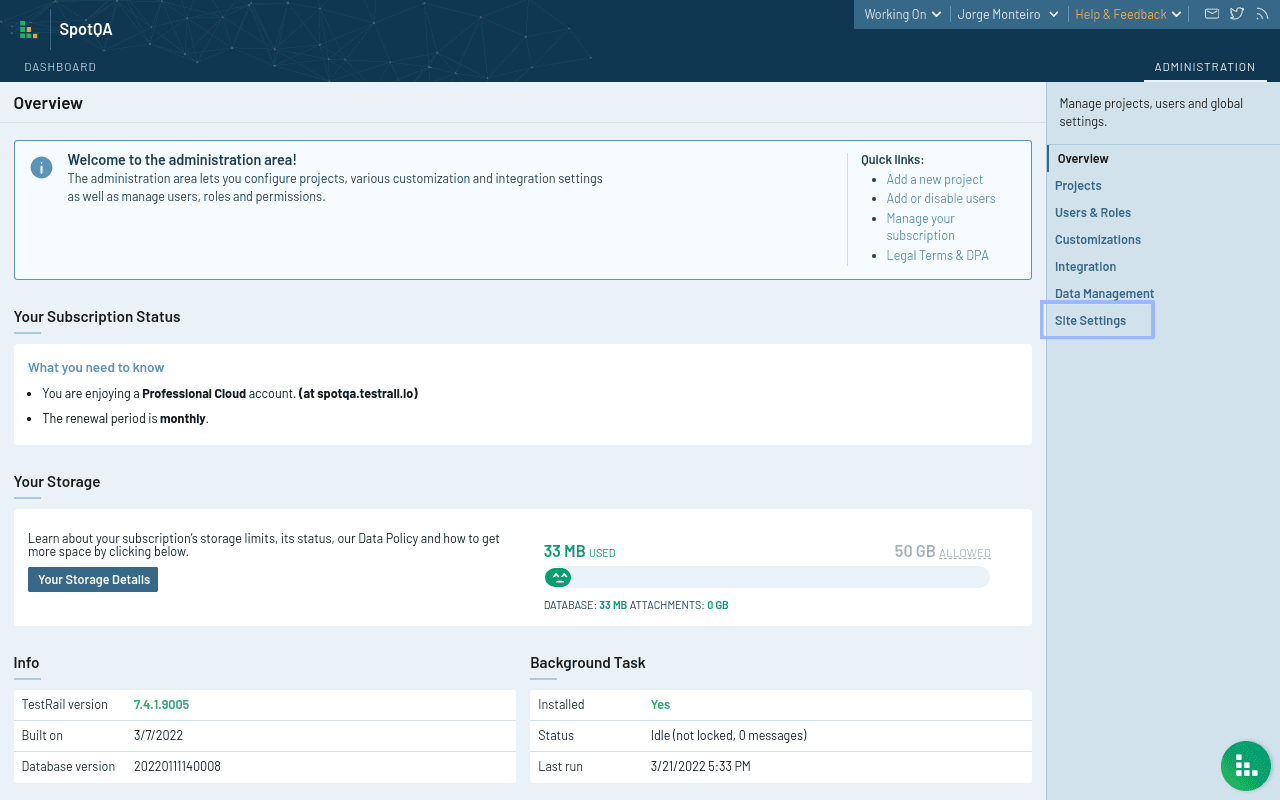
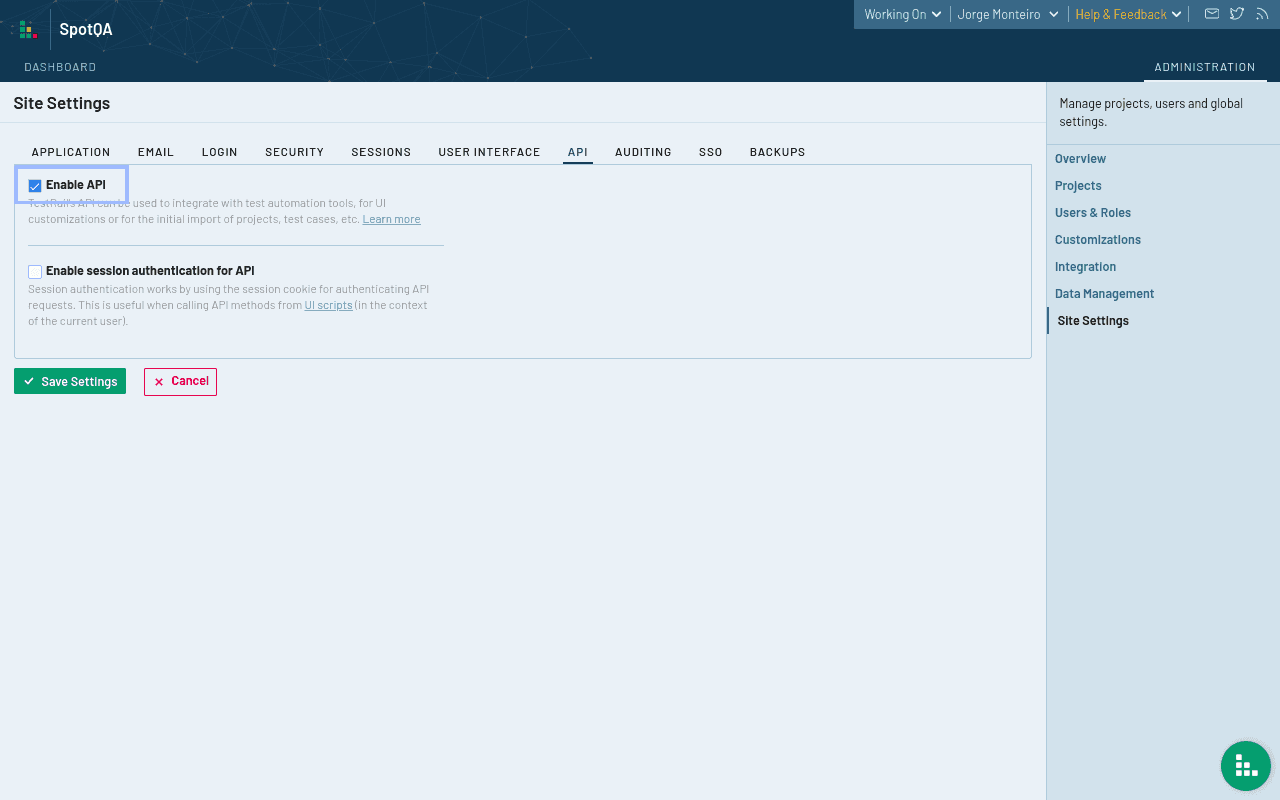
- Click on API from the site settings menu;
- Make sure the Enable API is checked (don't forget to press Save Settings);
Creating a Virtuoso User
The Virtuoso TestRail app requires administrative privileges to create projects and custom fields. Therefore, it is advised to create a dedicated user for this. However, if you don't want to use a dedicated user for Virtuoso, any user with administrative rights will work.
# Creating an API key
To create an API Key for the selected user, follow the following steps:
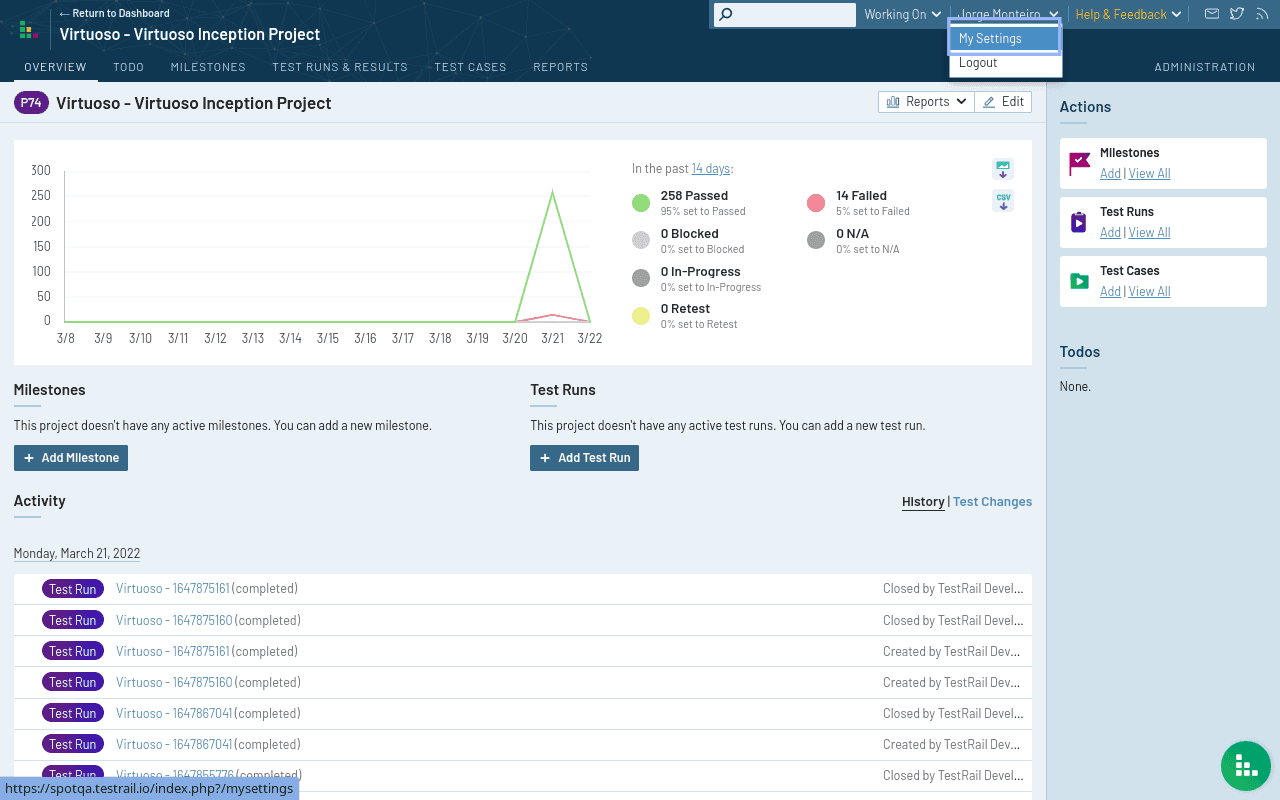
- Login in TestRail with the user created/selected;
- Click the username in the top right corner;
- Select My Settings
- Click API Keys
- Click Add key
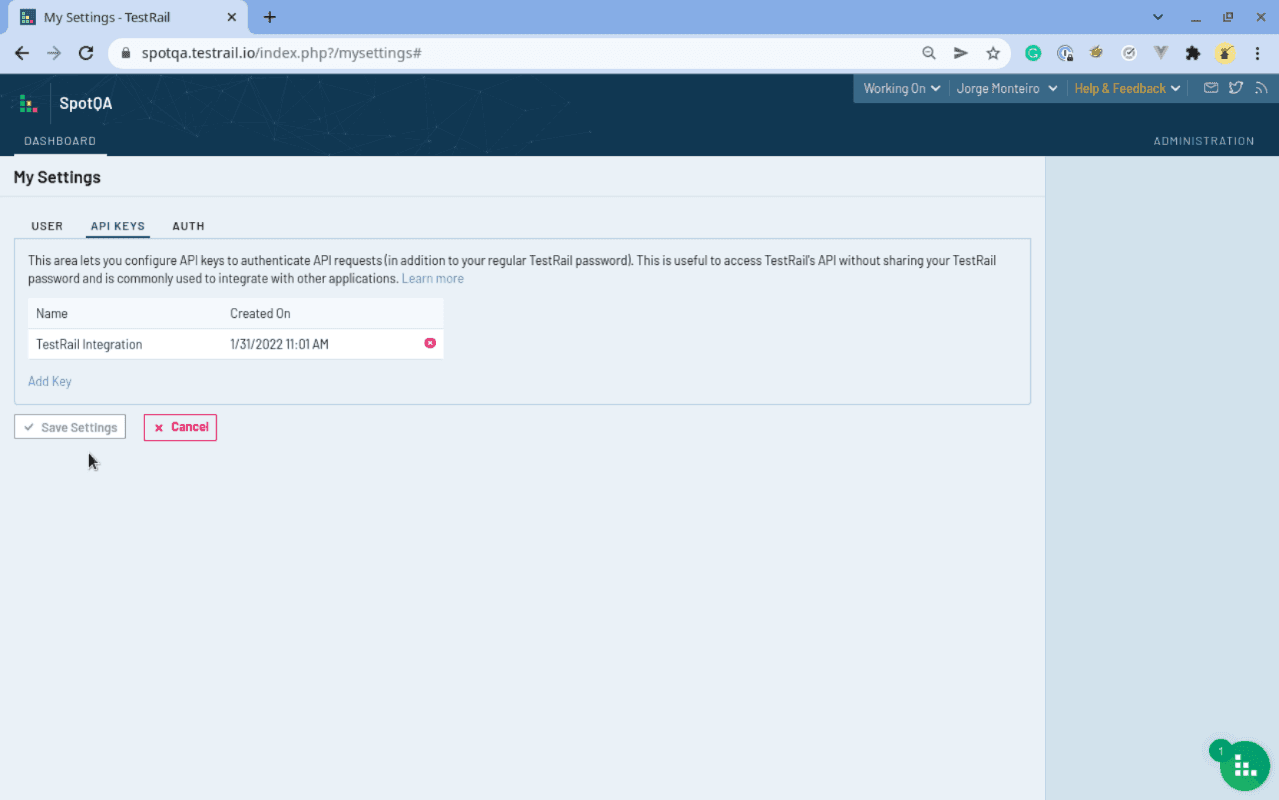
- Name the key TestRail integration (the name is a suggestion; any name will work)
- Copy the generated key and click Save Settings (save the generated key for later use)
# Adding the custom UI test case buttons to TestRail
Two optional buttons can be added to TestRail to allow more straightforward navigation (View in Virtuoso button) and direct execution requests (Execute In Virtuoso Button) to Virtuoso. To add the buttons, follow the following steps:
- Click ADMINISTRATION in the top right corner
- Click Customizations
- Click UI SCRIPTS
- Add the script's contents from the links in the app description.
WARNING
In order for Testrail to be able to communicate with Virtuoso through the custom scripts, it will be necessary to add the Virtuoso endpoint to the Content Security Policy
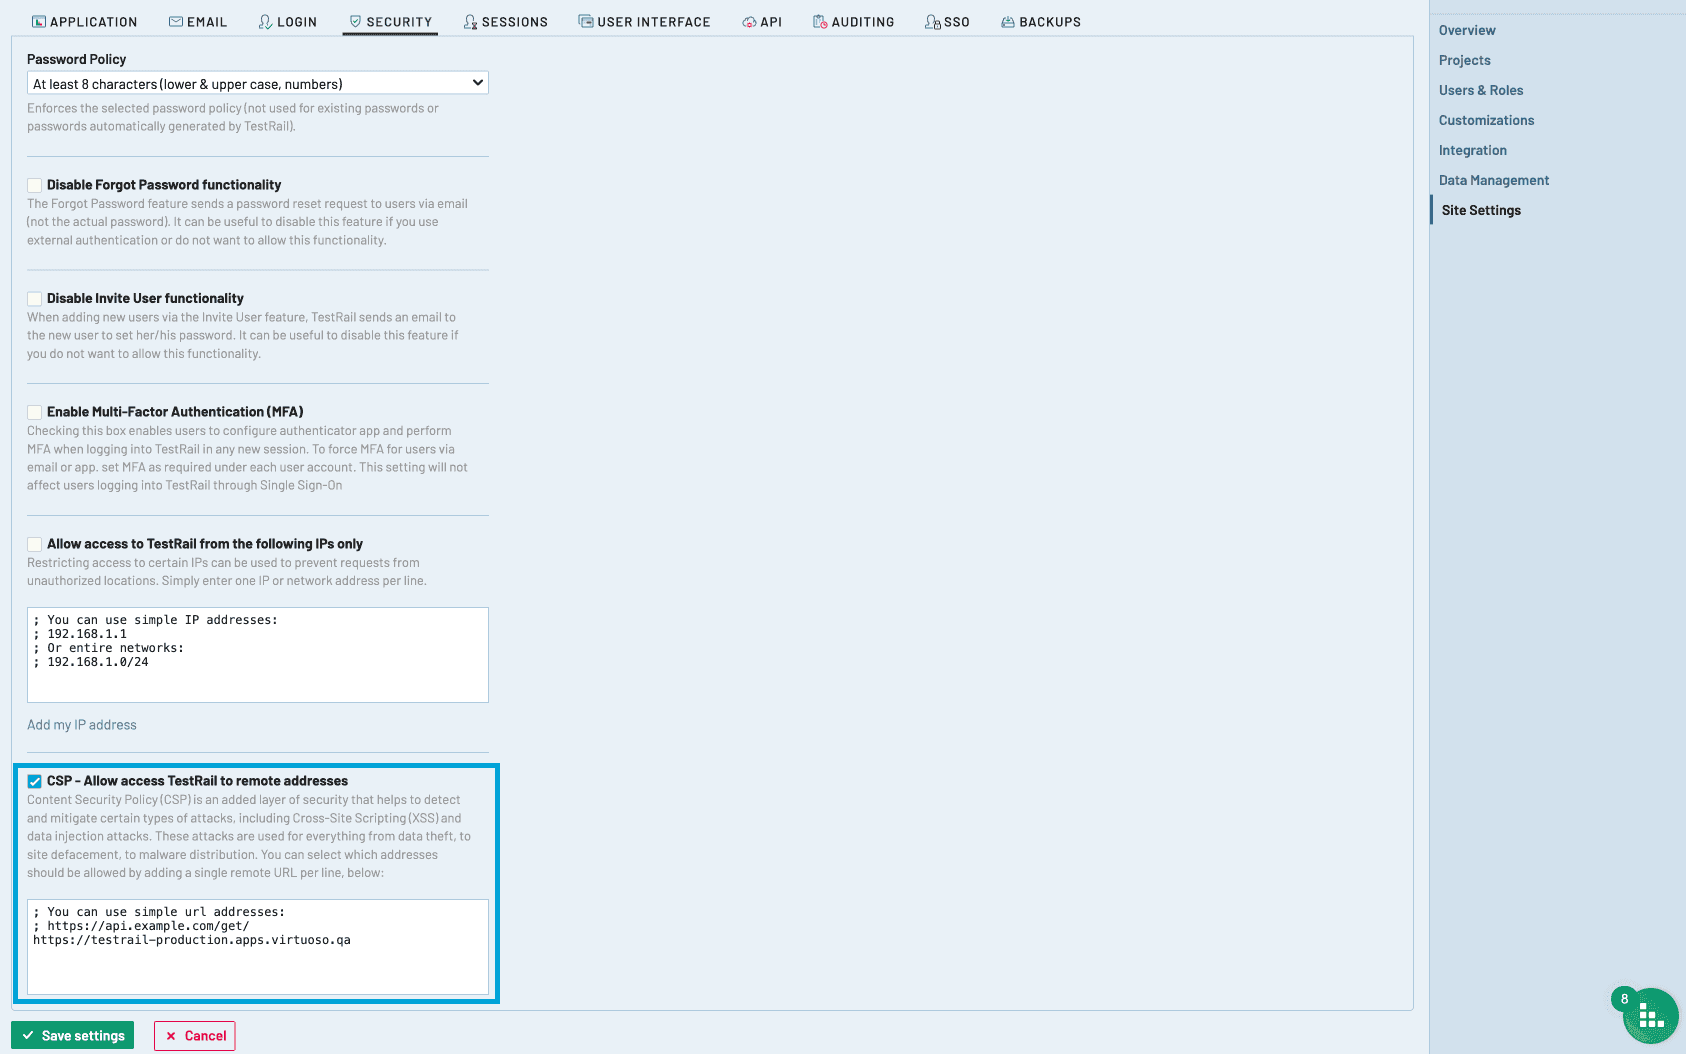
# Adding Virtuoso to Content Security Policy [Optional]
To allow Testrail to send requests to Virtuoso, it is necessary to include Virtuoso's endpoint to the allowed Content Security Policy. For this, follow the following steps:
- Click ADMINISTRATION in the top right corner
- Click Site Settings
- Click SECURITY
- Enable
CSP - Allow access TestRail to remote addresses - Add
https://testrail-production.apps.virtuoso.qato the list of addresses
# Setup Virtuoso
To install the TestRail Virtuoso App follow the steps described in the Installing an app of the Virtuoso docs.
Don't forget
When sharing the project with the application user, give write permissions to enable TestRail to trigger Virtuoso executions.
User permissions
Although it is not mandatory, it is strongly advised that you create a new user just for this application since sharing a project with the application user will enable the project to synchronize with Virtuoso.
- Fill in the TestRail API URL (this URL will match the URL you use to log in TestRail).
- Fill in the TestRail API Username, using the user created previously.

Synchronization Options
Configuration option TestRail Synchronization Behavior
- Synchronize on execution: The journeys synchronize when executed.
- Synchronize manually: The last Execution of a journey is synchronized when the option is selected from the journey menu (If the execution includes more journeys, they will also be synchronized).
Add checkpoint steps in result
Test steps can be synchronized to TestRail. They will be displayed both in the test cases and test runs.
Synchronize steps on 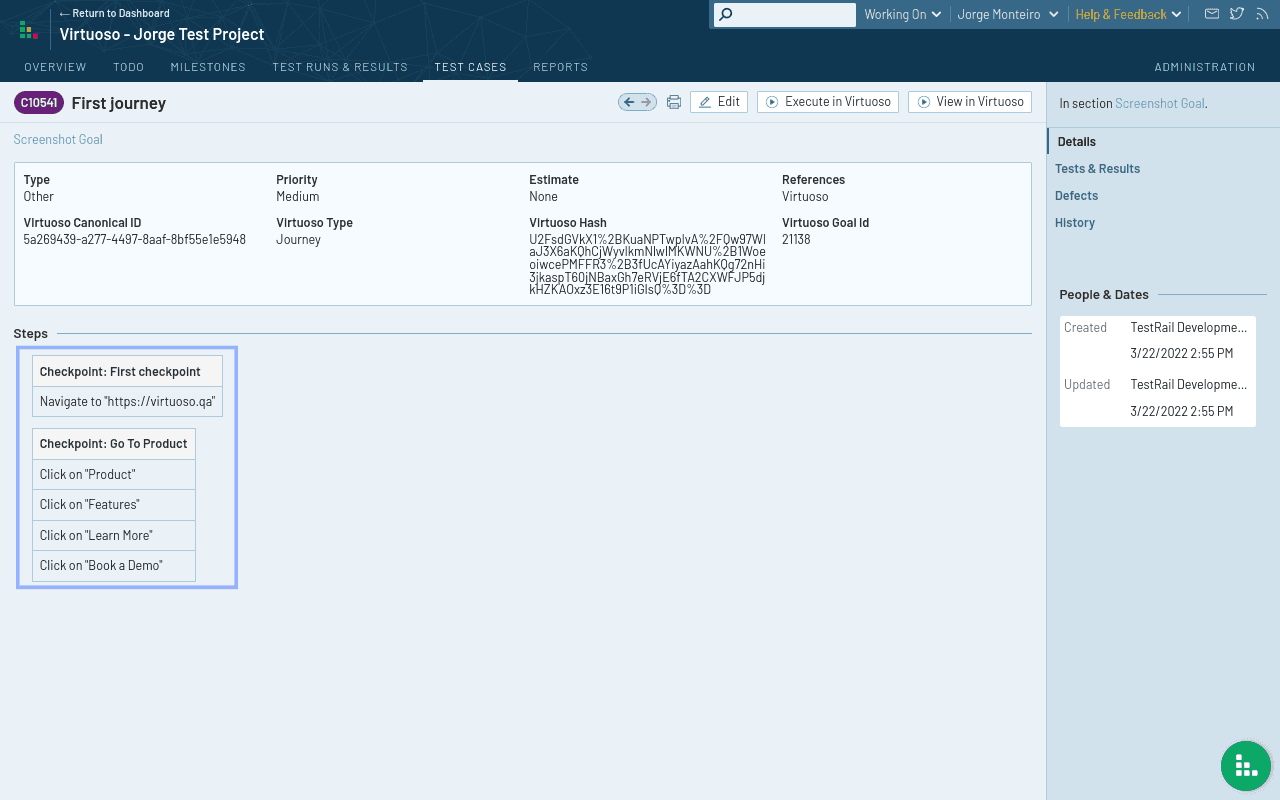 Synchronize steps off
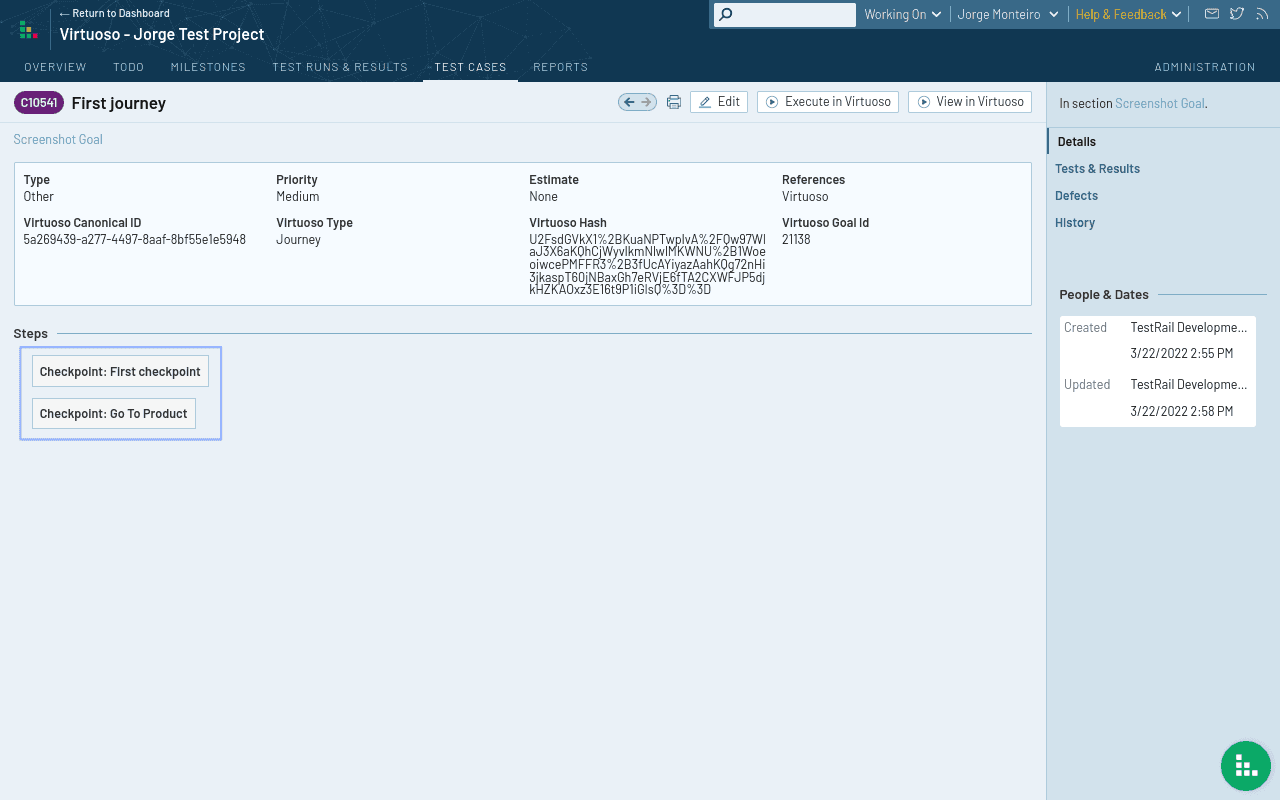
# Tips and FAQ
# How are Virtuoso entities being represented in TestRail
| Virtuoso | TestRail |
|---|---|
| Project | Project |
| Goal | Folder |
| Journey | Test Case |
| Checkpoint | Inside the test case description |
| steps | Inside the test case description (Optional) |
| Execution | Test Run |
# What is the corresponding action in TestRail when...
| Virtuoso | TestRail |
|---|---|
| Execution finished | Creates Virtuoso entities in TestRail (they are not already there) and adds the execution results. |
| Goal name changed | Updates the folder name in TestRail |
| Journey name changed | Updates the test case name in TestRail |
| Journey deletion | Remove the test case from TestRail |
# Manual synchronization with TestRail
If the TestRail app is configured to Synchronize on execution, every execution of goals or journeys is automatically synchronized without intervention.
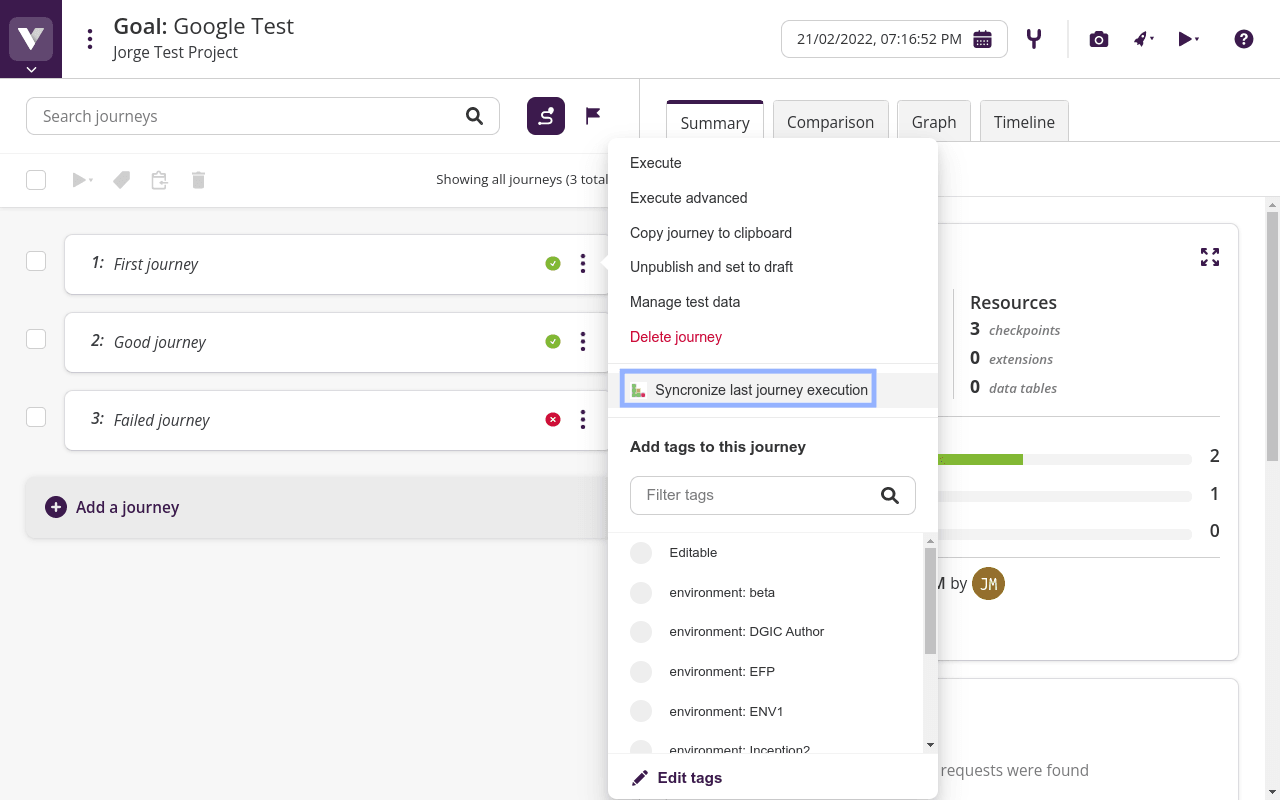
There is a menu option on the journey context menu that allows manual synchronization of the journey execution (if the execution includes more journeys, they will also be synchronized).
# Executions triggered from TestRail
When triggering an execution from TestRail, the execution will be triggered with the latest version of the journey.
# Failed test steps' screenshot attachments in TestRail
When a test step fails, Virtuoso will sync the screenshot of the failed steps to the execution. You would be able to see the screenshots under the steps table.