# Quick start
To assist you in using Virtuoso, this section will give an overview of the main components, the Organization dashboard and the Project dashboard. At the end of this page, there are several Tutorials covering the main tasks available in Virtuoso.
# Organization dashboard
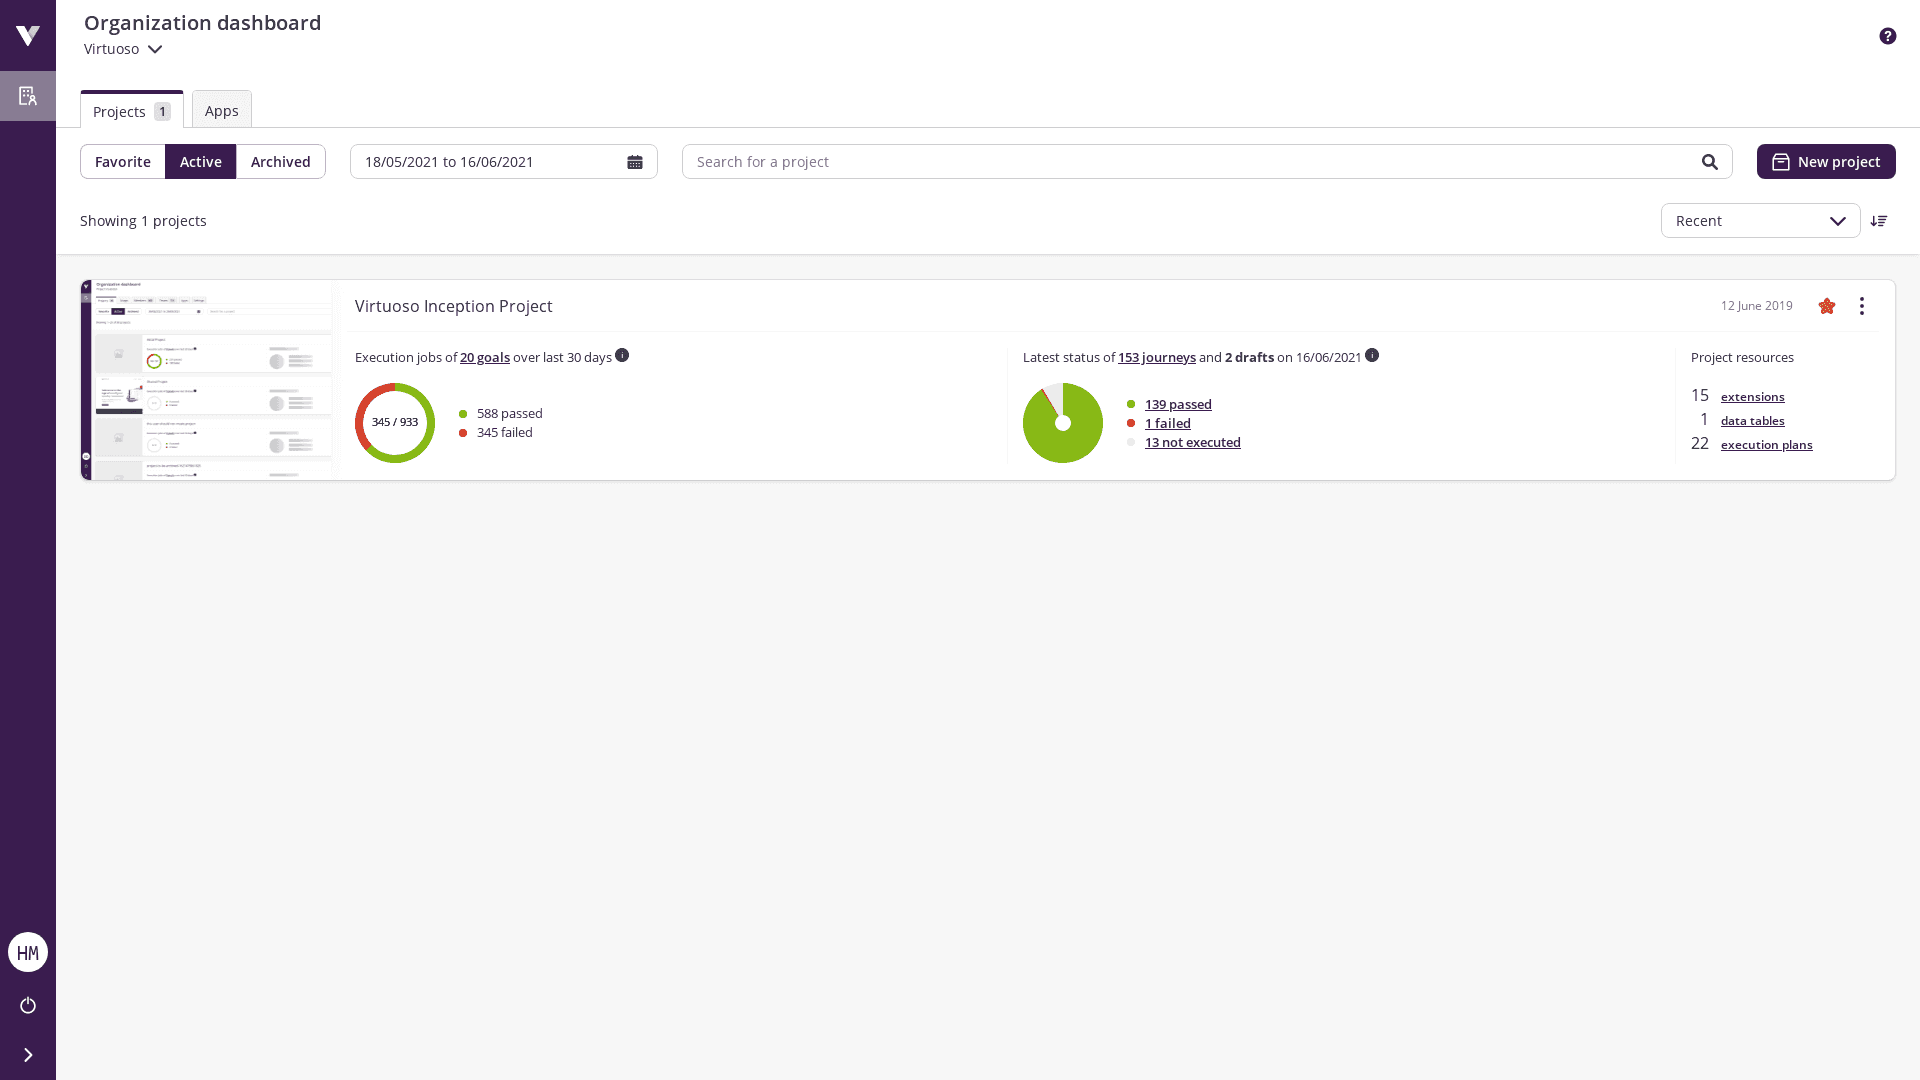
After logging in to Virtuoso, you are presented with the organization dashboard, in which you can view or manage various aspects of your organization (e.g., usage, apps, team and member management, and settings). More importantly, in this dashboard you can create new projects and access existing projects you have access to.
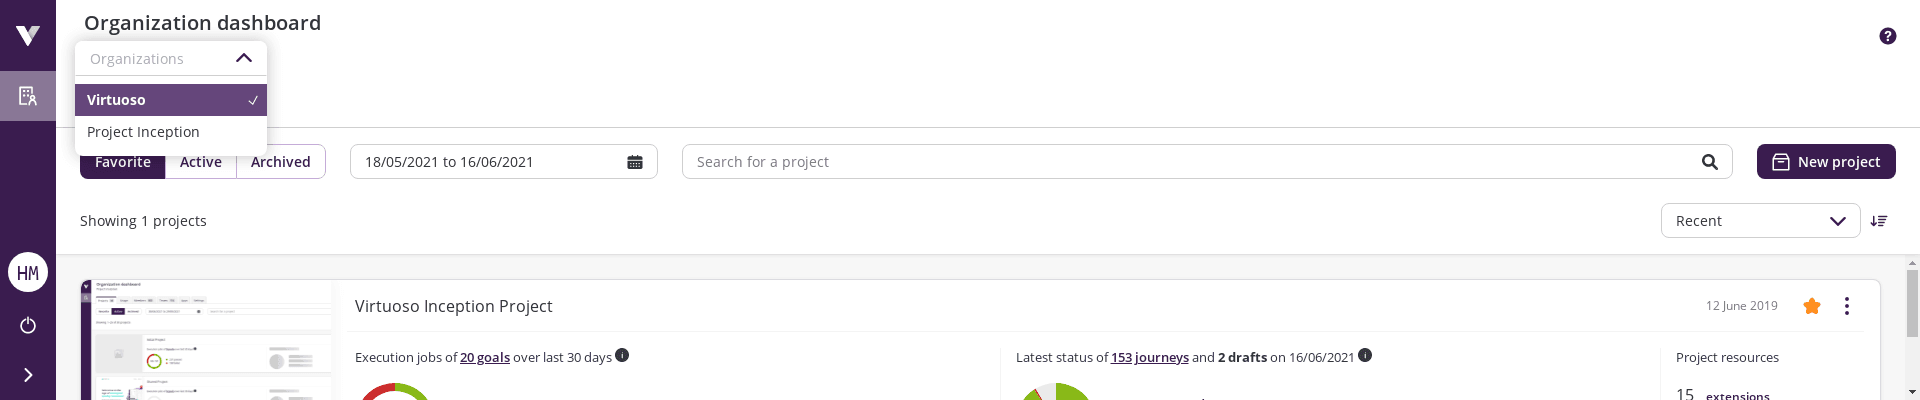
In case a user is associated to multiple organizations, it is possible to switch between them, by selecting the organization in the dropdown as depicted below.
# Project dashboard
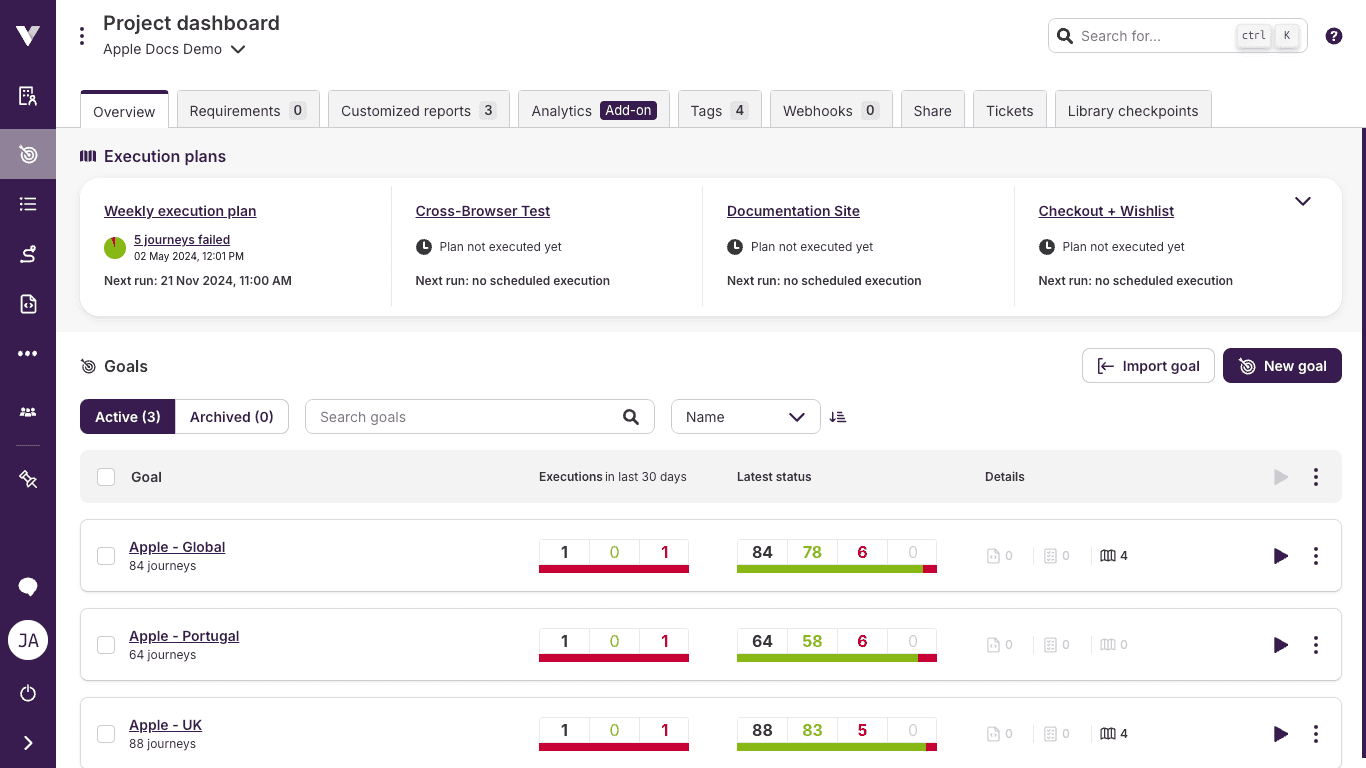
The Project Dashboard page presents an overview of the Project shared with you. Here, you can find an overall look at how your goals are doing and information about your execution plans, as well as other project-level settings such as tags, webhooks, and sharing actions. To access it, look for the icon on the left sidebar and click on it.
In this guide you will learn about the parts that compose the project dashboard:
# Overview
The project overview can be divided into two sections: the execution plans summary and the goal list.
If you have created an execution plan in your project, you will find a summary of these plans at the top of this screen. The summary provides information such as the last execution status and the next scheduled execution time.

You can open the respective plan editor by clicking on the name, and the execution page by clicking on the last execution status.
Below the execution plans section, there is a list of project goals showing various details on each. You can filter and sort the goals presented using the controls at the top of this section.
Some of the actions you can perform on these controls are:
- Import or create a new goal
- Execute selected goals or perform other "batch" actions
- Filter list of goals by name
- Switch between Active and Archived goals
- Sort goals by name, creation date, or other criteria
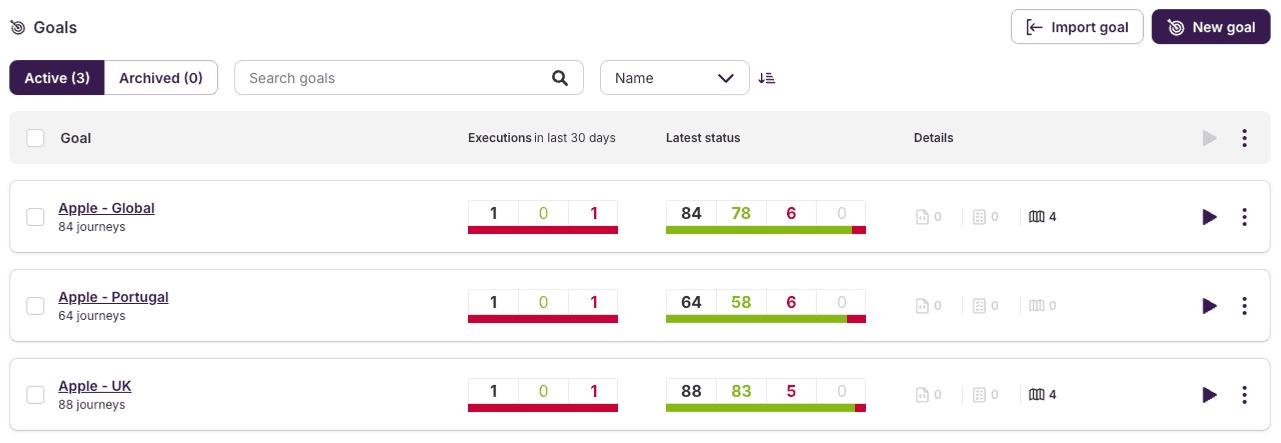
# Goal cards

Each goal card represents one of your project's goals and contains valuable information to help you check the overall status of the project at a glance. Each card contains:
- Goal name. Clicking on it takes you to Goal View, where you can manage its journeys;
- Counts for total and draft journeys;
- The total count of goal executions in the past 30 days, further divided into successful and failed executions. Clicking on any of the counts will take you to the Jobs activity dashboard of the goal, prefiltered for the corresponding execution outcome;
- A summary of the latest status of the goal's journeys, representing the most recent execution status of each journey. It is divided into total, successful, failed, and not executed. Clicking on any of the counts will take you to the journeys activity dashboard of the goal, prefiltered for the corresponding journey outcome;
- Counts for several resources associated with the goal journeys, such as extensions, data tables, and execution plans;
- App links, if the organization has installed apps and these have set up links for a goal;
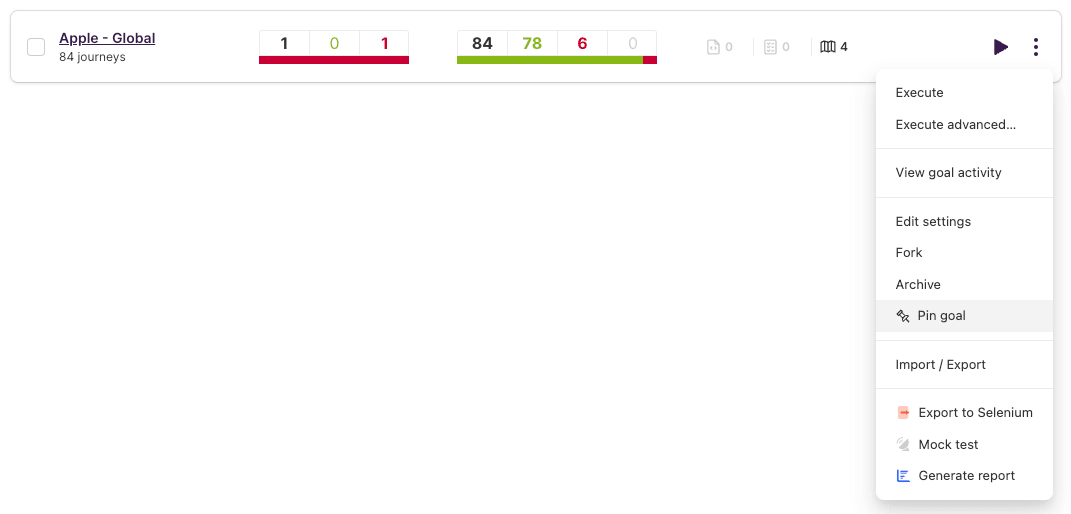
Additionally, goal context actions are made available:
Executelaunches an execution of all journeys in the goal's latest version;Execute advanced...shows a modal to change some settings of the goal before launching the execution, and those settings will be applied only for that specific execution;View goal activityredirects you to the Jobs activity dashboard of the goal applying a filter for this specific goal;Edit settingsopens the goal's configuration page;Forkmakes a full copy of the existing version into a new goal;Archivesets the goal as archived and hides it from being listed as anActivegoal;Exportshows a modal to export the goal in JSON format;Importshows a modal to import one or more existing JSON goal files into the goal.Export to Seleniumexports the journeys from the goal in a Selenium compatible format;
Archiving goals targeted by execution plans
Archiving a goal that is included in an execution plan target will cause that target to be deleted from the plan.
If the plan is left without any valid targets, it will not be executable until new targets are added to it.
# Tags
Tags can help you to categorize your tests and their execution results, and allow you to find specific journeys and jobs quickly using the tag filters.
To access to the project tags page, click on Tabs on the top part of the project dashboard.
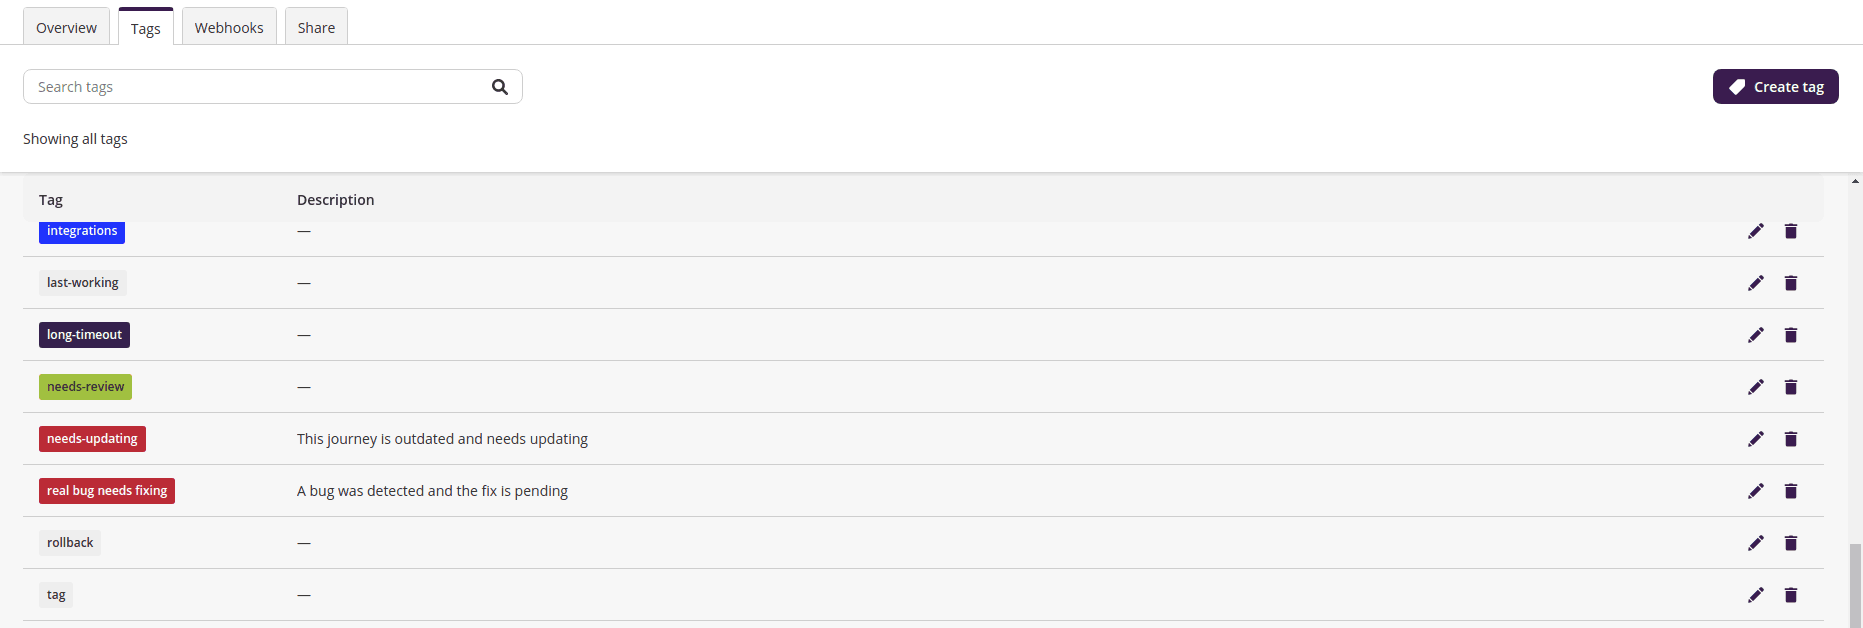
At the top of this page, there is a search box to filter tags by name, and on the top right, there is a button to create new tags. Each tag can use a different color, has a unique name and an optional description.

To add tags to a journey, visit the goal view page (see Authoring your goal) and use a journey's context menu.
You can also add tags to a job using the job activity dashboard. Expand a job from the list and type the tag you want to add in Add tag. If the tag does not exist, it is created for you.
Alternatively you can add tags to an execution before the job runs by choosing the Execute advanced... option and filling the Add tags with the desired tag names, creating them as project tags if they do not exist already.
Effects of tag deletion on plans
If a tag is deleted, any execution plan targets that includes it will be deleted as well.
This is done in alternative to simply removing the tag from the target, which could lead to a potential widening of the targets' scopes.
It may cause a plan to be left without any valid targets, making it non-executable until new targets are added to it.
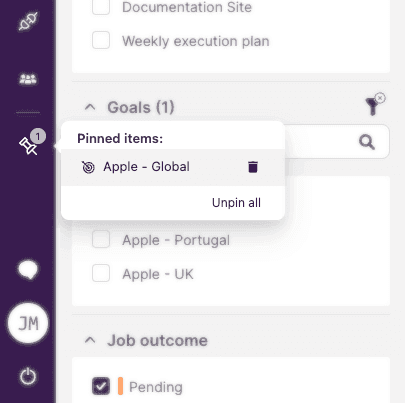
# Pinning items
You can pin an item to the sidebar by clicking on the context menu icon of the item and then clicking on Pin <entity name> (e.g., Pin goal).
Once you have a pinned item you can click on it to jump directly into that resource. To remove a pinned item, click on the bin icon next to the item. You can also remove all pinned items at once by clicking on Unpin all.
FAQ
- Pinned items are stored on your browser storage. If you clear the browser storage, your pinned items will be reset;
- Removing a pinned item from the list does not remove the resource from the platform.
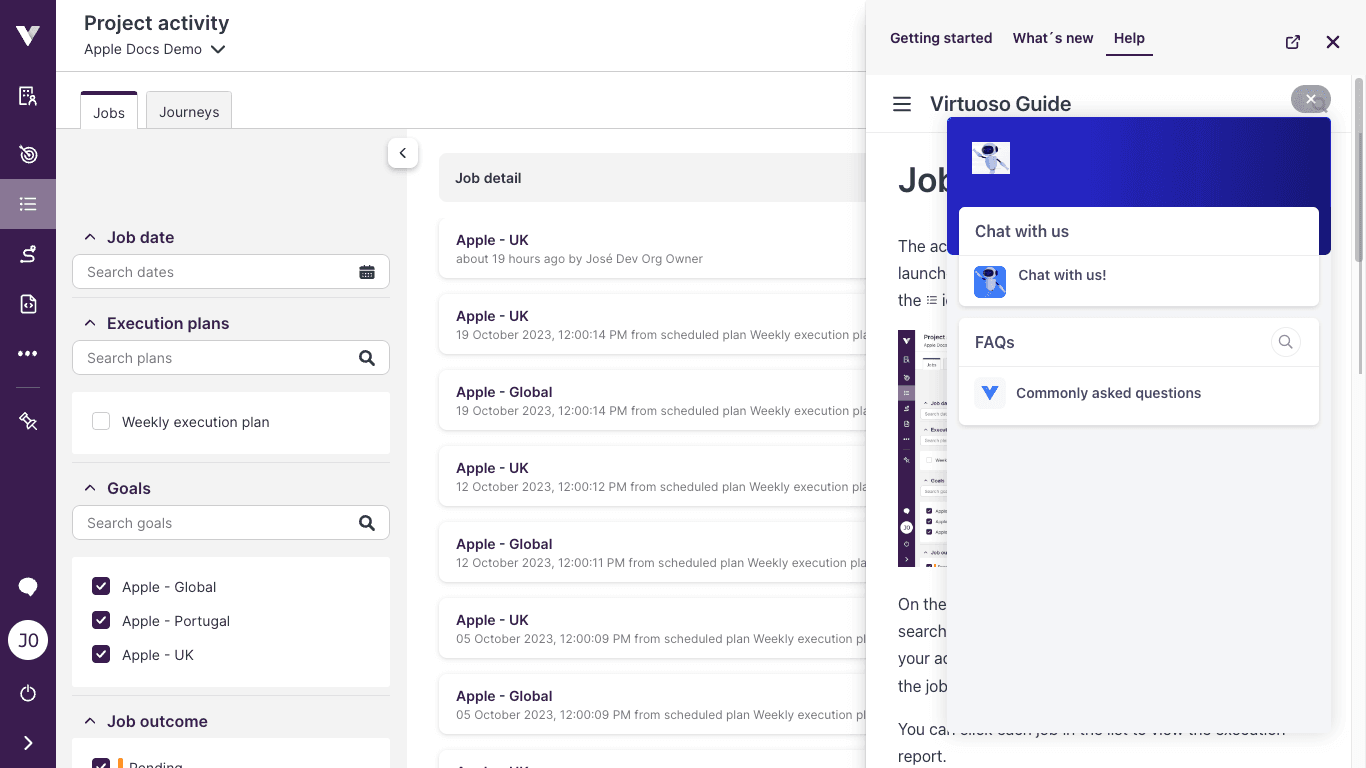
# Get help at any point while using Virtuoso
While using Virtuoso you may need to take a peek at some of our guides and tutorials or maybe you did not need to read a guide and now you do.
By clicking on the ? help icon of the top right corner of the Virtuoso interface you can get a help panel that gives you the exact guide you are looking for (e.g., if you are creating test step it will show you the relevant documentation for creating tests steps).

The help section will show the relevant documentation for you depending on which feature of Virtuoso you are using.

You can also take a look at our What's new section to keep up with what's new in the platform.
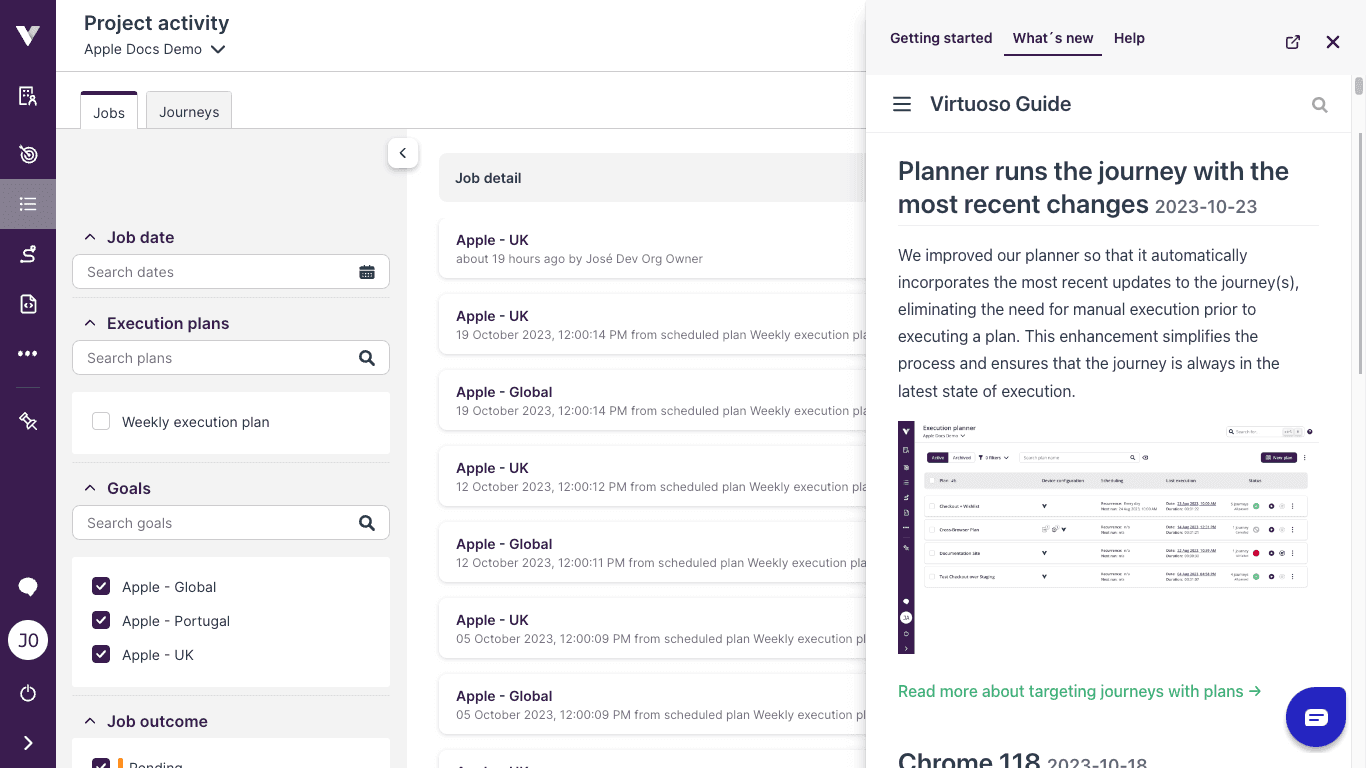
If you need to reach out to a human or even to just give feedback, you can always click on the chat icon in the bottom of the panel and our team will help you through a live chat as soon as we can.
# Tutorials overview
Multiple tutorials are available to assist you with the main tasks that can be performed from Virtuoso's Dashboard. Some depend on previous ones or on specific Core concepts presenting that information at the top. This allows you to skip directly to the task you need assistance with.
WARNING
All tutorials assume that you have an account and reached the main page of the Dashboard. If you have problems reaching the main page consult Getting started or contact support for further assistance.
We suggest that the tutorials are consulted by the following order: