# Environments
You can create environments containing the initial values of environment-specific variables to use in your journeys. For example, you may have one set of login credentials on your staging environment and another set for your production environment, while your journeys are the same.
Each project can have as many environments as you need, and you can optionally define the environments such that they inherit defaults from one another (see Inheriting environments).
Environment variables can store files and any value as text (e.g., text, JSON objects, boolean values, numbers, etc.). These values can also be marked as secrets (sensitive information), so they are only shown during creation. This is helpful for storing data such as login credentials or a pdf file with sensitive data.
Each environment may also contain an associated Bridge to be used when running journeys with that environment. Environments in Virtuoso can be created at two different levels: Organization and Project. Choosing the appropriate scope ensures the right balance between flexibility and reuse across your teams.
# Organization-level environments
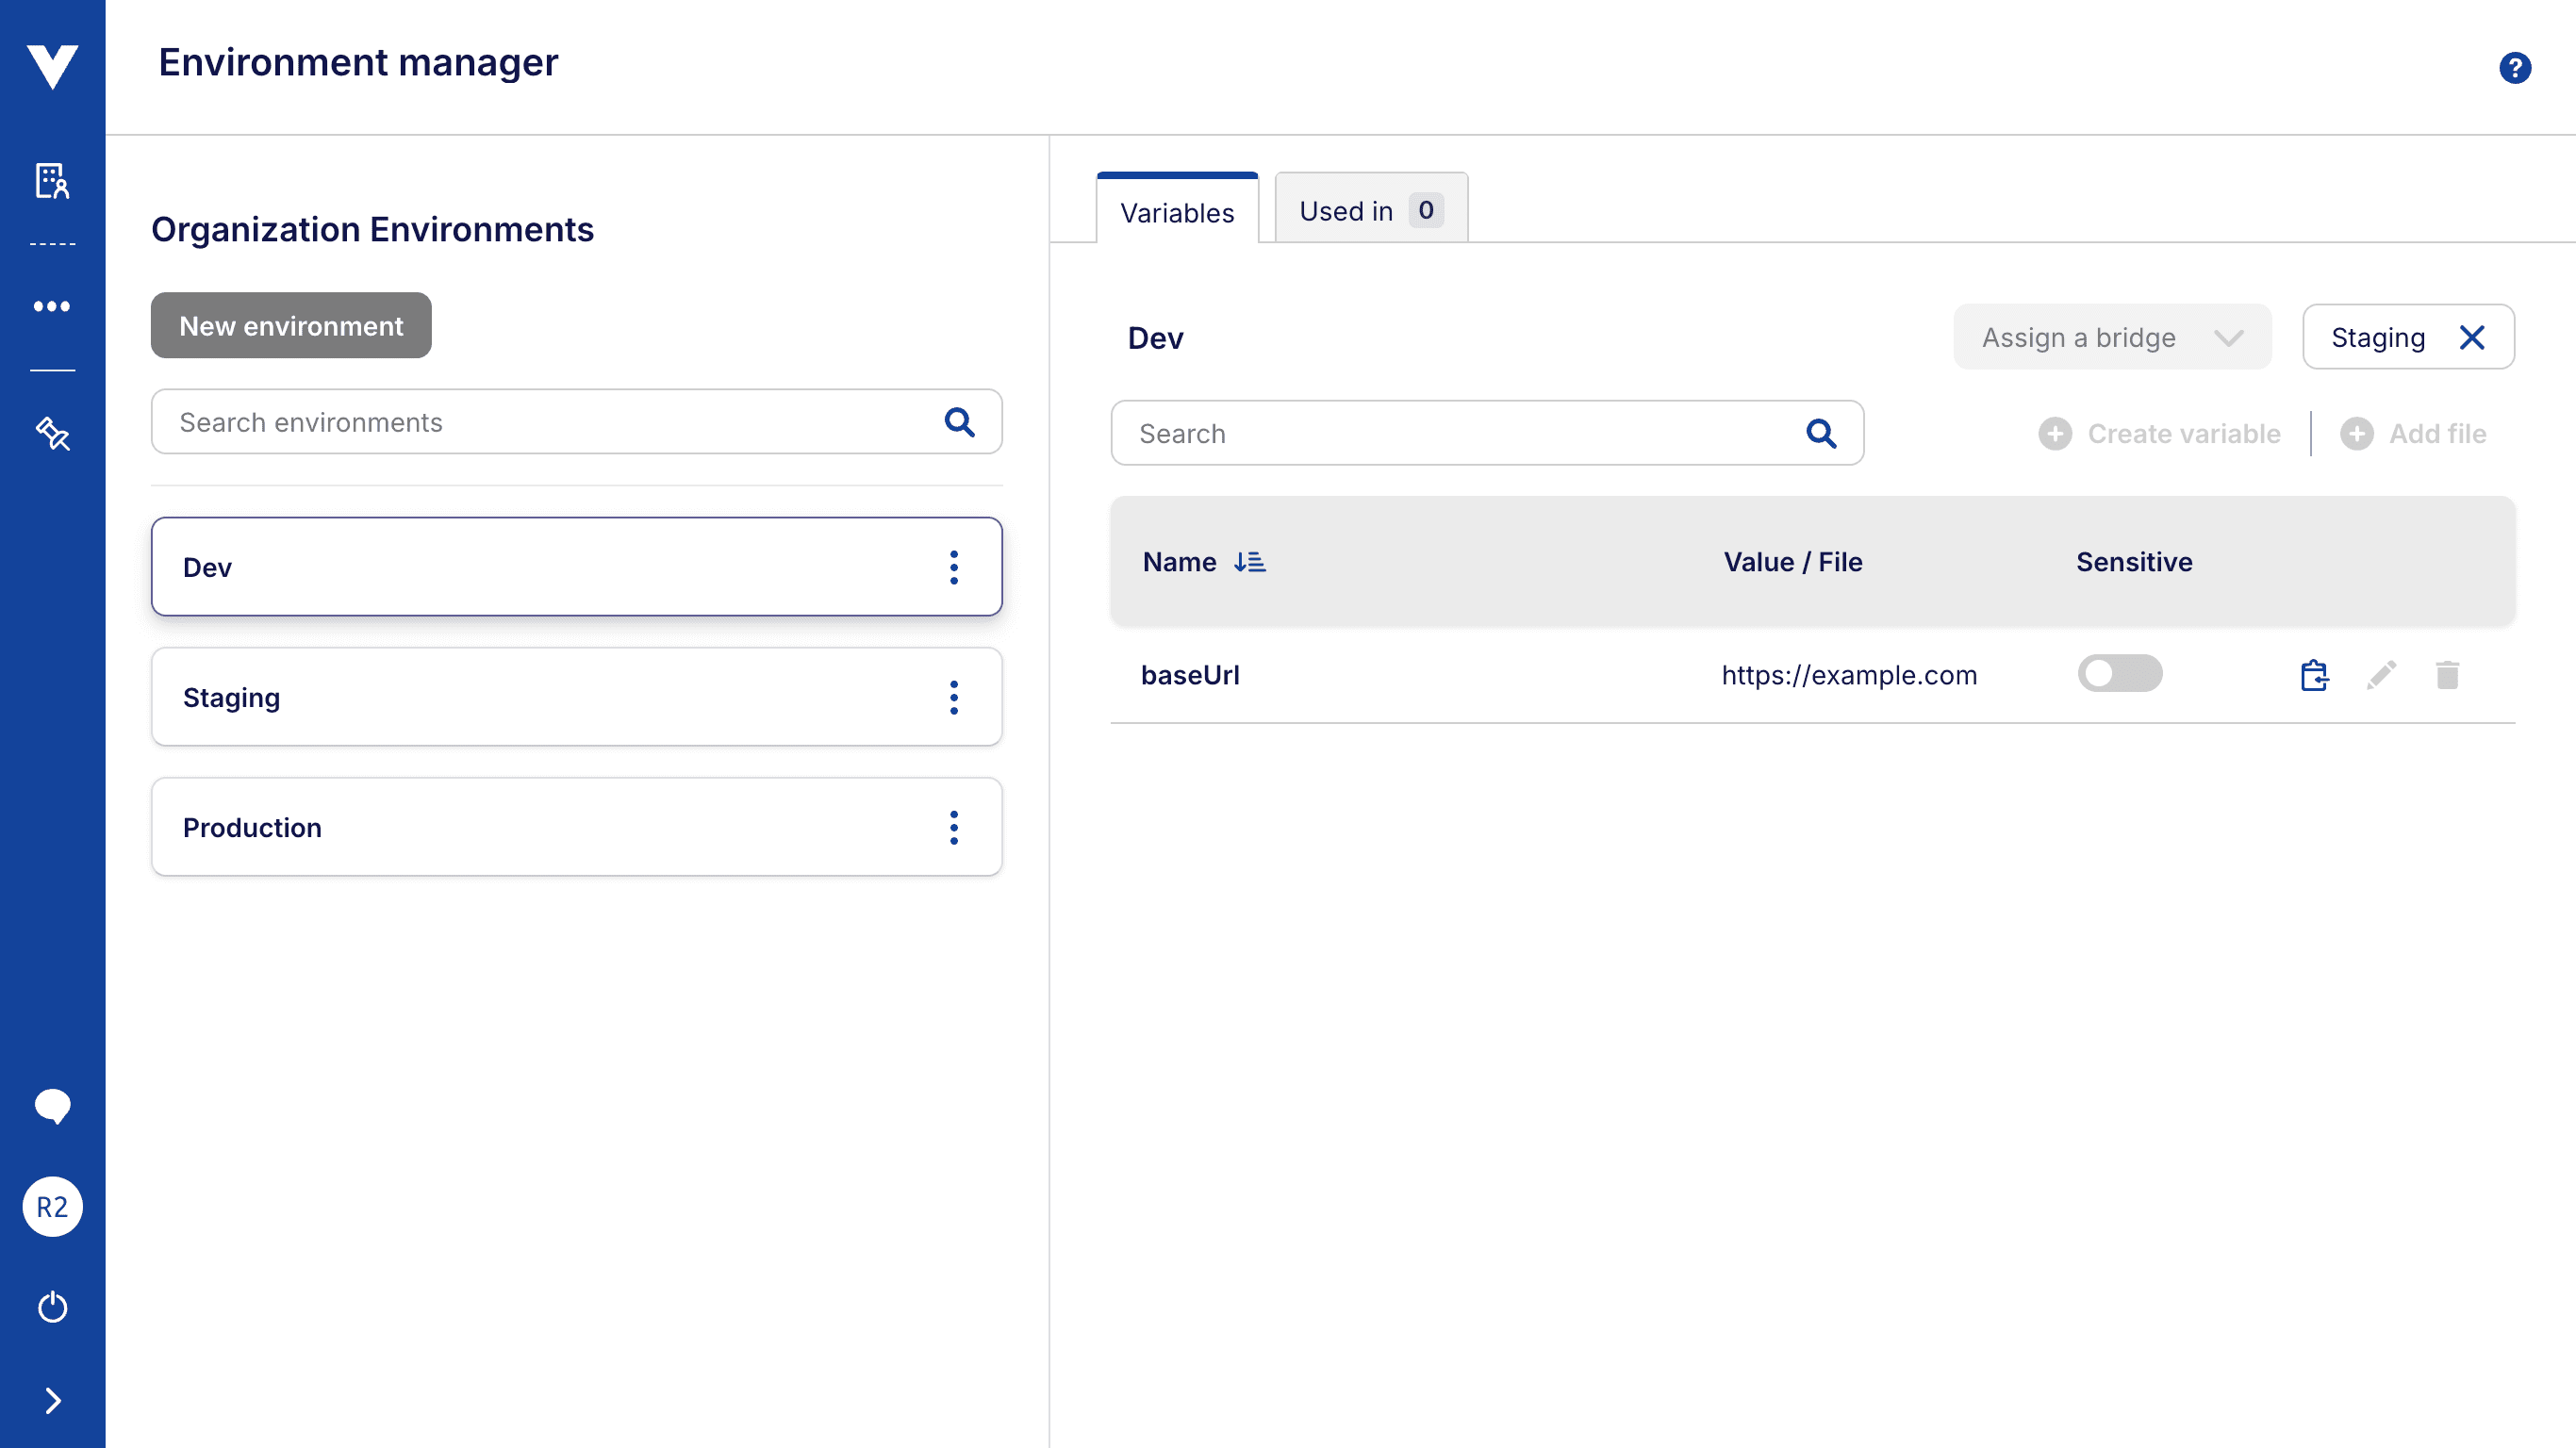
Environments created at the Organization level are available to all projects within the organization.
Use organization-level environments when:
- The environment configuration should be shared across multiple projects
- You want to maintain a single source of truth for common environment variables and credentials
User accessibility
Organization-level environments can be updated by owners of the organization.
# Project-level environments
Environments created at the Project level are available only within their current project.
Use project-level environments when:
- The environment configuration is specific to a single project
- You are experimenting or iterating on a new set of variables
- The environment depends on project-specific workflows or conventions
# How to create an environment?
You can always access the Environments manager by clicking on the Environments icon on the side-bar.
However, depending on whether you are in the context of a specific project or not, you will be accessing either the project-level or organization-level Environments Manager.
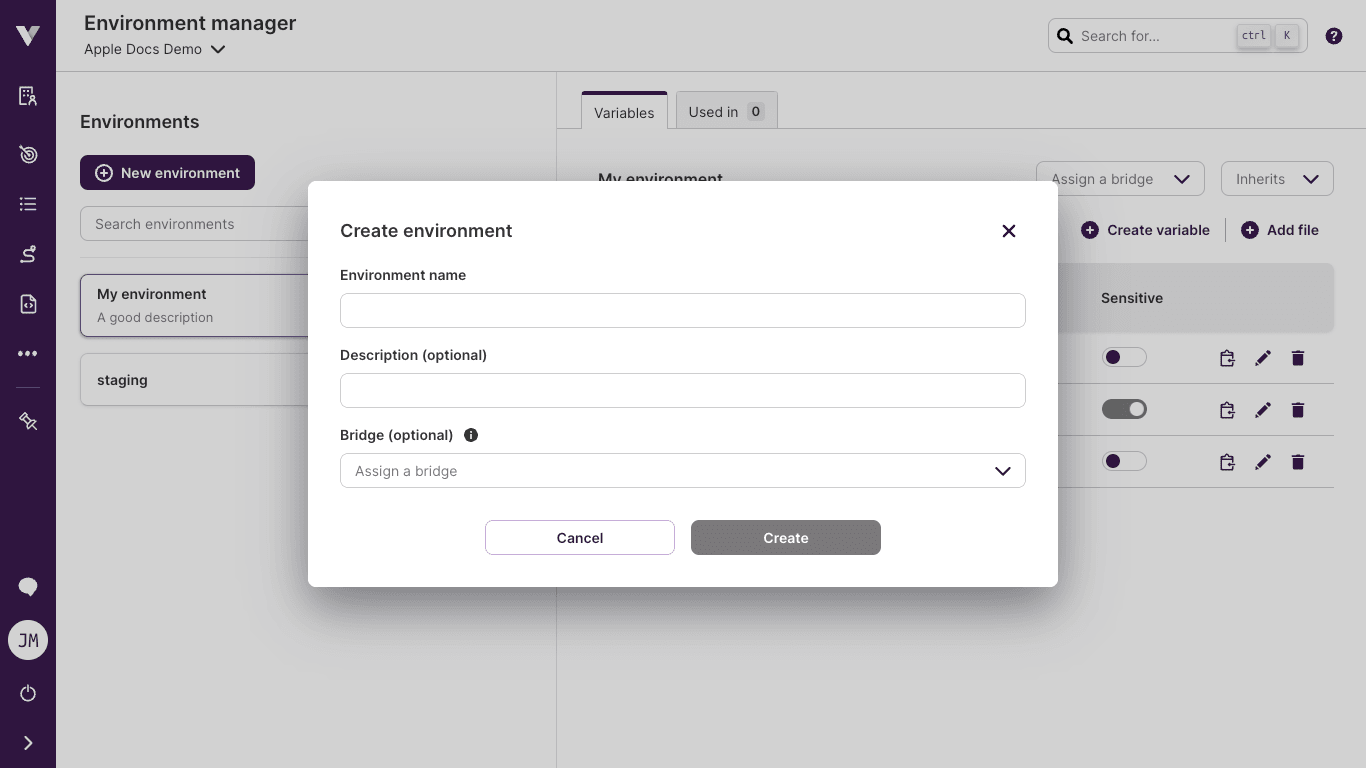
Click on Create environment and fill the information for your environment:
- Name: A unique name that allows you to identify the environment.
- Description (optional): A short description to allow you to identify the purpose of the environment.
- Bridge (optional): A Virtuoso Bridge to be used whenever the selected environment is also used.
After creating the environment, you can add environment variables to it.
# How to create an environment variable?
Open the Environment manager, select an environment that you want to create the variable in, and follow the instructions below depending on the type of variable you want to create.
# Text variables:
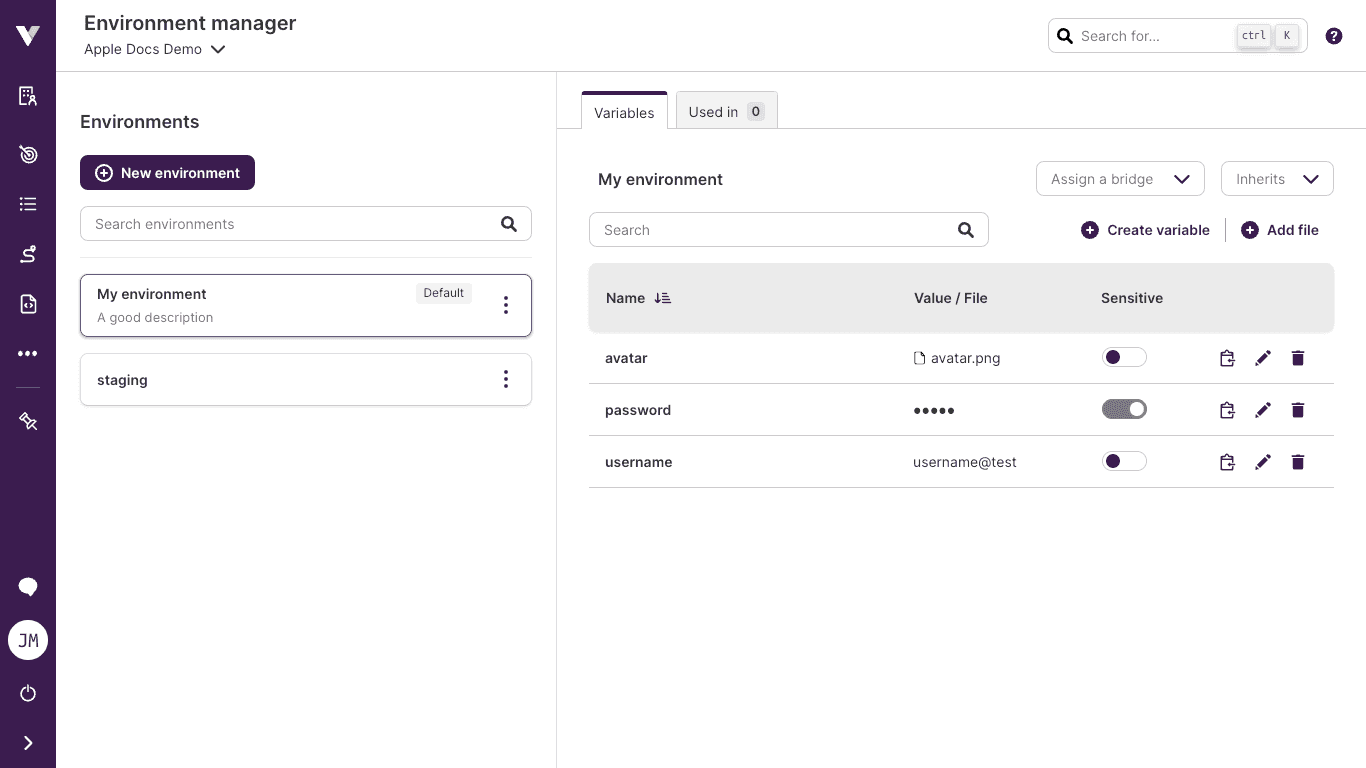
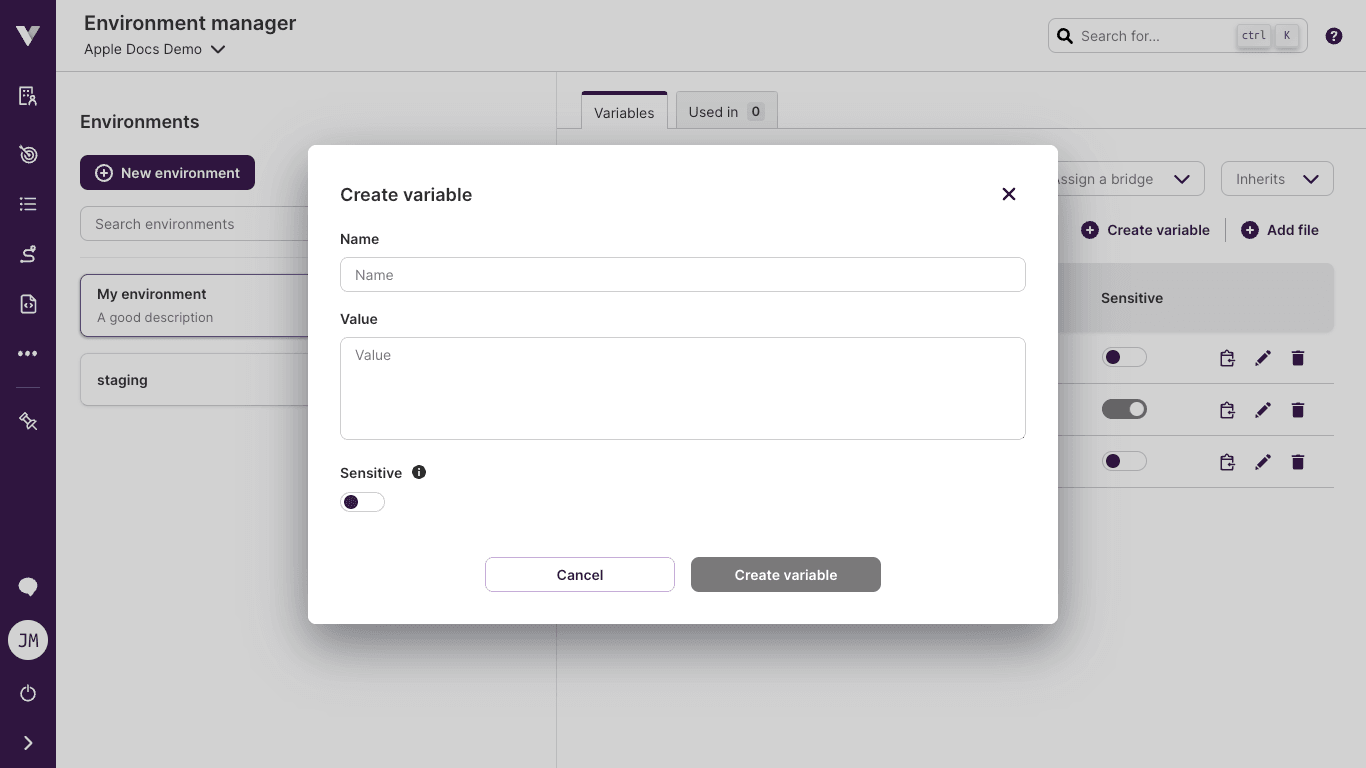
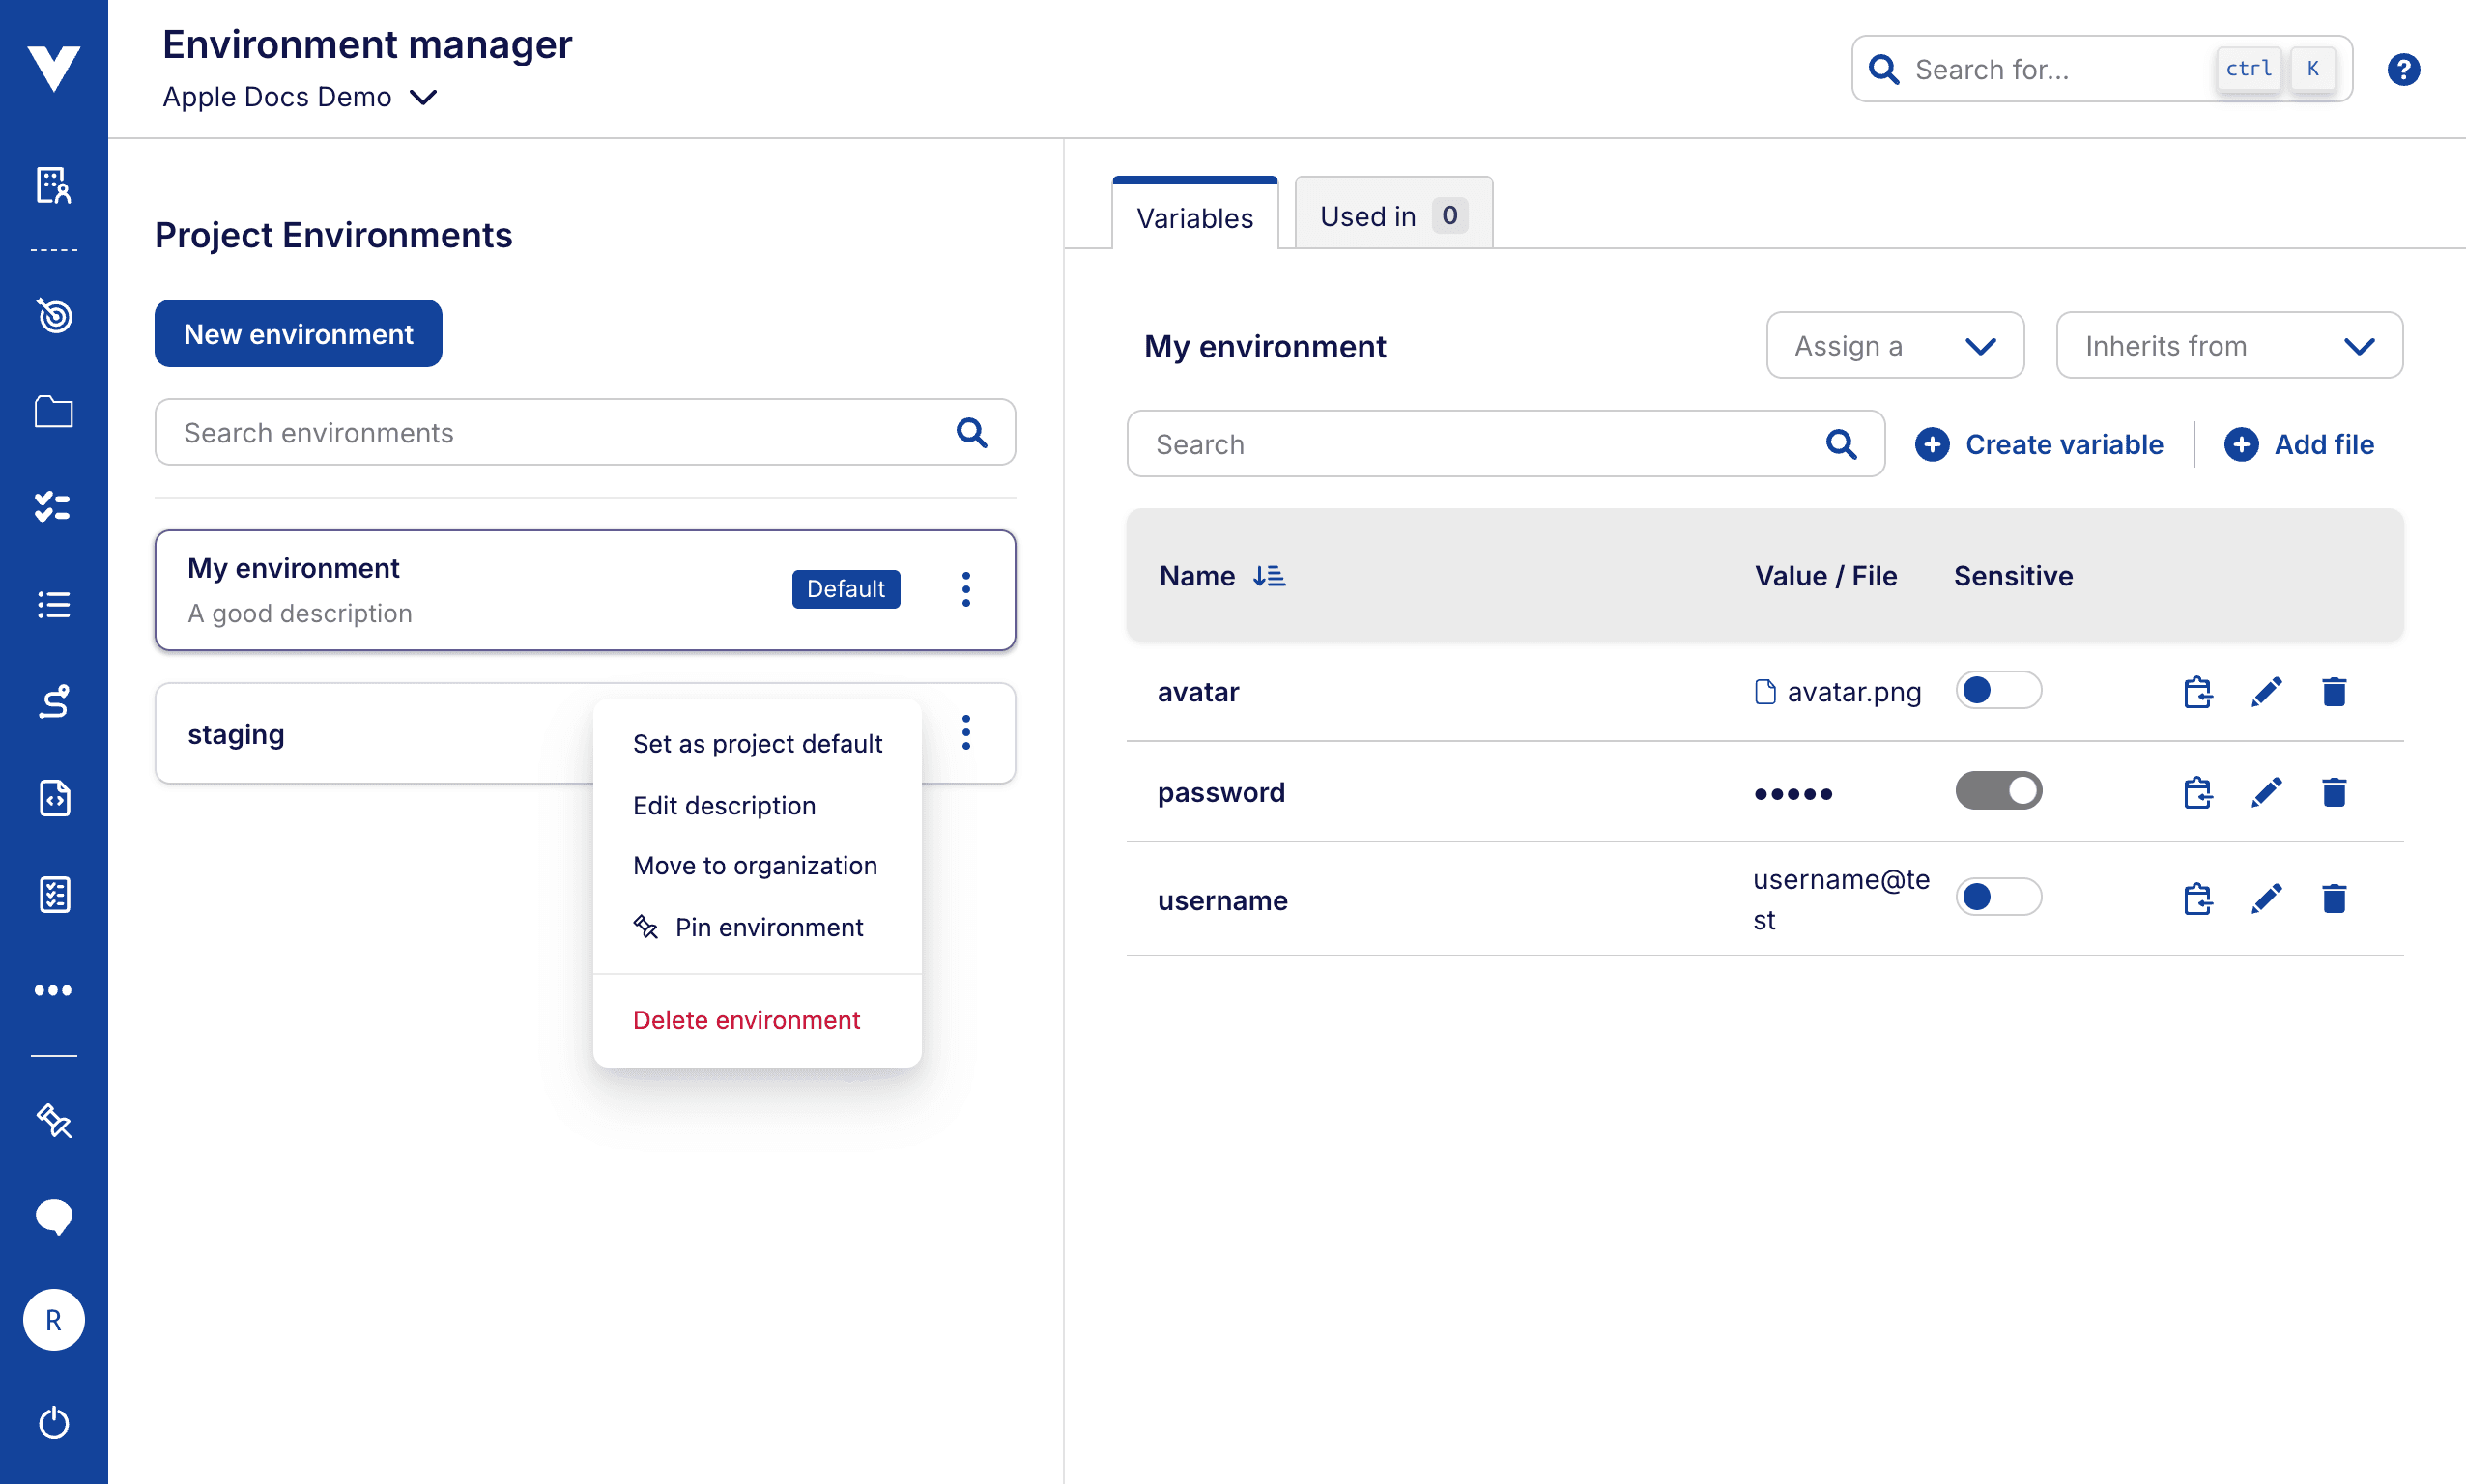
Click on Create variable, fill in the name and value for that variable, and click on Create variable. In the example, we show the creation of a variable named username using username@test as its value.
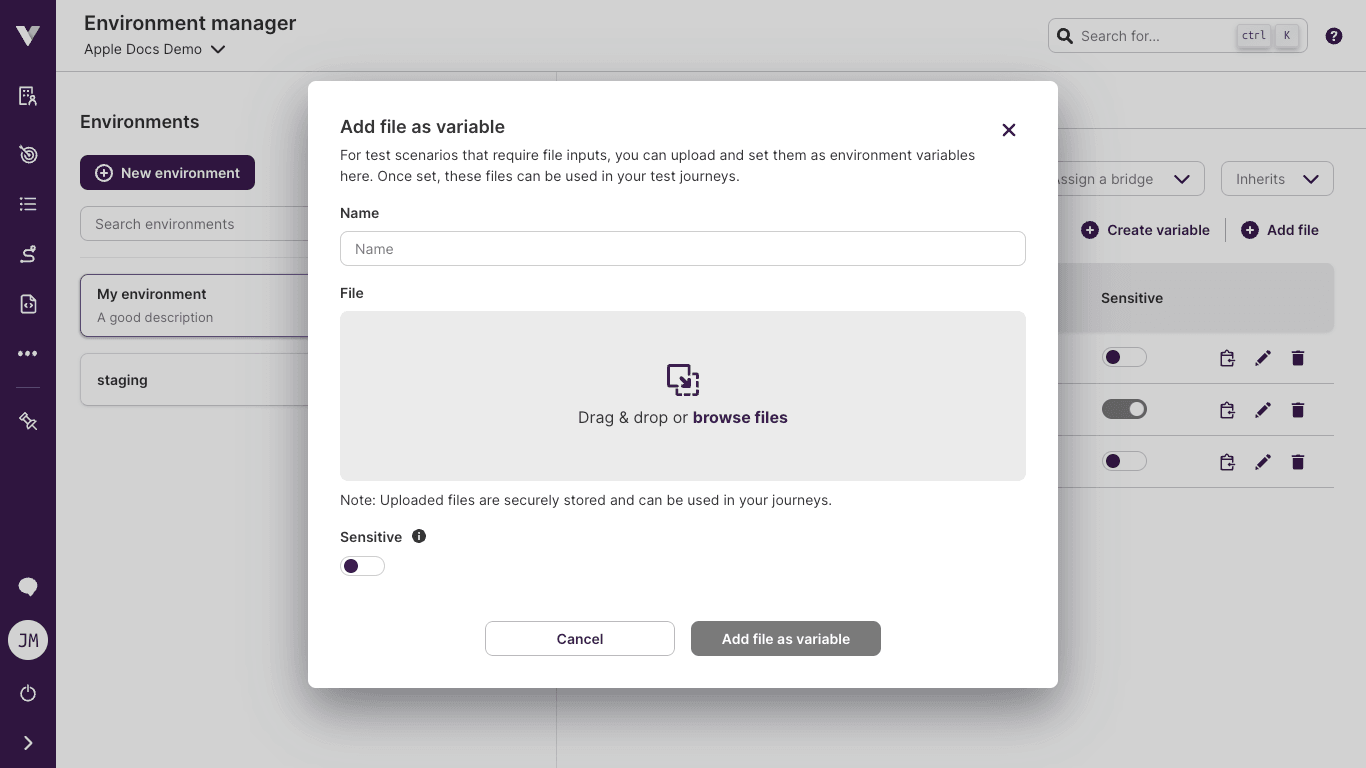
# File variables:
Click on Add file, fill in the name, select the file for that variable, and click on Add file as variable. File variables come in handy for test scenarios that require file inputs.
In the example, we show the creation of a file variable named avatar using avatar.png, and this variable can be used in a scenario where an image file is required to be used.
File variable maximum size
The maximum size of the file is defined in the Quotas and thresholds section.
The created variable is shown as part of the selected environment. Clicking on the pencil icon will allow modifications to the variable, and clicking on the bin icon will delete the variable. The variables can be sorted by name or sensitive value by clicking on the Name or Sensitive column headers.
Copy variable name
The variable name can be copied to the clipboard by clicking on the copy icon
Sensitive variables
To make the variable be sensitive click on the switch placed after the value input box. Once created, you can still edit it, but you cannot see its previous value.
# Moving a project-level environment to the organization level
If you initially created an environment at the project level and later realize it should be shared across multiple projects, you can promote it to the organization level without recreating it from scratch.
To move a project-level environment to the organization level:
- Open the Environments manager from the sidebar within your project.
- Open the context menu for the project-level environment you want to move.
- Click on the Move to organization option.
- Confirm the action.
Once moved, the environment and all its variables become available to every project in the organization. Any project that was previously using the environment will continue to have access to it at the organization level.
Review before moving
The environments marked as project default environment cannot be moved to the organization level. Make sure to change the default environment of the project before moving it.
# Inheriting environments
You need to have at least two environments to make one of them inherit from the other one. Once you have both environments created, just click on the environment which will be the child, click on Inherits from, and choose the desired parent environment:
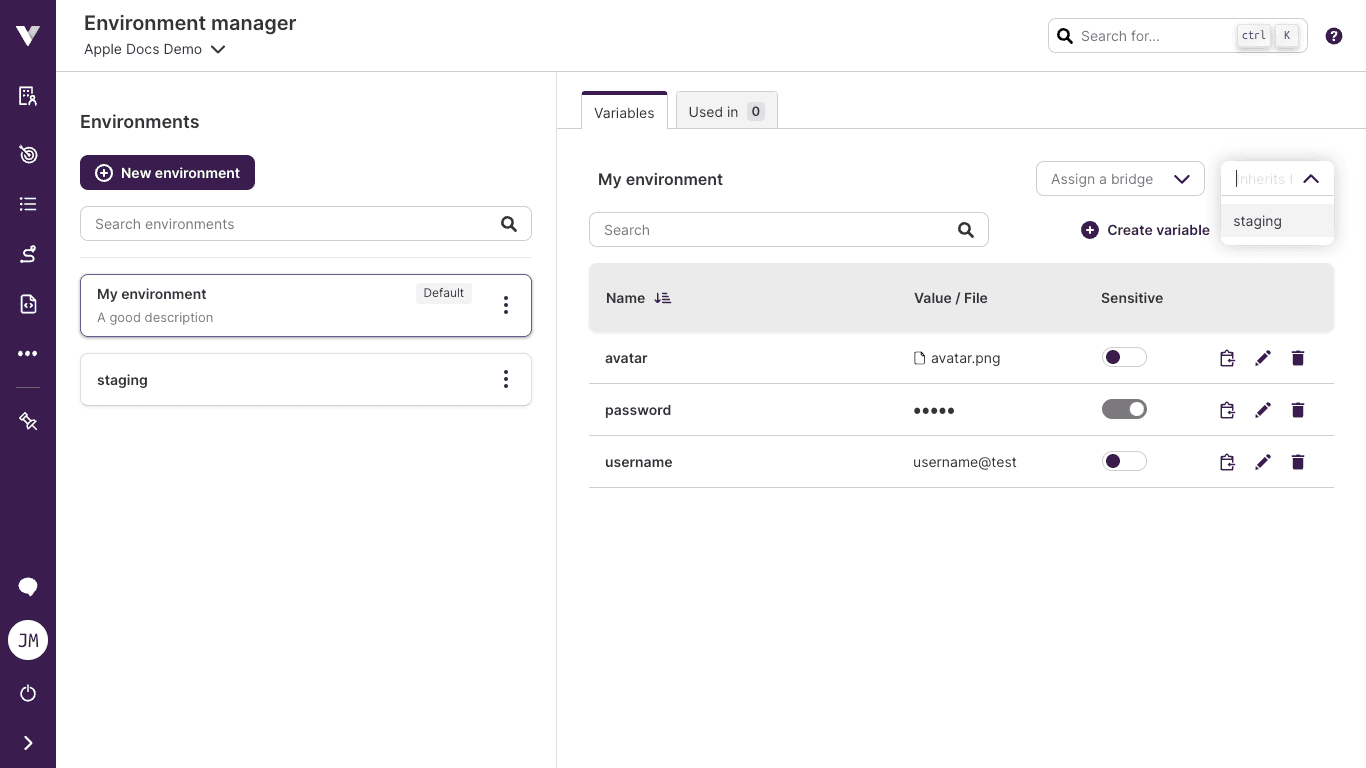
Once you confirm the change, the child environment will inherit all variables from the parent environment. Values defined in the child will take precedence over values in the parent, and values not defined in the child will be automatically updated when changed in the parent environment.
Environment inheritance allows you to define what your tests should use depending on specific environments. As an example we can define a production environment with the URL of the production application, a username, and a password. Then we can define two more environments: staging, which inherits from production and overrides the URL but uses the same credentials and development which inherits from staging and overrides the URL and the password.
Multiple levels of inheritance
Project and organization-level environments can be combined to create multiple levels of inheritance. For example, you can have a project-level environment that inherits from an organization-level environment, allowing you to maintain common variables at the organization level while customizing specific values at the project level.
To achieve the above use case you can create the following environments:
production
|__staging
   |__development
The result for our example would look like this:
- Environment
productiondeclares the next variables:url,usernameandpassword. - Environment
staginginherits fromproductionand only declares the variableurlto override its inherited value fromproduction. - Environment
developmentinherits fromstagingand declaresurlandpasswordto override their inherited values fromstaging.
# Running a journey with an environment
If you only created a single environment, it's the default environment for your project and it will be used always.
On the other hand, if you have two or more environments, you can choose which one is the default environment for your project:

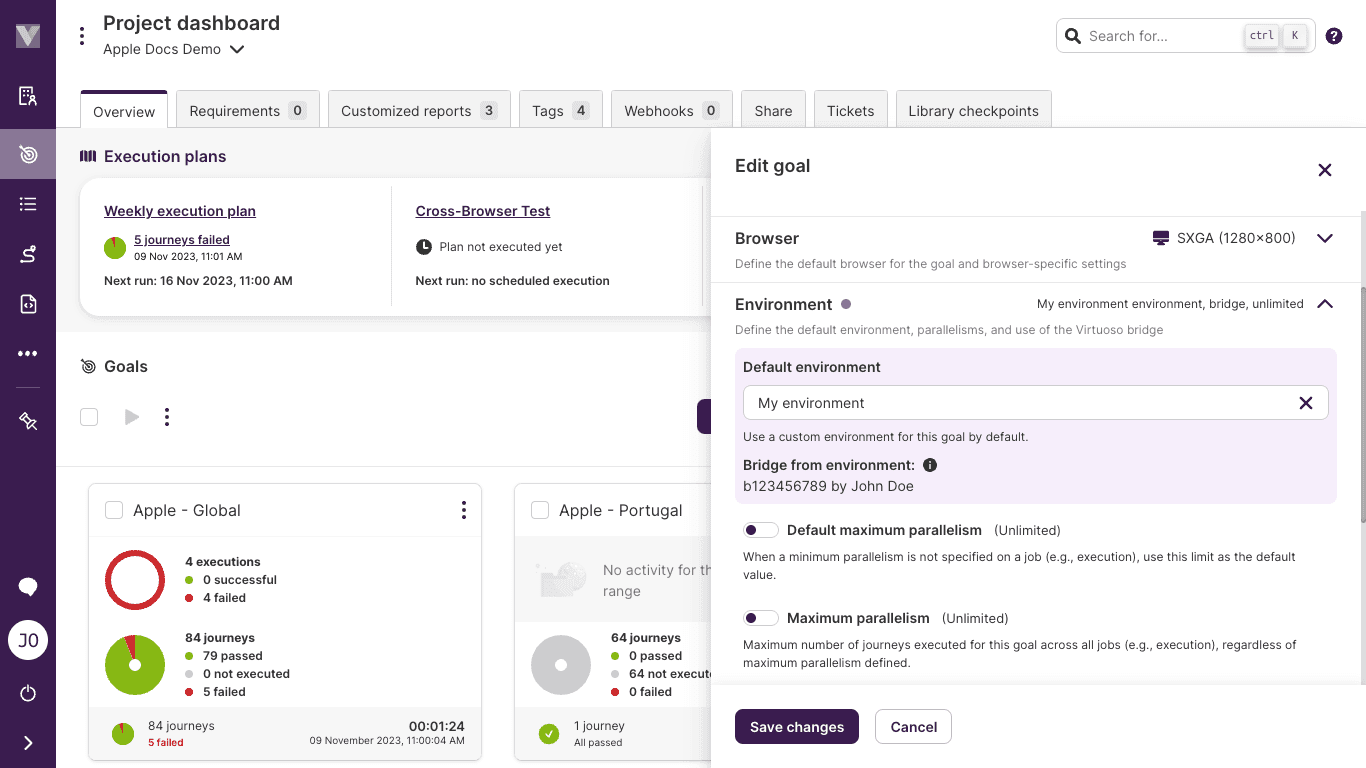
You can also configure a specific goal to use a different environment. In the goals list, click on Edit settings in the context menu of a goal and then select the default environment in the "Environment" settings section. If the environment has an associated bridge, it will be shown here.
If you just want to run a specific goal using a different environment once, you can configure it using the "Execute advanced..." option to run the goal or journey, then choose the environment as part of the execution.

If a goal is executed using an environment that is not the project's default environment, the execution job will be tagged with a tag following this format: environment: <environment-name> (e.g: "environment: development"), so you can filter and locate jobs that used a certain environment.
You can also easily test your journeys while authoring by using an alternative environment configured for the scope of your live authoring session.
# Using environment variables in your tests
The syntax to be used for our NLP parser is $variableName. Our autocomplete step will suggest to you at the time you start to type the name of one of your variables:
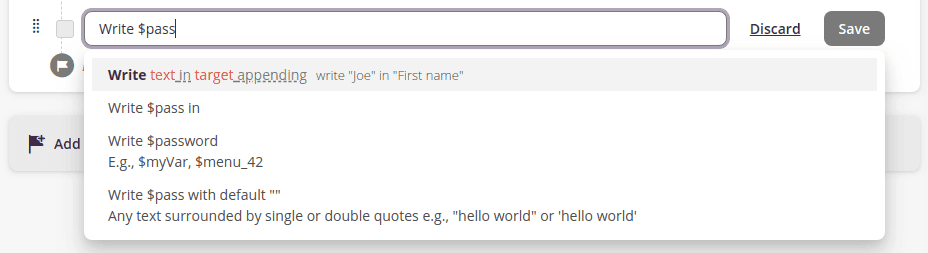
Example:
Write $username in field "Username"
Write $password in field "Password"
Click on "Login"
To use a file variable, you can use the same syntax as above.
Upload $avatar to "Drag an image here"
This syntax is also valid if you want to pass the value of your variable as input for an extension:
Execute myExtension using $myVariable as input
After running your tests, every step that used an environment variable will now have a side effect:

Note that variables marked as sensitive won't show their values:

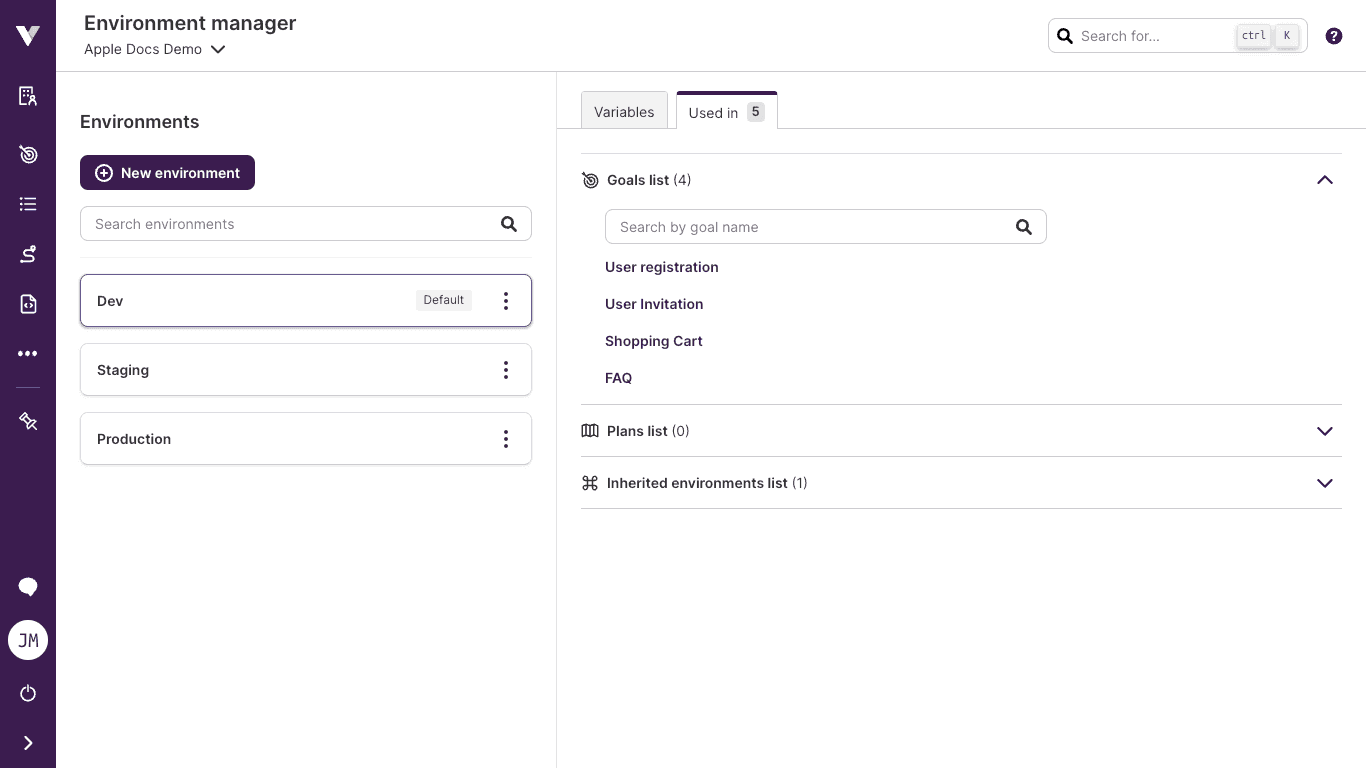
# Track environments usage
The environment plays a versatile role within a project, finding its application across goals and plans and serving as a foundation for other environments.
To streamline tracking and management, we've introduced a Used in tab on the environment details page.
This feature displays all instances where the environment is utilized, neatly categorized into goals, plans, and inheriting environments for easy navigation.
← Timeline Requirements →