# Managing journeys
Journeys represent end-to-end user flows against your application.
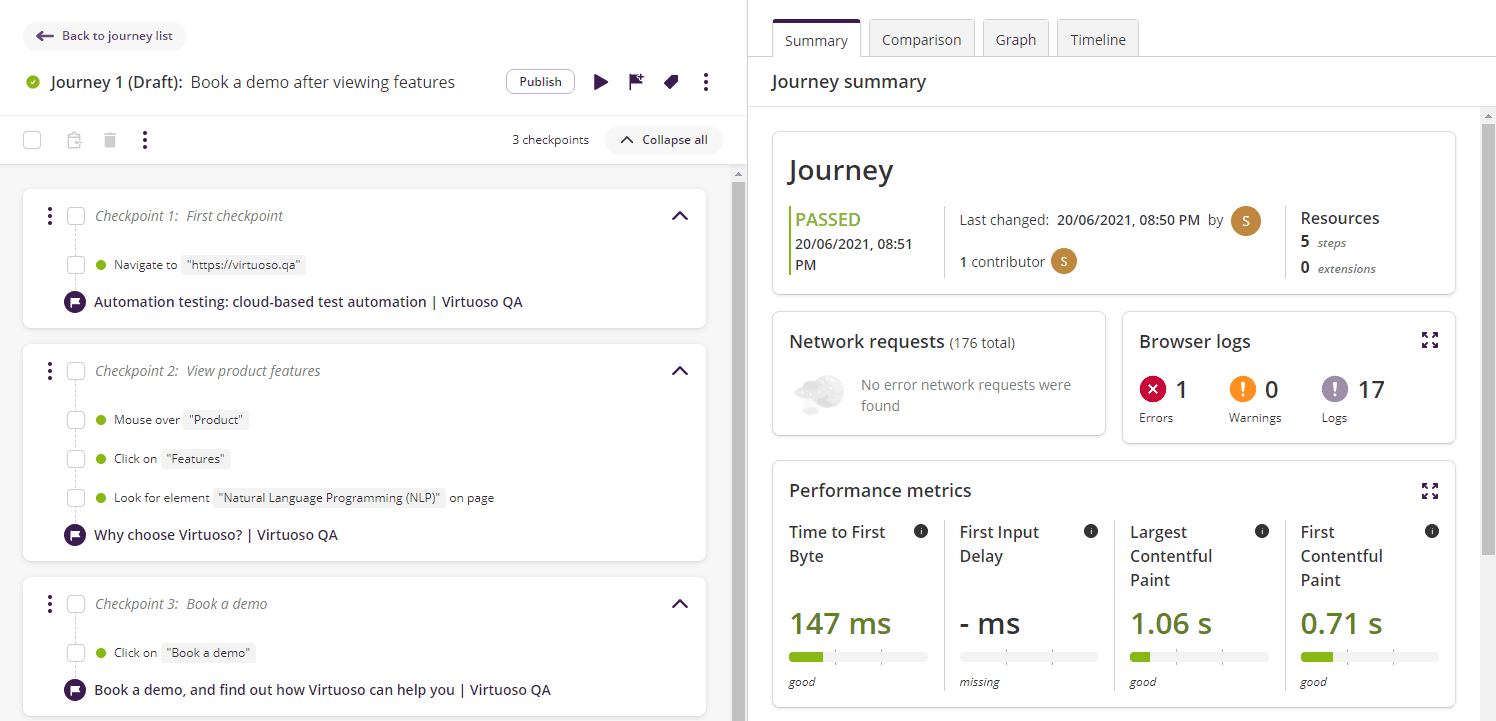
Each journey, generally consists of some interactions that take you from the starting point A to a target point B, and some validations along the way. We call each of these actions a step, and you can separate these actions by checkpoints.
# Creating new journeys
From the goal view, to create a new journey, click on Add a journey positioned at the end of the journey list.
This will open up the form to name a new journey. After choosing the name, click Save and you will be redirected to the newly created journey.
# Publishing a journey
Creating new journeys often involves tinkering and envisioning how to best represent an end-to-end user flow. To make this less intimidating, newly created journey are created as draft, meaning that they will not be executed when you execute the whole goal, until you publish them. This allows you to freely build your journey, and only once you're happy with it, you include it in your goal's set of tests.
Once you have created your journey and you think it is ready to be included in your goal (described in Adding checkpoints and test steps), you can publish the journey by clicking the publish button on top:
Tip: Code review for tests
One practice that can help with the completeness and quality of your tests, is to seek a review from your colleagues/manager, before you publish a journey.
You can even leave the decision to publish a journey to your manager or colleagues. From the goal settings under Manage, project managers can enforce rules that allow only managers to publish journeys in the goal.
# Tagging journeys
As you create more journeys, you may wish to organize them in various ways.
For example, some journeys may target a specific feature, some may target a specific user action, some may be part of your core smoke testing pack, some relate to a test specification in a JIRA ticket ID, etc.
We find the best way to organize our tests is through tags. You can tag your journeys in bulk or individually, and you can tag them with anything you want. You can then filter, view their status, and re-execute them simply by their tags. We will cover this in more details on the Journeys Dashboard.
# Journey summaries
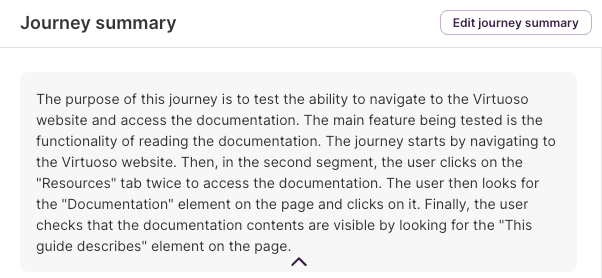
It is often difficult to understand what a journey is doing at a glance, introducing an extra layer of work when maintaining your journeys.
To solve this problem, journeys have a summary section, which can show a short description of what your journey does.
To start creating a summary for your journey, click the create a summary button on the right-hand panel of the journey editor.
# Generating a summary
Manually writing summaries for many existing journeys would require a lot of effort.
To help with this, you can use the generate summary button, which automatically generates a summary for your journey from its contents!
While our generative AI strives to be helpful, it may occasionally generate summaries with minor errors. Please review its output and make any necessary adjustments.
Once you've reviewed the summary, and are happy with it, click save changes. You and your colleagues will now be able to see this summary on the right-hand panel of the journey view.
# Updating existing summaries
If you want to update an existing summary, you can do so at any time by clicking the edit journey summary button.
Here, you can:
- update the existing summary;
- generate an entirely new summary; or
- clear the summary altogether.
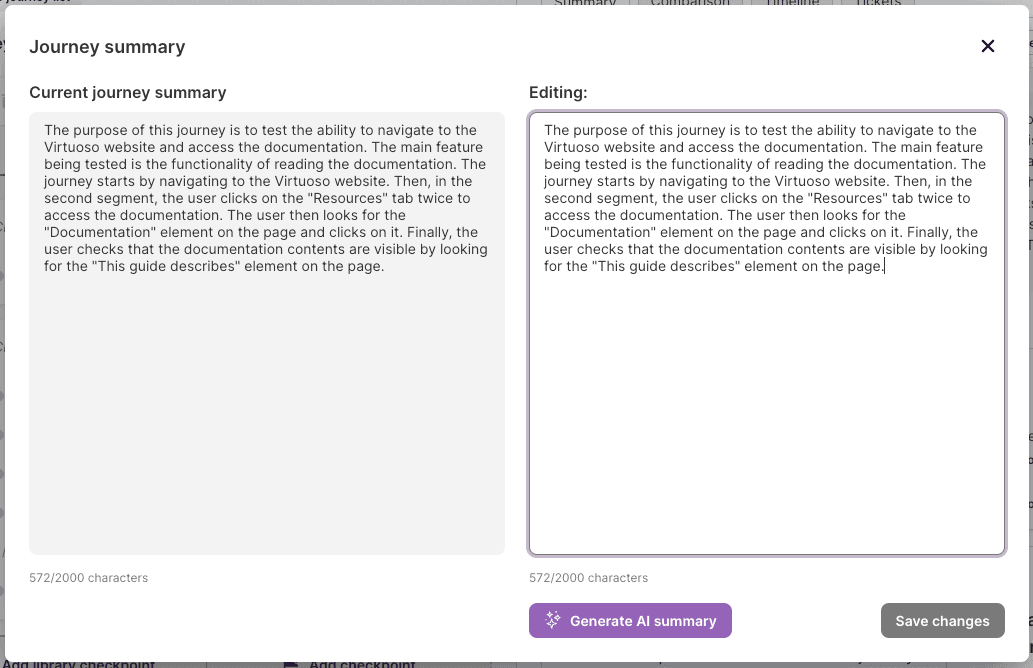
Note that changes to your summary (including generating a new summary) will not be saved until you click the save changes button. If you prefer the old summary, you can keep it by closing the summary editor without saving.
Other uses of journey summaries
You could also add other information to a journey summary, for example:
- Notes on additional steps that need to be added to the journey;
- Pre-conditions for the journey (e.g. if another journey needs to be executed first);
- What environment the journey should target.
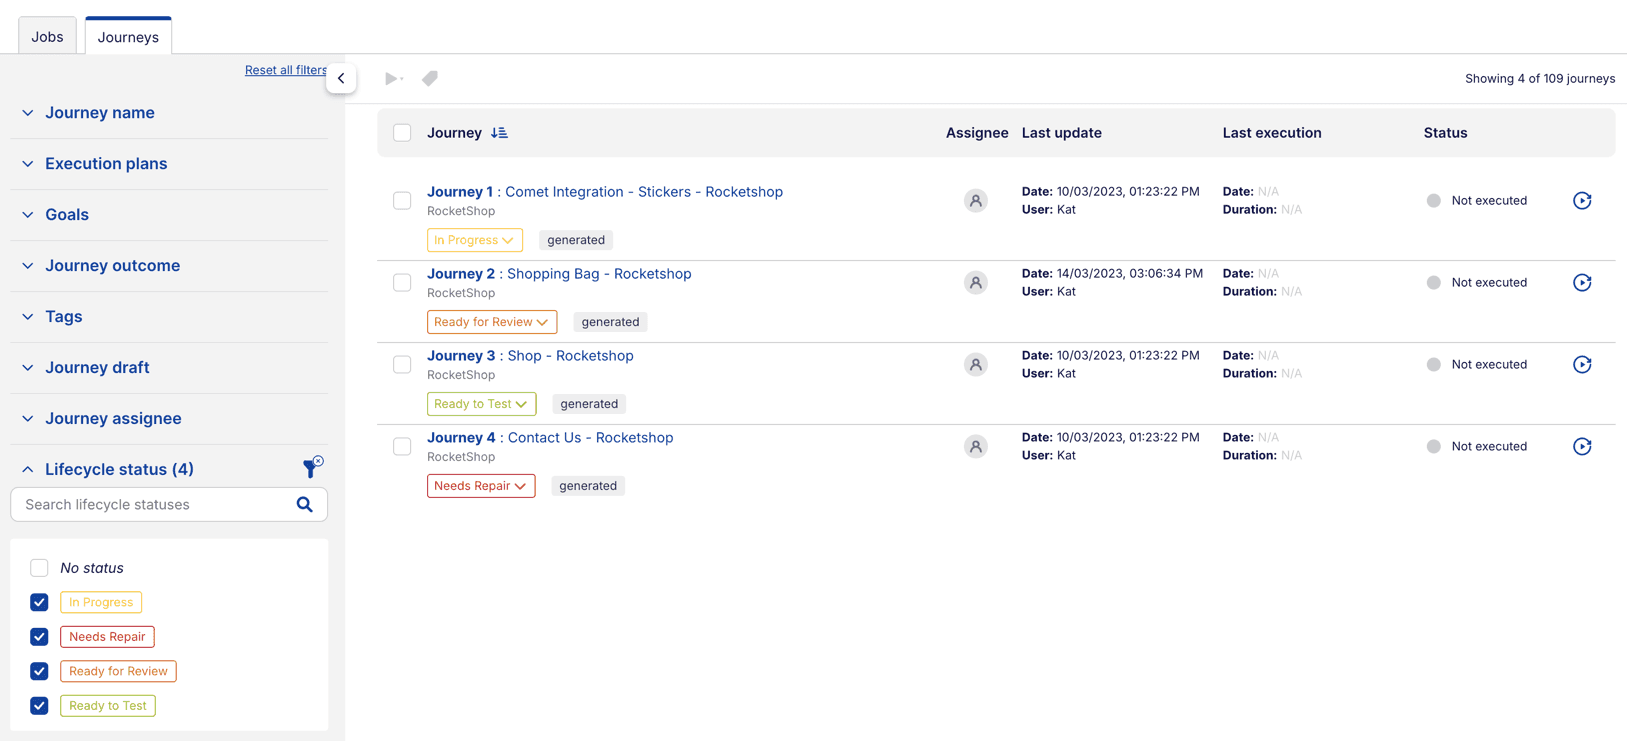
# Journey lifecycle status
As your test suite grows, you may wish to track where each journey stands in your workflow — whether it's still being built, awaiting review, or ready for testing.
The lifecycle status field allows you to capture this information. Your project administrator can configure the available statuses (such as "In Progress", "Ready for Review", or "Needs Repair") to match your team's workflow. See Configuring journey lifecycle for setup details.
# Updating the lifecycle status
You can change a journey's lifecycle status from two places:
- Journey list — In the Goal view, click on the status dropdown next to any journey;
- Journey details panel — When viewing a journey, use the status dropdown in the right-hand panel.
Each status is displayed with its configured color for easy identification. Users with Write or Manage access can change the lifecycle status. Read-only users can view it but not modify it.

# Filtering by lifecycle status
In the Journeys dashboard, you can filter journeys by their lifecycle status using the filter panel on the left. Select one or more statuses to show only journeys matching those states. You can also filter by "No status" to find journeys that haven't been assigned a lifecycle status yet.
# Lifecycle history
Every lifecycle change is recorded in the Timeline, showing who made the change, when it occurred, and the status transition (e.g., "lifecycle status from To-Do to In-Progress").

# Assigning ownership to journeys
As the number of journeys grow, it becomes important to clearly define ownership. While Virtuoso tracks contributors—users who have made changes to a journey—there are situations where a single accountable owner is needed.
The assignee field lets you designate one user as the owner of a journey. The assignee is the primary point of contact for maintaining, reviewing, and ensuring the quality of the journey depending on your needs.
# Viewing and assigning
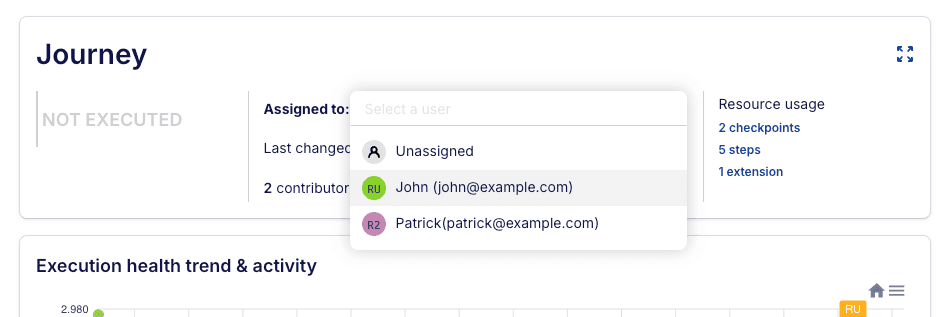
You can see the journey assignee in the journey details panel on the right-hand side, as well as in the Journeys dashboard list view. This makes it easy to identify who owns each journey at a glance.

To assign or change the assignee, click the Assigned to field in the journey details panel and select a user from the list of project members. Changes are saved automatically.
# Tracking assignee changes
All assignee changes are automatically recorded in the Timeline. Each entry shows who made the change, when it occurred, and both the previous and new assignee.

This helps your team track ownership history and understand how responsibility has shifted over time.
Now that we have some journeys, in the next section, we will look at executing them.