# Creating a goal and the goal view
As explained in the Core concepts, a goal is a testing scope within a project, which can be a module, a component, or a version of an application to test.
# How to create a goal
You can create a goal in Virtuoso with only a few steps:
- Click on the
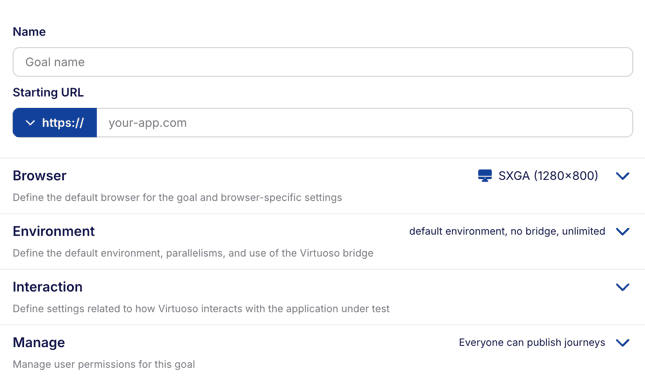
New goalbutton on the Project dashboard; - Enter a goal name, with a maximum length of 100 characters. (e.g.,
Example); - Add a URL in the
Starting pointfield (e.g.,https://example.com,example.com).
This is the minimum information that Virtuoso needs to create a goal. There are more settings that you can tweak, but we will cover those later.
- Click on the
Create & add first journeybutton at the bottom:

# The goal view
Whenever you create a goal, Virtuoso will include a first journey and redirect you to the goal view.
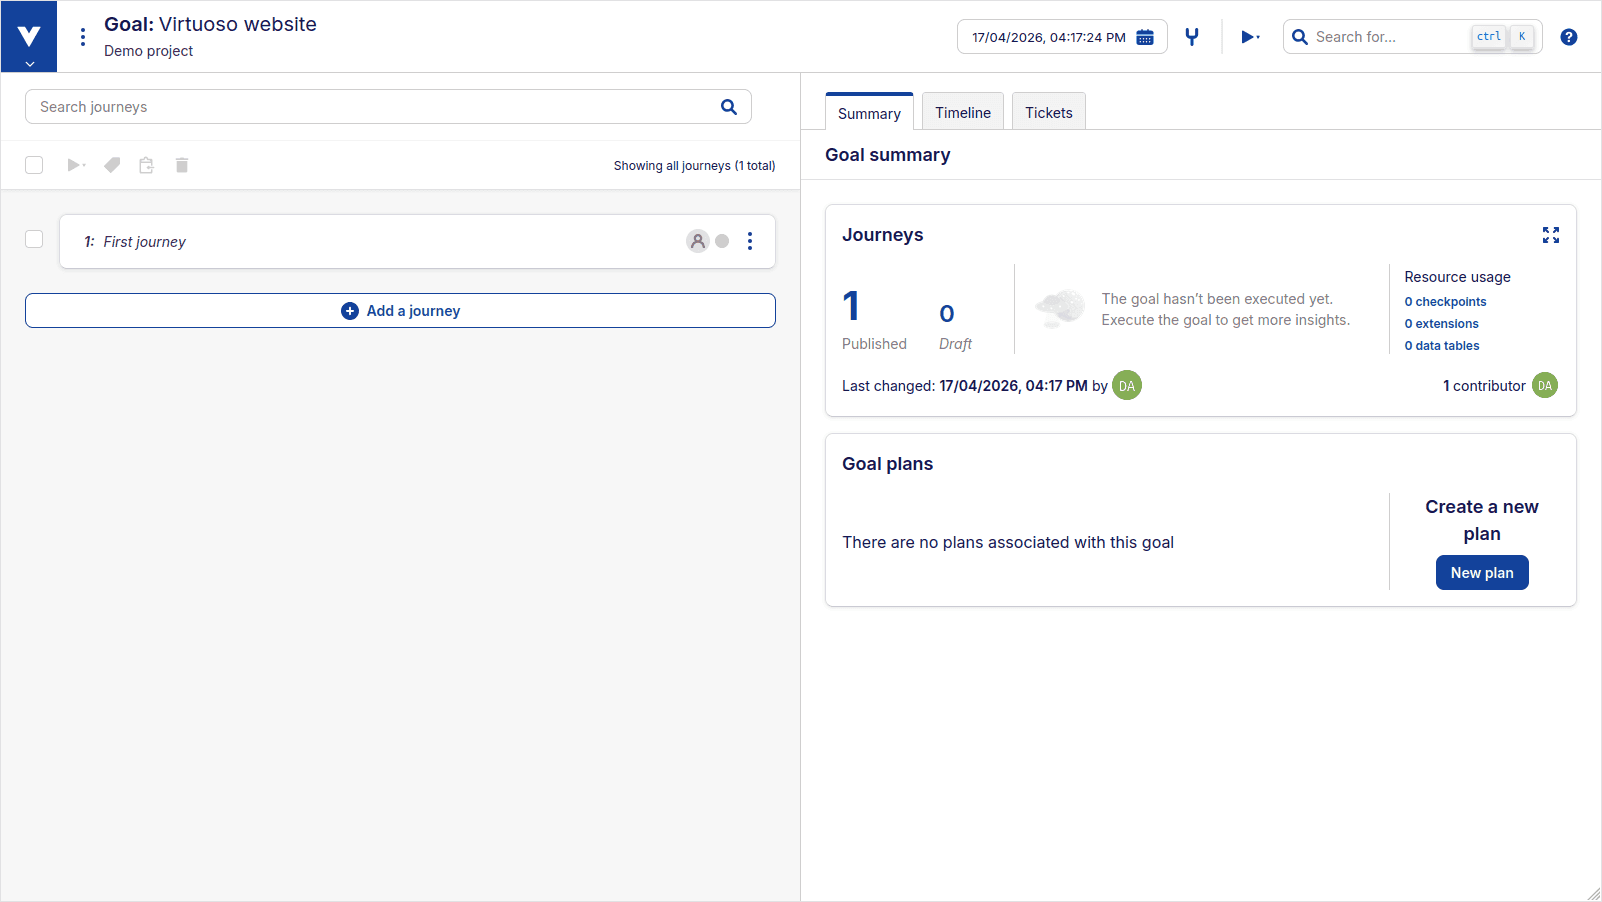
On the top left, you see the goal's context menu and name. On the top right, you see the version picker, the fork icon , and the execution icon . The left-hand side of the screen contains the list of journeys in the goal, and the right-hand side contains tabs for the goal summary, the goal timeline, and the ticket tracking panel.
You can execute the journey by clicking on the execute icon. You should notice that when your journey starts to execute, the status badge next to the journey will first turn yellow and thereafter green or red once the execution of the journey finishes. A gray badge indicates that the journey version was not yet executed.
Goal versions are created as the journey evolves. You can use the version picker to navigate through the history of your goal. The fork icon allows you to create a new branch of your goal from the current version.
Enter the journey, and you see that it contains a single test step which is just a navigation step to your testing web application.

You can find more information about how to do test authoring at Managing journeys followed by our section Executing tests which provides a more in-depth explanation of how Virtuoso executions work.
# Goal settings
You can customize various aspects of the goal and how Virtuoso should interact with the application in the goal settings panel, beyond the name and the starting URL mentioned before.
For existing goals, you can open the goal settings panel again by clicking on the context menu icon next to the goal's name in the project dashboard, or by clicking on the context menu icon located inside the goal view of that particular goal. This is also located in the top bar, next to the goal name.
# Browser
Your tests run through a browser on Virtuoso's side. By default, it uses Virtuoso's own Chromium-based browser with a default resolution of 1280x800. However, you can set a custom resolution if desired.
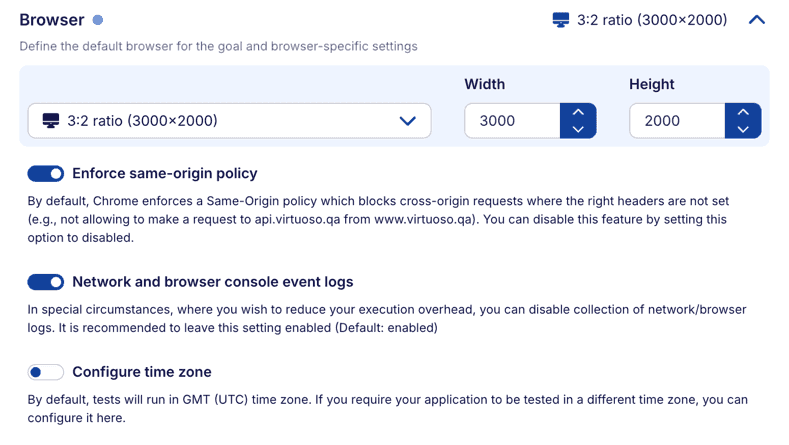
The mobile and desktop variants will all by default use the Virtuoso browser for execution at the given resolution. These are just resolution templates to get you started, but you can execute them on custom real devices as well.
There are other aspects related to the browser that you might be interested in, such as enforcing same-origin policy (CORS) in your executions (enabled by default).
# Timezones
By default, the browser will use the GMT/UTC time zone to create or execute your tests, but you can change this by choosing a different time zone. This might be useful if your test results are dependent on running across different/multiple time zones. This is applicable for both the default Virtuoso browser as well as for cross-browser testing.
Some of the time zones change during the year due to DST. In this case, in the dropdown list you can find both of their offsets when compared to GMT.

# Environment
Here you can configure which environment should be used by default when Virtuoso runs your goal. Environments are used to inject environment variables into your test steps during execution, you can read more at Environments.
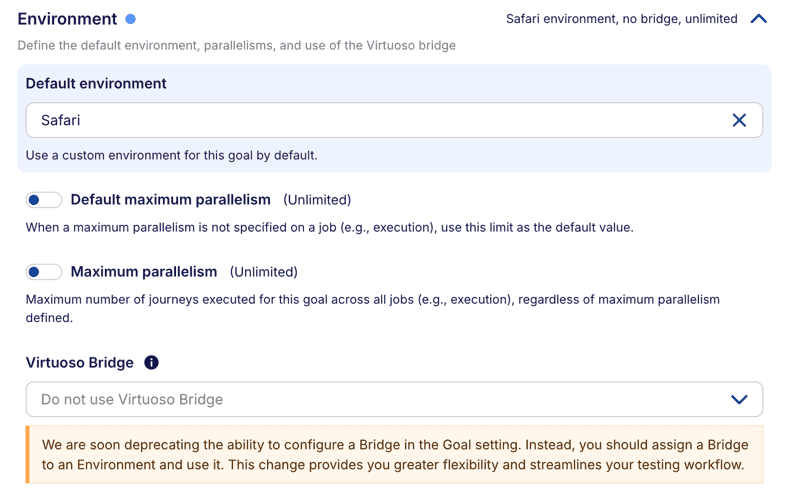
Also, you can set the parallelism limit for your executions, by default there is no limit set and these limits affect how Virtuoso would execute journeys. For example, with no limit set Virtuoso will attempt to execute the maximum number of journeys for your organization limits, but if you set the limit to 1 and execute multiple journeys each will be executed once the previous journey finishes (at most 1 will be active at any given time for that specific execution).
Finally, you set a Virtuoso bridge. This is used to provide a proxied connection to your target application for those cases where it's running in a limited access environment (e.g., localhost, private networks). You can read more at Virtuoso bridge.
# Interaction
This group of settings defines how Virtuoso should interact against your testing application while executing your tests, note these are advanced settings, and you will not need to change them in most cases.
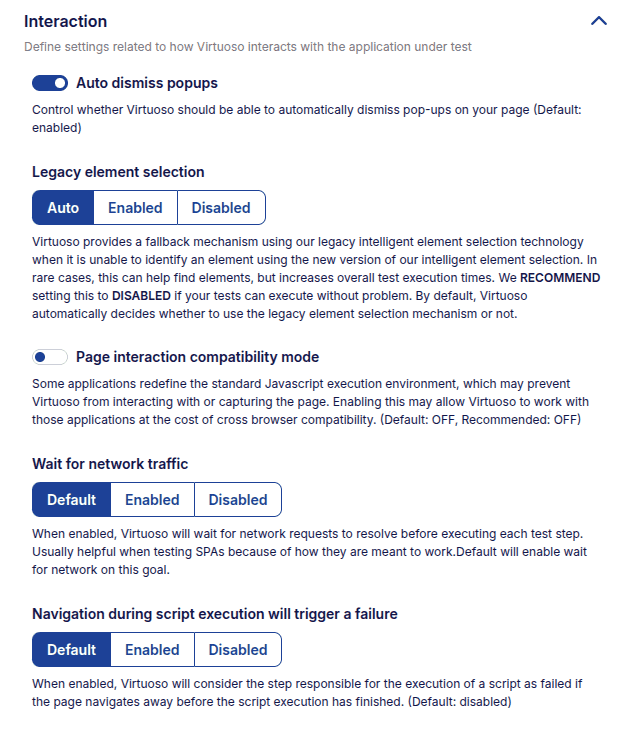
# Auto dismiss popups
Certain in-page popups can interrupt the flow of a journey, requiring additional steps to dismiss them, in order to continue with the testing flow. When enabled (default), Virtuoso will automatically try to dismiss unexpected pop-ups, so your journeys can continue without a hitch. This does not impact pop-ups that deterministically appear.
For example, if you have a newsletter pop-up that randomly may occur at any part of the journey, this option can be helpful to prevent your journeys from breaking. However, if you have a cookie pop-up when you enter your page, you would need to dismiss the popup as part of your journey.
Given the automated nature of this behaviour which in exceptional circumstances may have unexpected consequences, if this causes any issues for your normal journeys when you aren't dealing with pop-ups, you can disable this feature for all journeys in a goal with this setting.
# Wait for network traffic
Dynamic web pages – such as single-page applications (SPAs) – update their contents according to responses that they receive from a remote server; using their APIs behind the scene. This means that steps in a journey could try to interact with elements on the page that will exist, but do not exist yet. Virtuoso resolves this problem by autonomously waiting for pending network requests to resolve by default.
Note that this does not include subsequent network requests, or additional page rendering that will be performed by the browser as a result of the requests.
Note: due to unpredictability and best practices of network traffic, we never wait more than 1 minute for a request to resolve. If you have situations where certain network traffic take more than 1 minute, you can use wait-for commands.
Cross-browser testing: this option only works for Virtuoso's default browser (which uses the latest version of the Google Chrome browser); so if you expect to use your journeys cross-browser, please use wait-for steps to resolve elements.
# Navigation during script execution will trigger a failure
For different reasons, the application under test may navigate to a different page after completion of an async operation. If the navigation happens while the journey is executing an extension script inside an iframe, the script will be interrupted, i.e. the browser stops its execution indicating a timeout. By default, Virtuoso will ignore the error and continue executing the journey. If you want the journey to fail when this happens, enable this option.
# Manage
If you are a project manager, you can control whether publishing journeys in the goal is restricted to only project admins, or all members of the project with write access (default).

Execute advanced
If you are not sure about some of the settings above, you may find it useful to know that most of these settings can be altered for a single execution by using the Execute advanced option of the goal context menu in the project dashboard, or from the goal view.