# Reusing steps with library checkpoints
You might find yourself writing the same steps over and over again in new goals in the same project. Library checkpoints allow you to save these common sequences and to reuse them whenever and wherever you like.
Like shared checkpoints, library checkpoints can be imported at any point in your journey. Unlike shared checkpoints, they are not limited to a single use in each journey, and are shared across your entire project.
WARNING
Unlike shared and regular checkpoints, library checkpoints exist outside the current version control system. Once a library checkpoint is changed, new executions of previous journey versions will also use the new library checkpoint version.
Library checkpoints are really useful if you have your tests organized into multiple goals. This centralizes your maintenance instead of requiring you to manually copy changes between goals, achieving complete reusability.
# Creating a library checkpoint
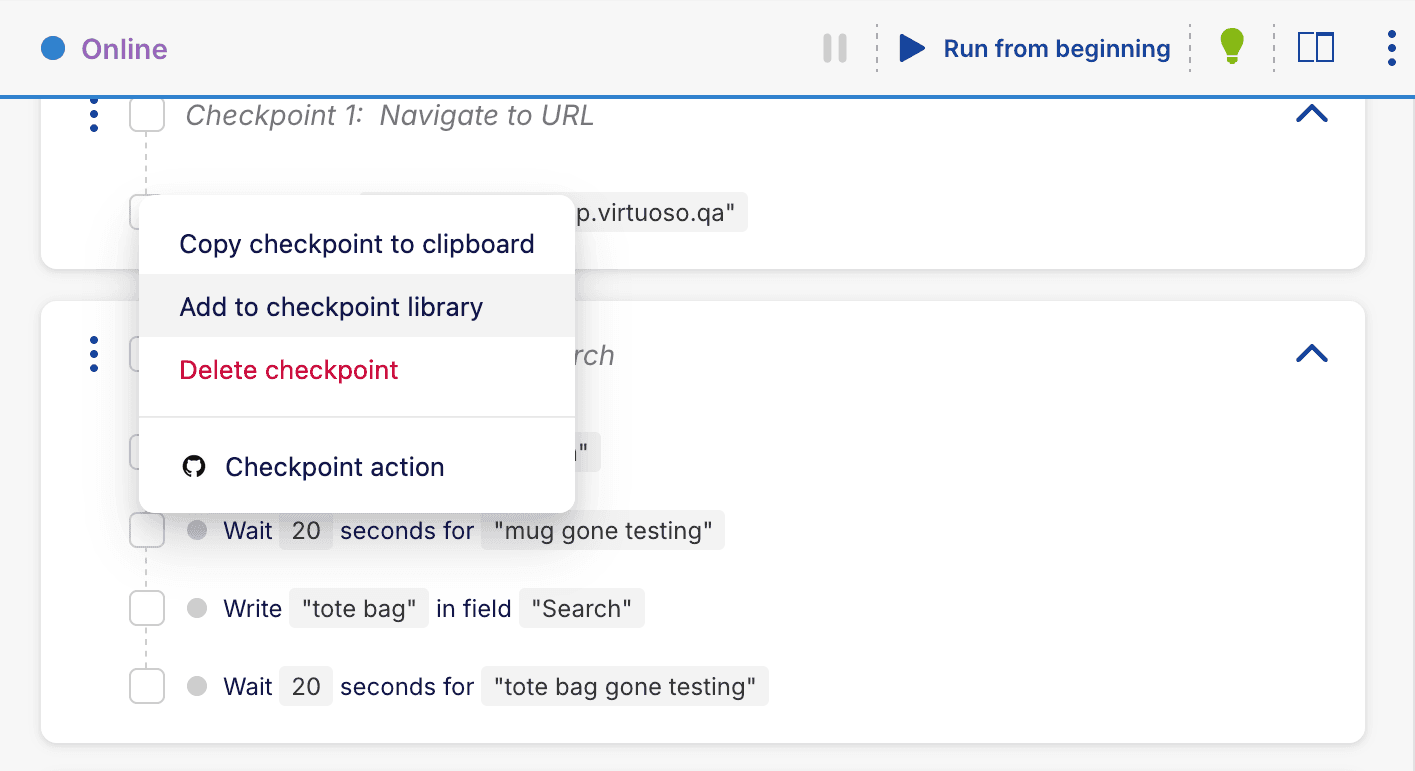
To create a library checkpoint, use the context menu of a checkpoint to add your checkpoint to the library. Your library checkpoint will replace the original checkpoint automatically.
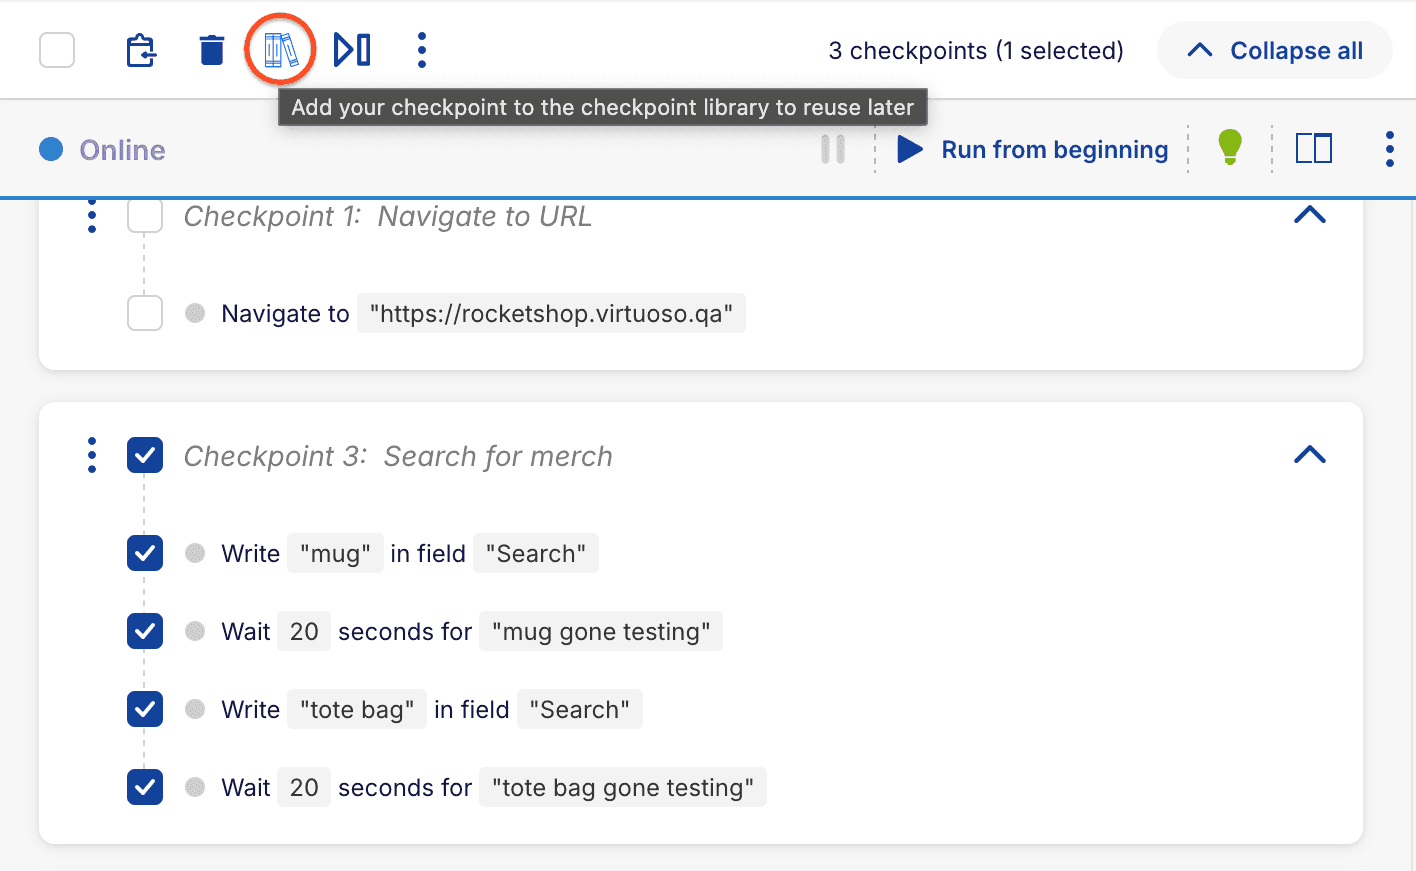
You can also use the icon in the toolbar after selecting a checkpoint to add it to the library:
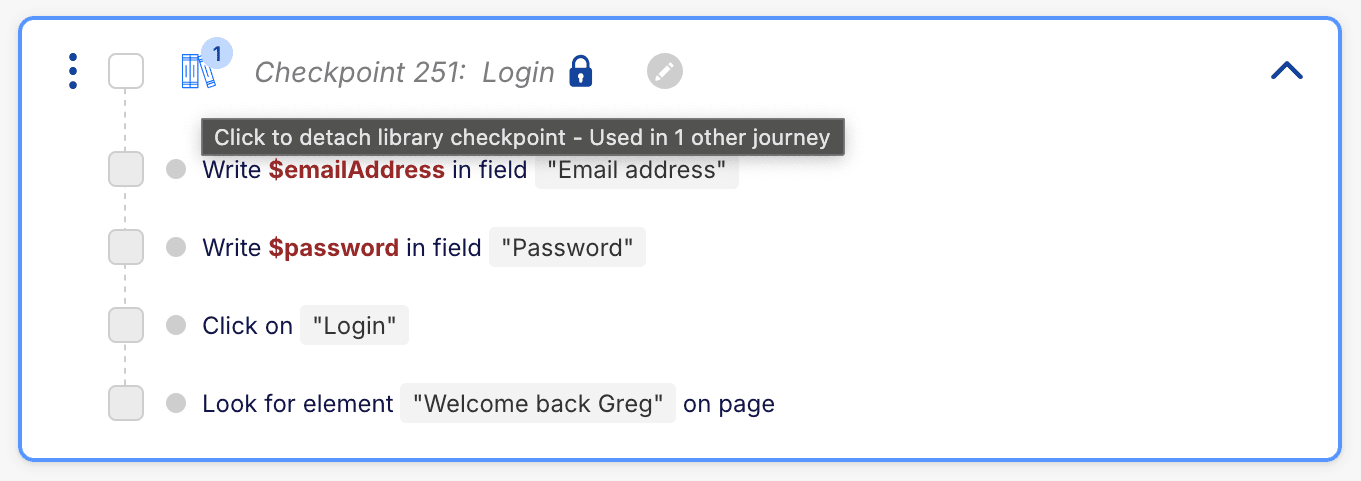
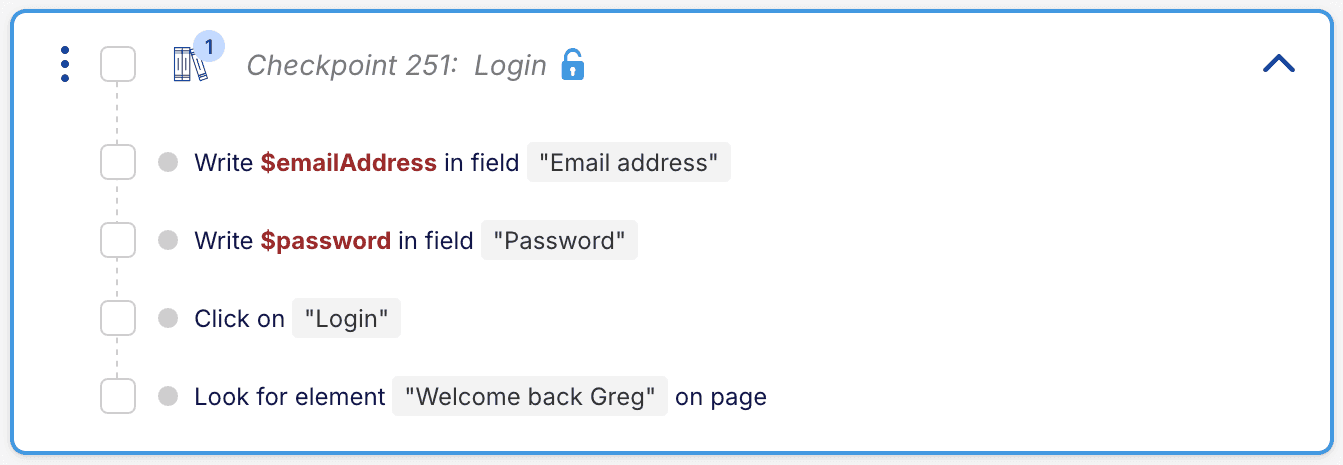
Once a checkpoint is made a library checkpoint, it will be differentiated with a blue border and a library icon on the checkpoint along with a lock:

# Converting a shared checkpoint into a library checkpoint
A shared checkpoint can be converted into a library checkpoint by adding any of the instances to the library. This will make all the instances of the shared checkpoints into a library checkpoint, which can then be used in other goals within the project.
# Reusing a library checkpoint
The bottom of the journey shows two buttons that allow you to add checkpoints. You can also see the same options by clicking the Add checkpoint button that appears when you hover the area between two existing checkpoints:

Choose Add library checkpoint and a list of your active library checkpoints will be shown:

- Click the chevron icon to expand a library checkpoint entry and view its test steps.
- Use the search box to find a specific library checkpoint by name.
- Use the dropdown menu to sort the list alphabetically, by date, or by the number of journeys using them.
- Quickly add multiple library checkpoints by clicking the Add button of each checkpoint, and then click on the close icon to the top right of the panel.
# Removing library checkpoints from a journey
Like other checkpoints, library checkpoints can be removed from the journey using the delete option in the toolbar or from the context menu. Unlike standalone checkpoints, library checkpoints are not automatically removed if they are no longer referenced, so even if you remove a library checkpoint from all of your journeys, you can add it back at any time. Notice, however, that archived library checkpoints are not shown in the library checkpoints panel; in order to add an archived library checkpoint, you will need to restore it from the Library checkpoints tab in the project dashboard.
# Making changes to a library checkpoint
Library checkpoints are locked by default to prevent accidental changes. This is because they could be shared in many places, and changes to the library checkpoint will be propagated to every journey that uses them.
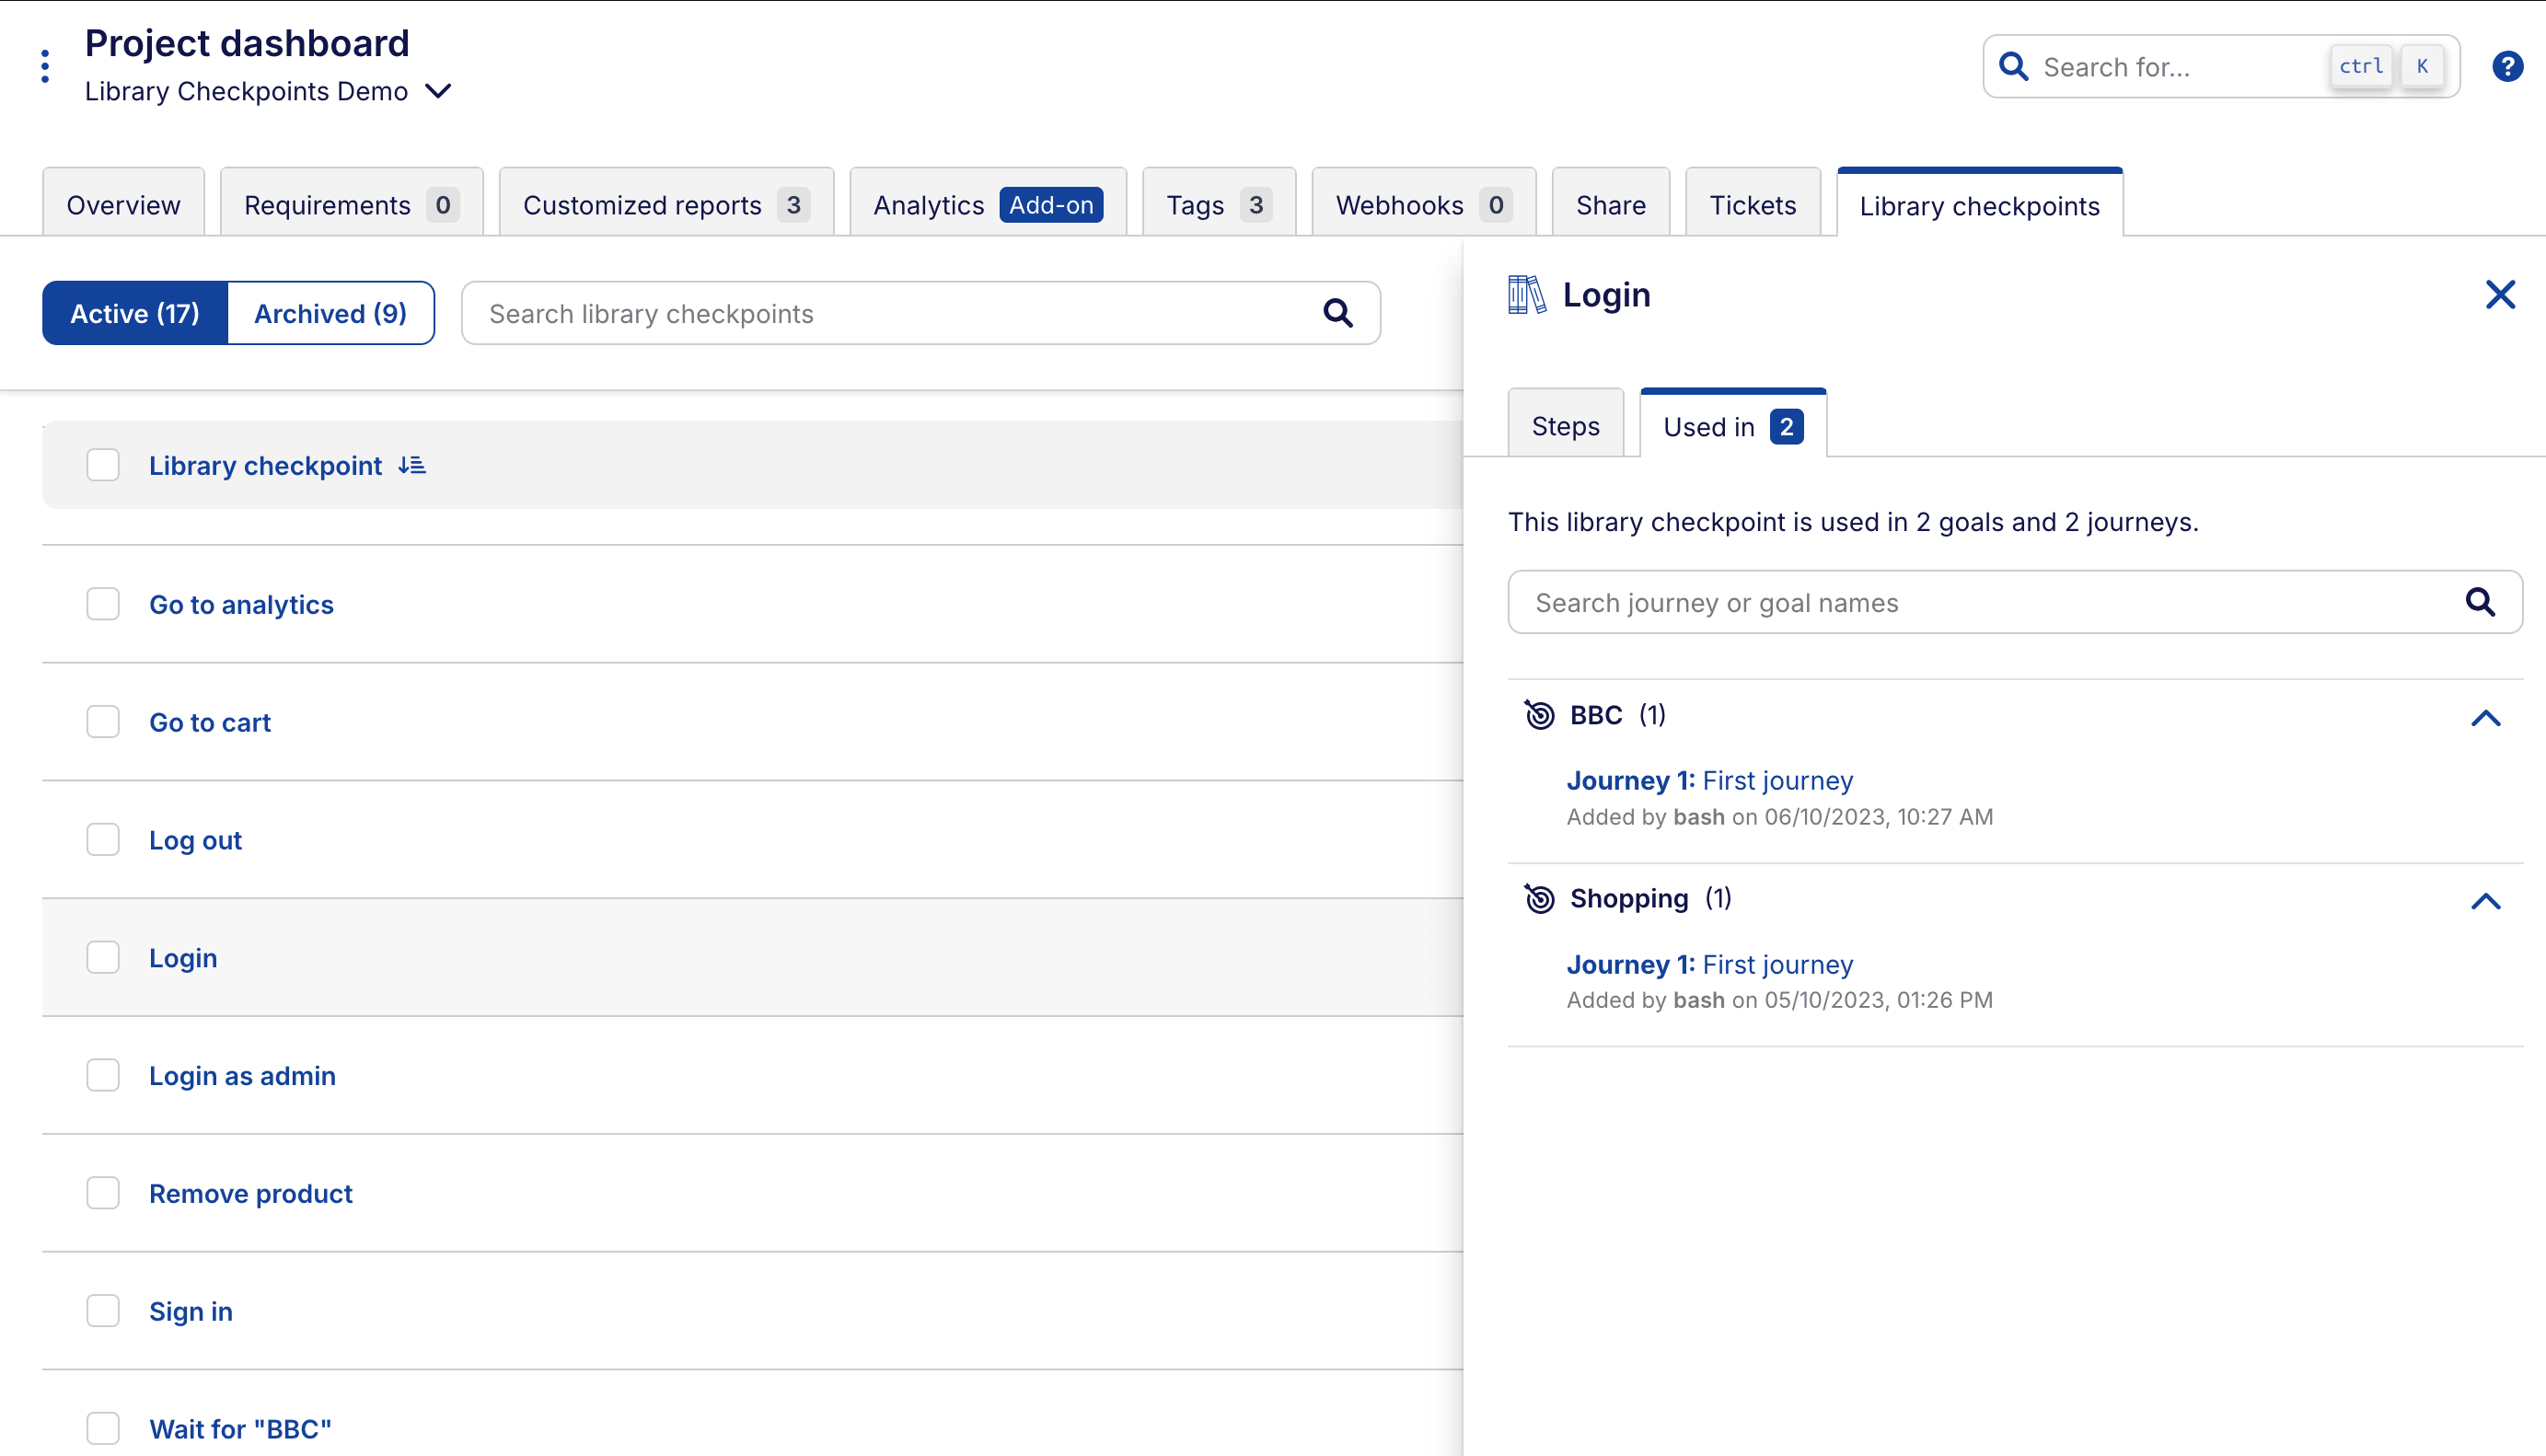
Take care! Other users may be depending on a library checkpoint, so if you make changes, be sure to check that the other journeys are not affected. You can see how many journeys are using the library checkpoint by hovering over the library checkpoint icon.
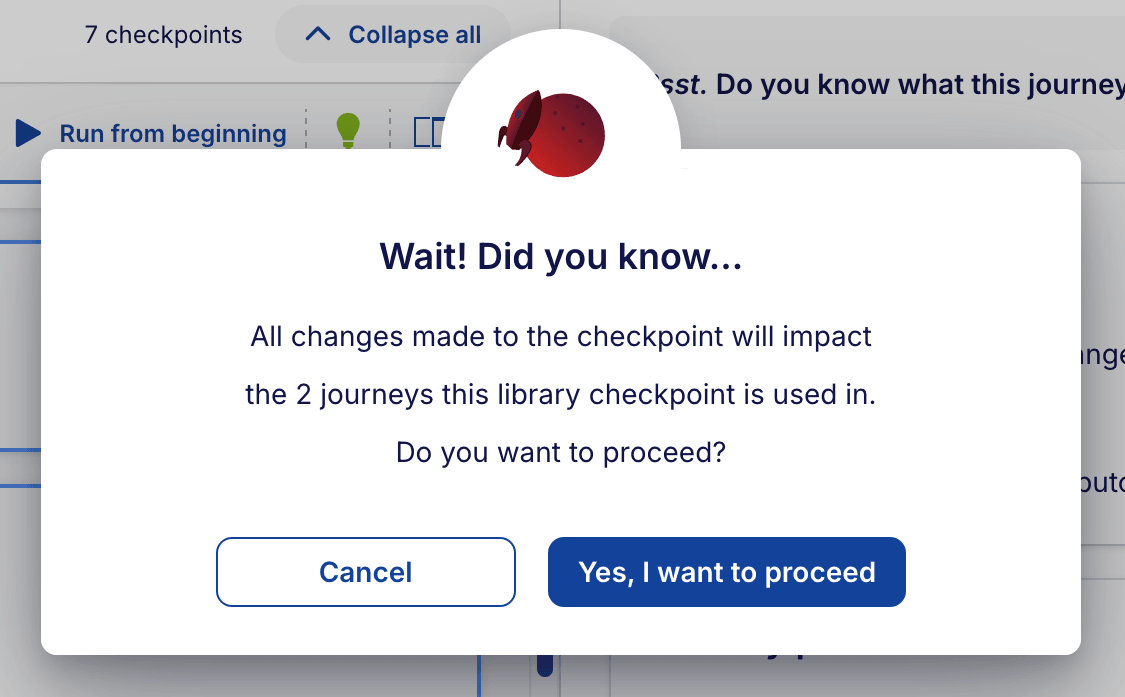
To make a change to a library checkpoint, first make sure that it is unlocked. Clicking the padlock icon
 will show a confirmation message before unlocking the checkpoint.
Once unlocked, you can make changes to the checkpoint as if it were any other checkpoint. The icon displays an open padlock and its color changes to light blue to indicate that changes can be made:
After you have made your edits, click the unlocked padlock to lock the checkpoint again.
WARNING
The lock is only local to your session; other users may make changes to the same checkpoint at the same time. Be sure to check with your colleagues if you are both working on journeys that use the same library checkpoint.
# Converting a library checkpoint back to a standalone checkpoint
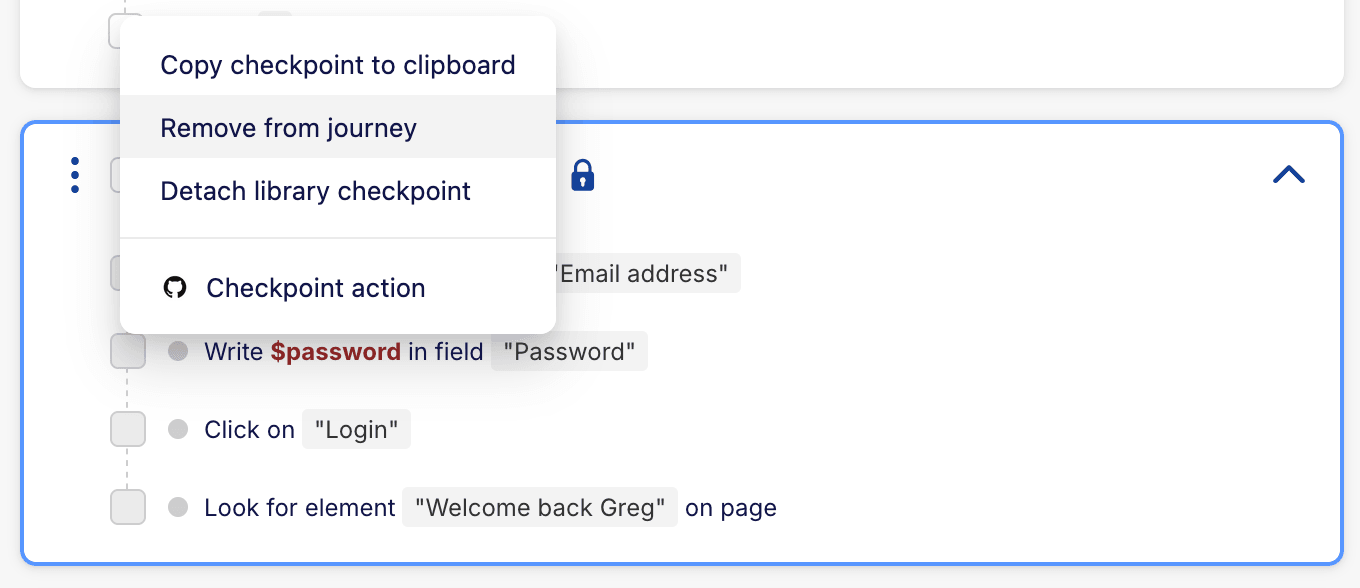
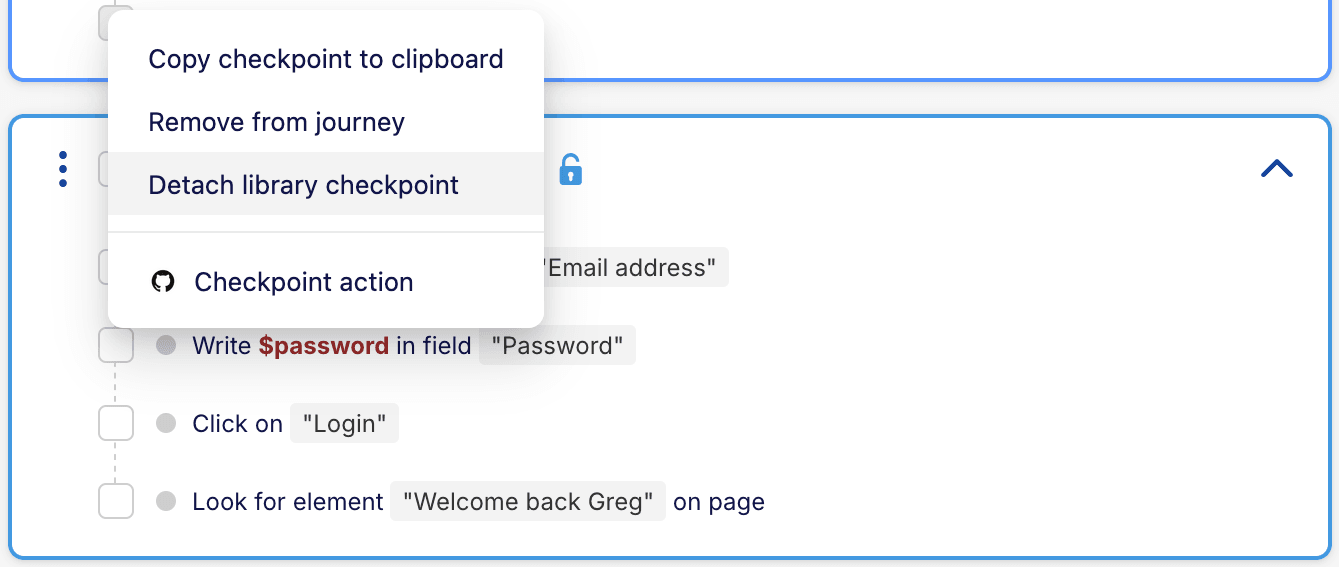
You may need to make a new version of a library checkpoint without affecting existing journeys. You can do this by detaching the library checkpoint using the context menu and selecting Detach library checkpoint, or clicking on the library icon on the checkpoint itself. This will leave the library checkpoint in the library and replace it in your journey with a unique copy that is detached from the library.
You can then make changes to this checkpoint without them affecting other journeys. If you then wish to share these changes, you can convert the checkpoint back to a library checkpoint (but note that its name must be changed first!).
# Managing library checkpoints
To check what checkpoints you have in your library, you can head to the library checkpoint view. To access it, go to the Project dashboard and then click on the Library checkpoints tab.
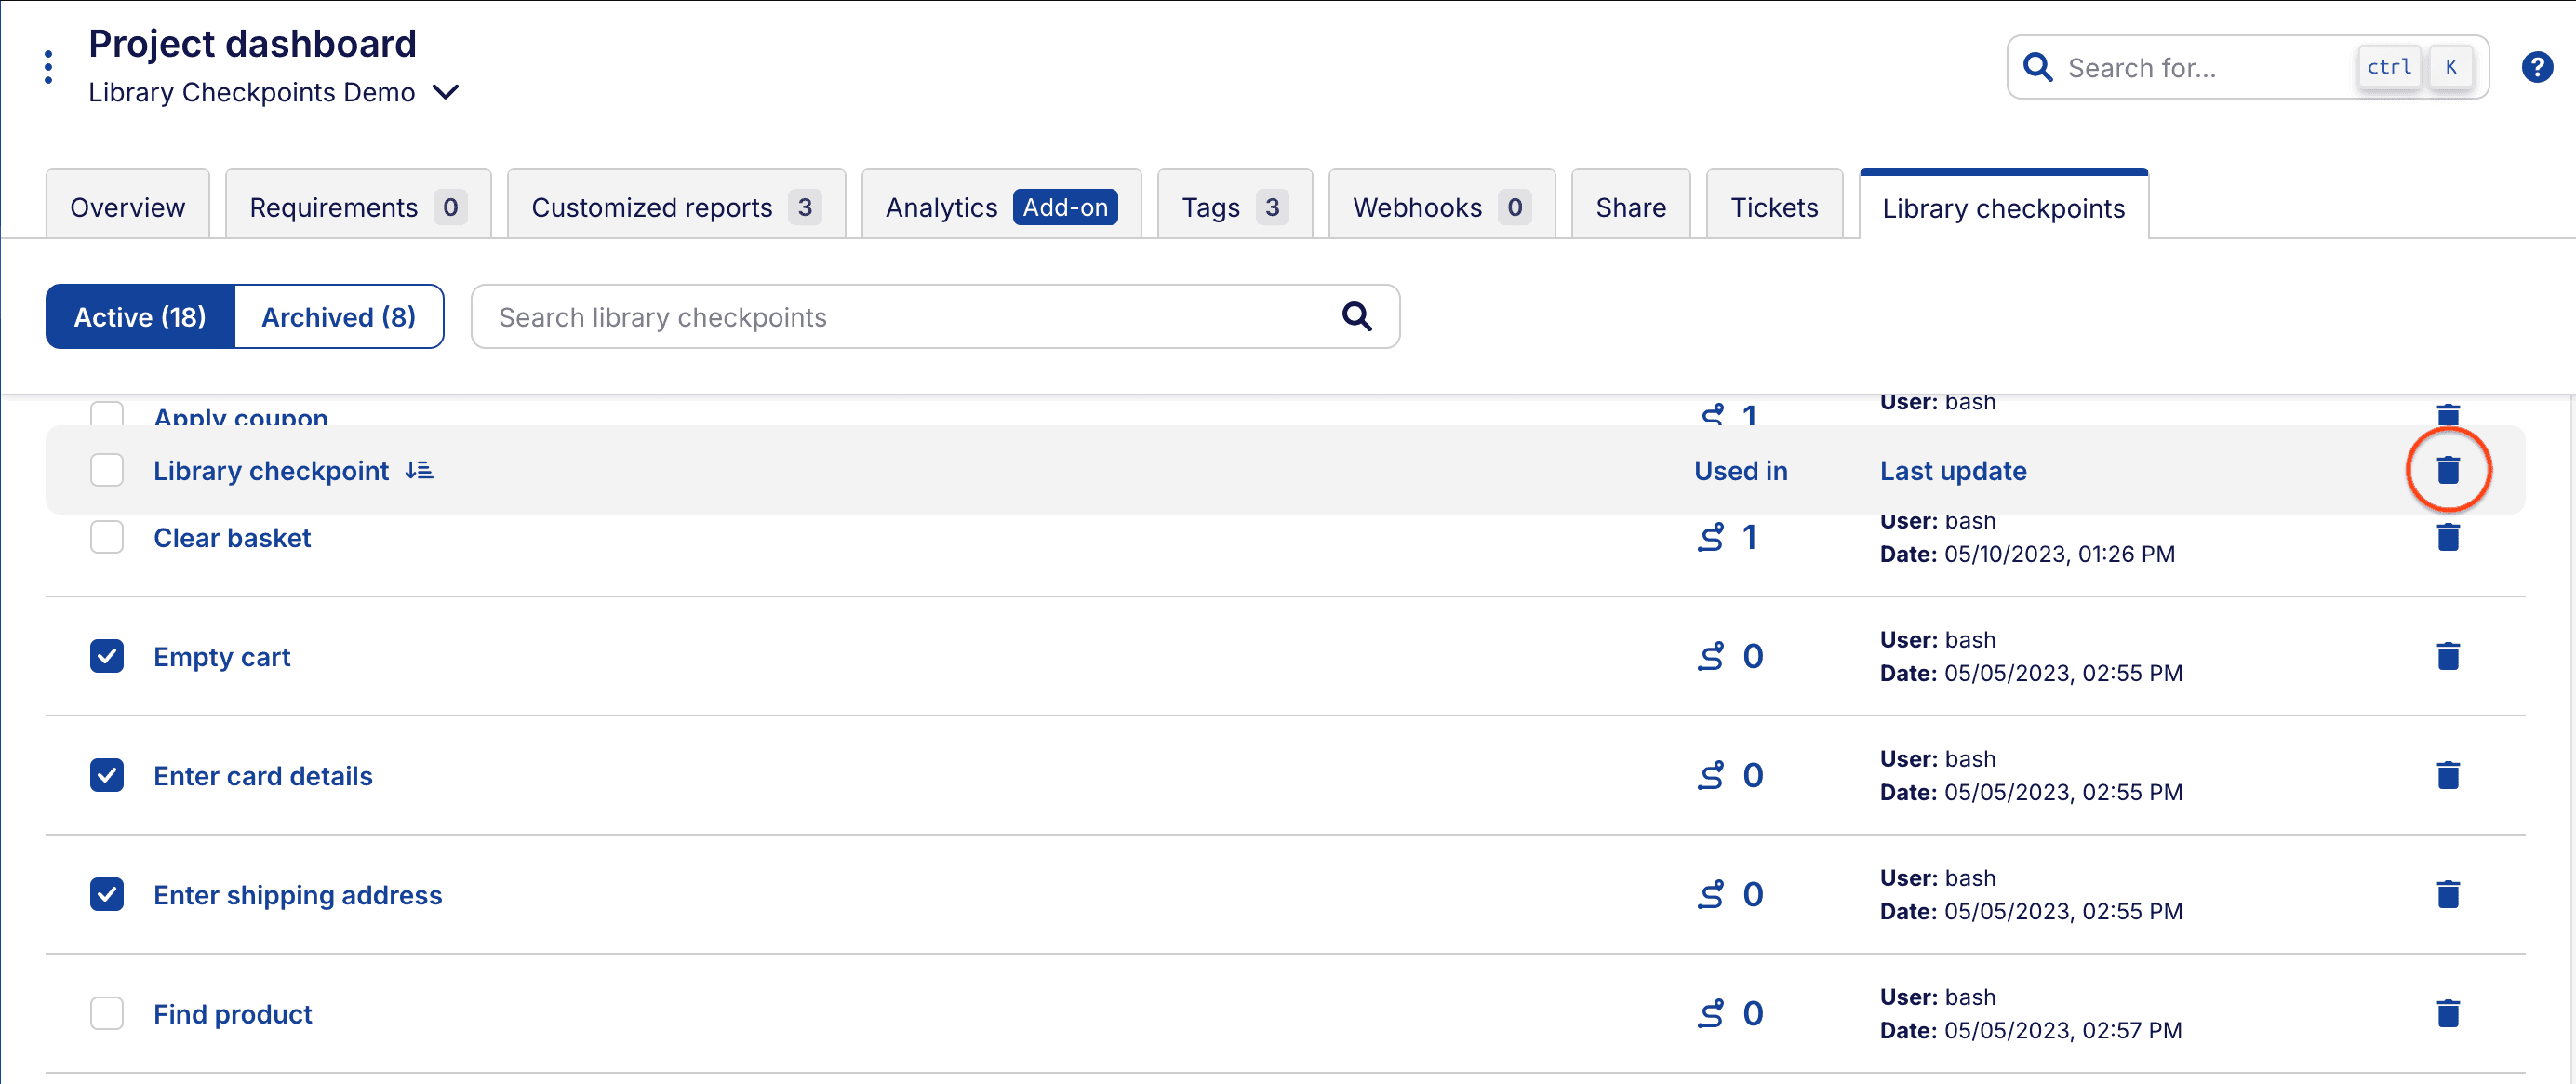
The tab displays a list of all the library checkpoints in your project. You can use the search box at the top to filter the results. To its left, you can further filter between active and archived library checkpoints (see Archiving library checkpoints below for more information).
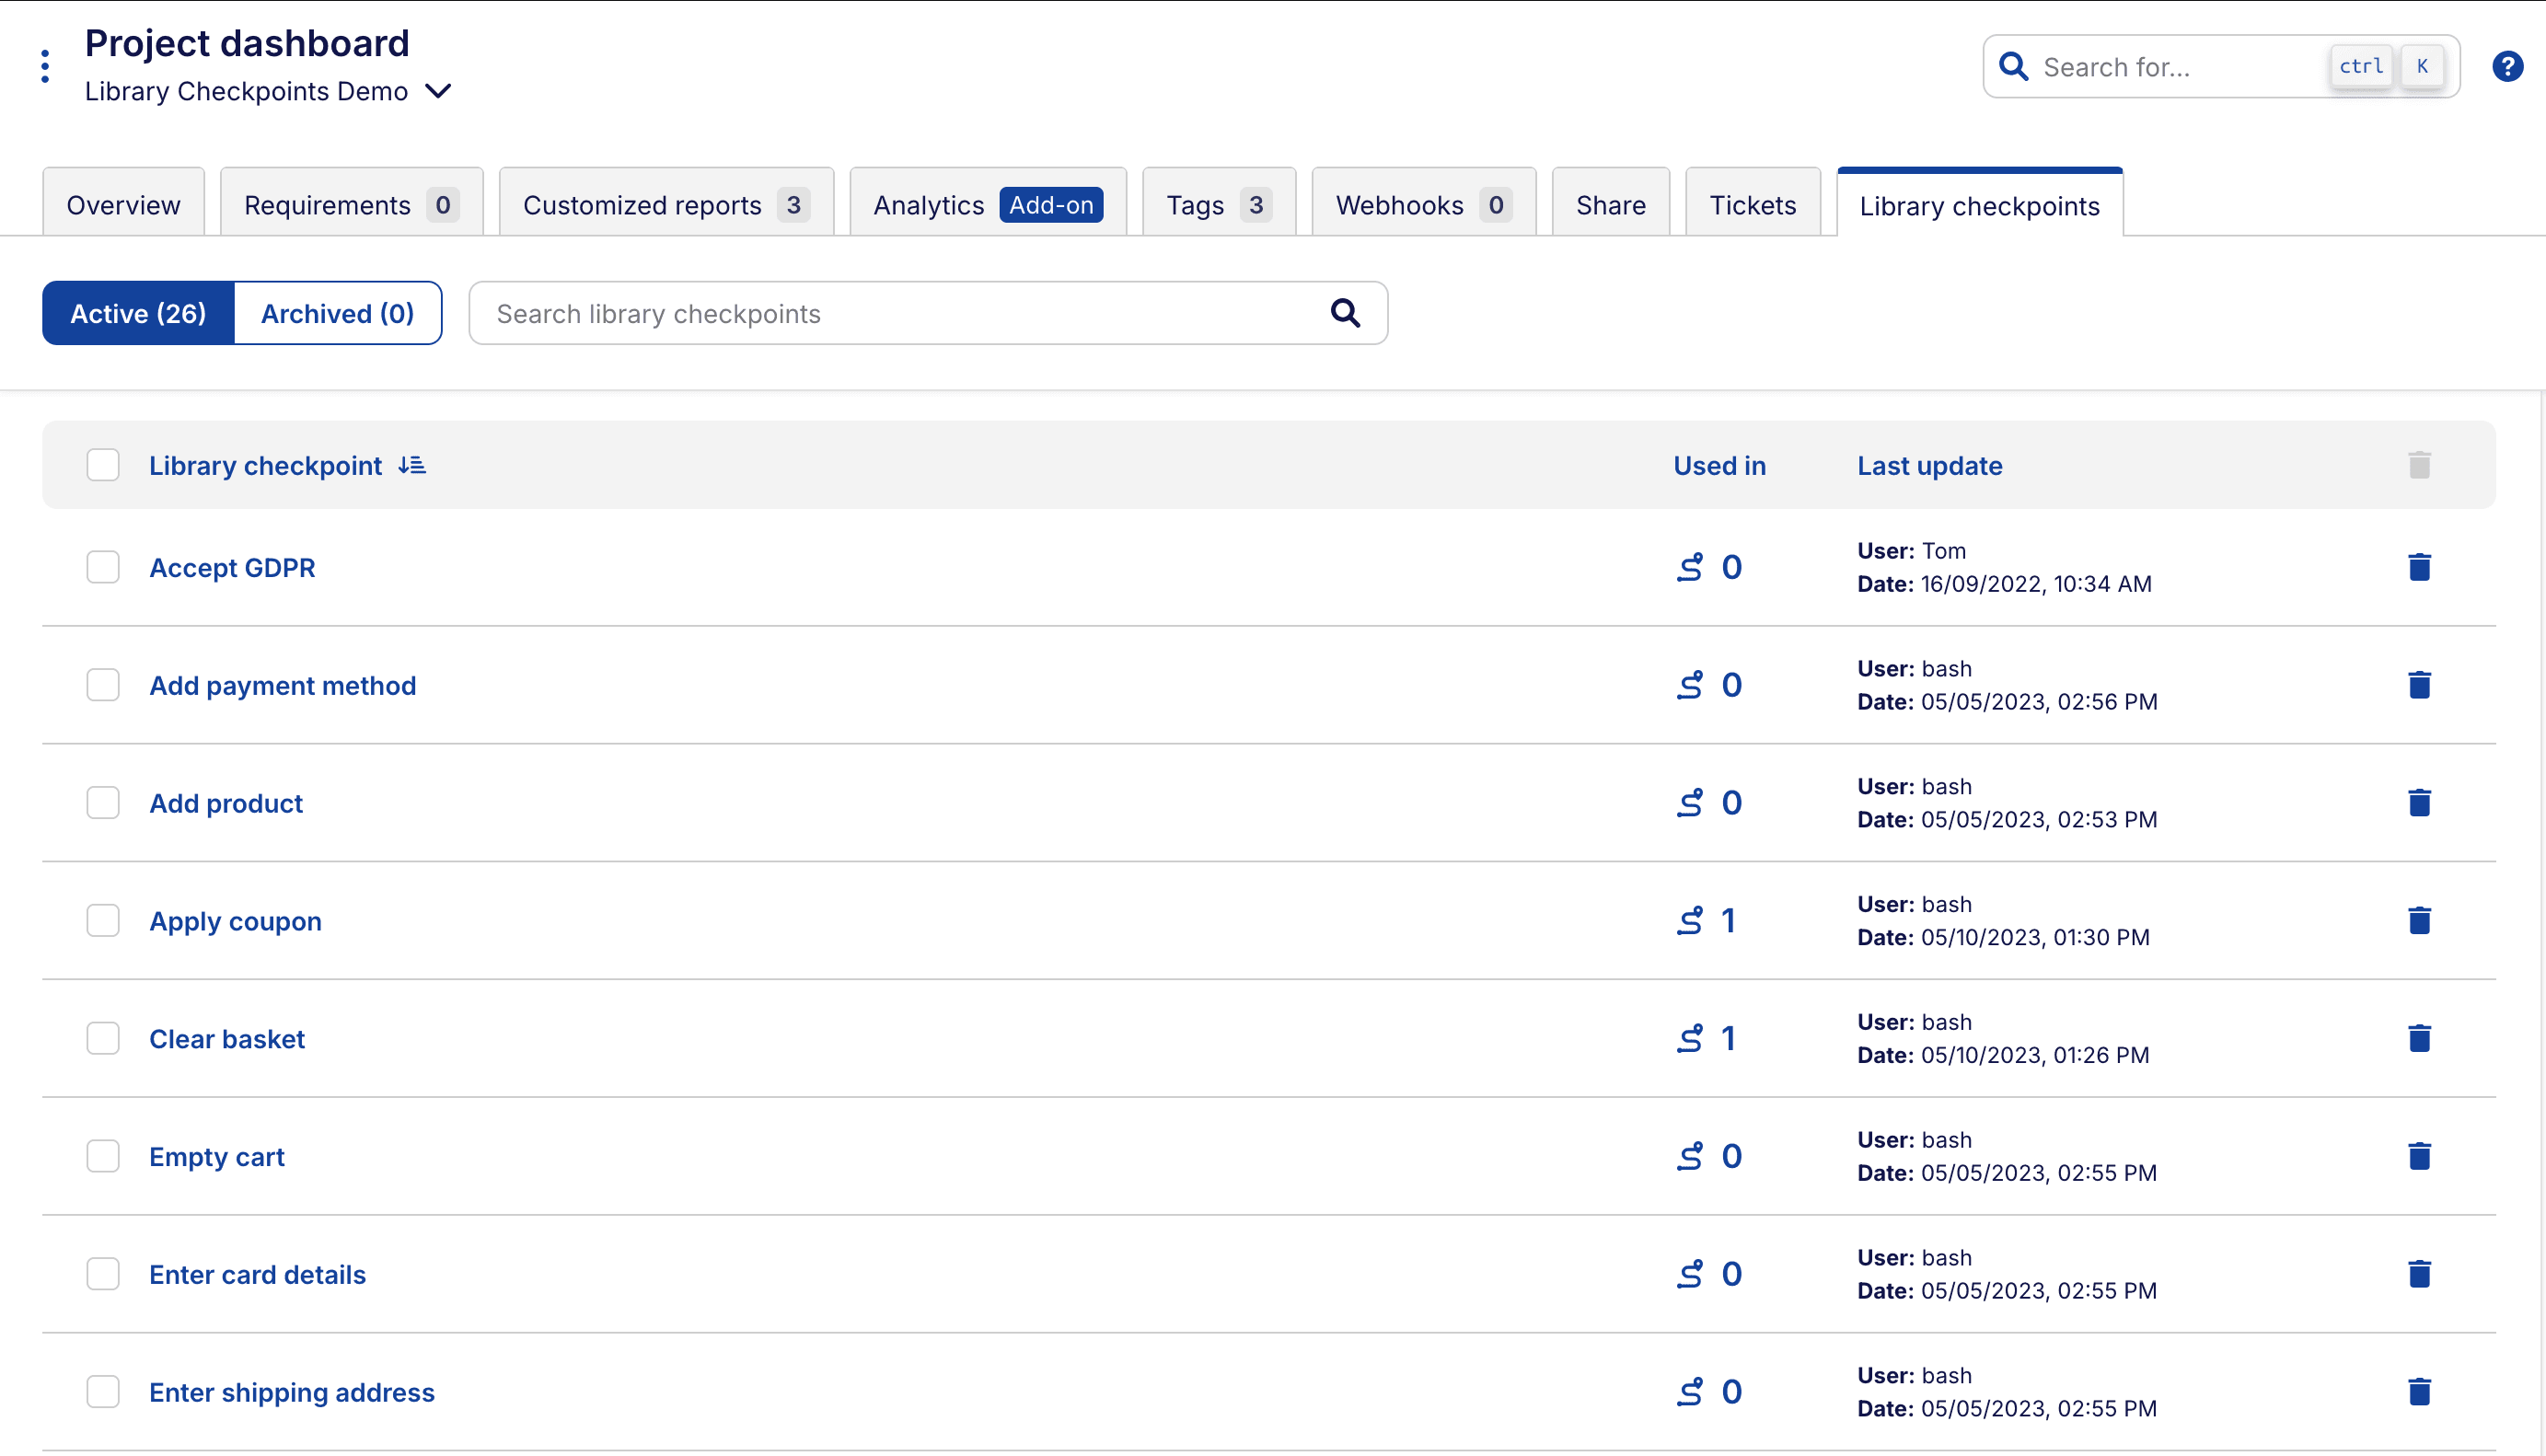
Each row in the list shows the name of the library checkpoint and other useful information such as the number of journeys that use the library checkpoint, as well as the last person who edited it (or the creator if there were no updates).
Clicking on a library checkpoint opens a side panel that displays detailed information about that checkpoint, including the goals and journeys that use it (with links to each journey), as well as the content of the library checkpoint itself (the test steps).
About library checkpoint content edition
Please note that editing library checkpoints directly from the dashboard is currently not supported. You need to unlock the library checkpoint within a journey where it is used, and edit it there. Refer to the section Making changes to a library checkpoint for more information.
# Archiving library checkpoints
You can archive a library checkpoint when you no longer want to use it in your journeys. This helps you have a clutter-free list of library checkpoints, since archived library checkpoints are not listed when you add one to your journey.
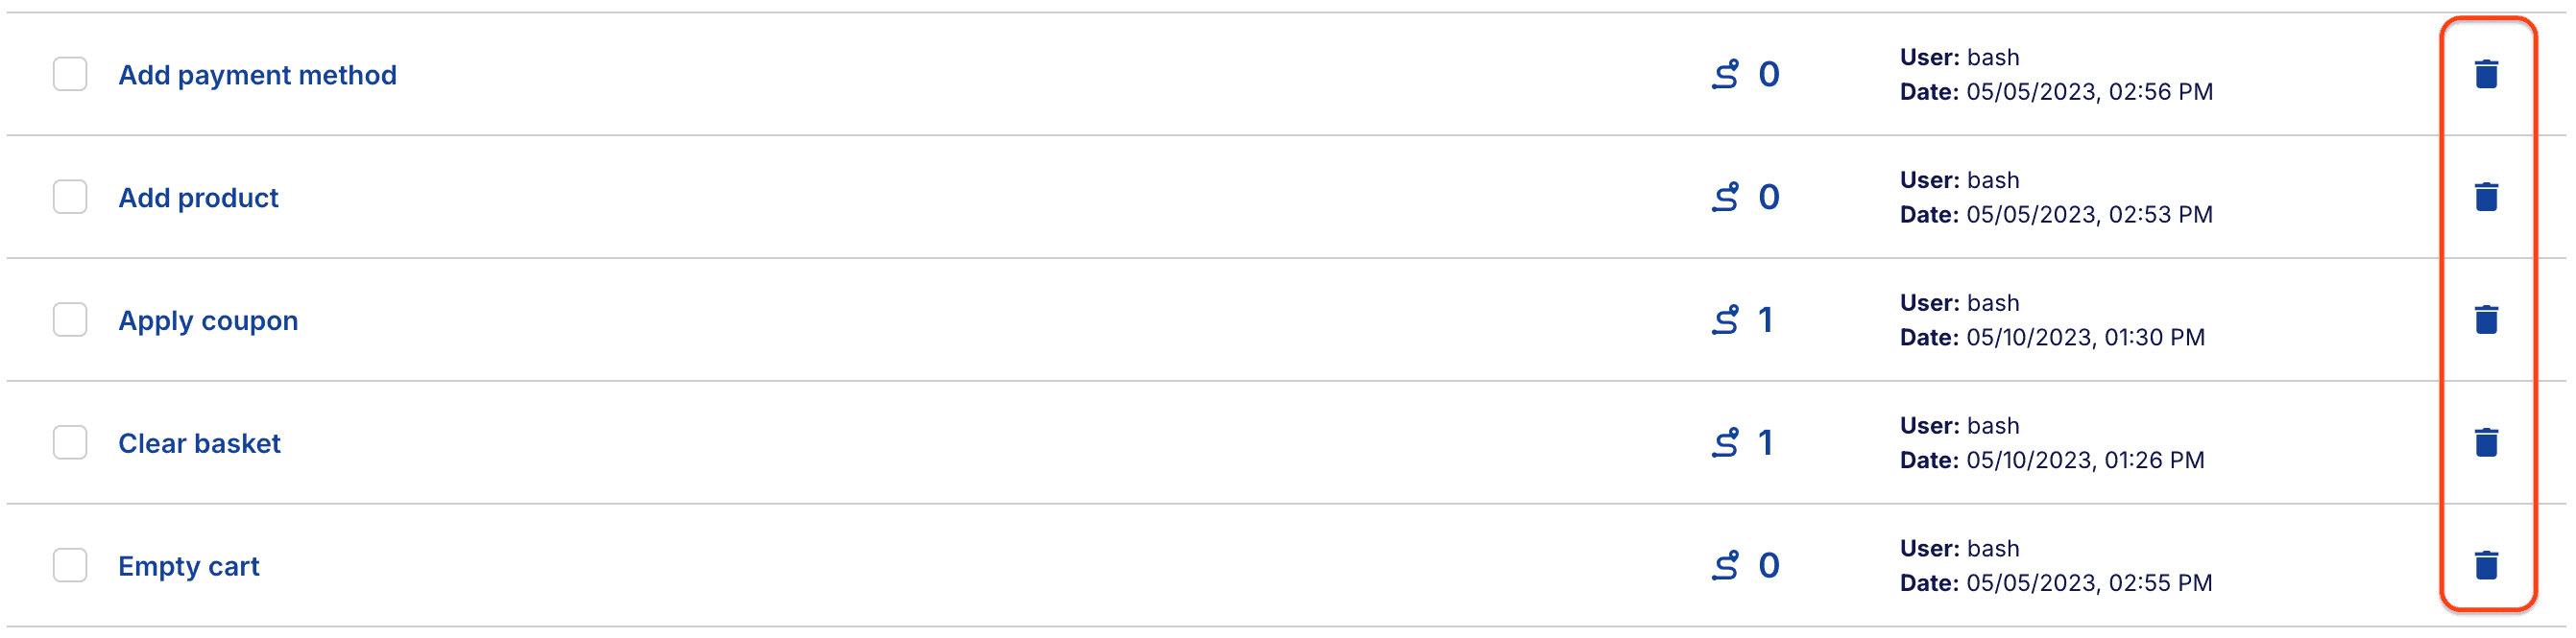
Library checkpoints can be archived by clicking the trash bin icon at the right of each row.
To archive multiple library checkpoints, select them first with the checkbox at the left, and then click on the trash bin icon on the sticky horizontal bar at the top of the library checkpoint list.
Every time you archive one or more library checkpoints, Virtuoso will display a confirmation dialog providing details on whether they are used in any journeys.
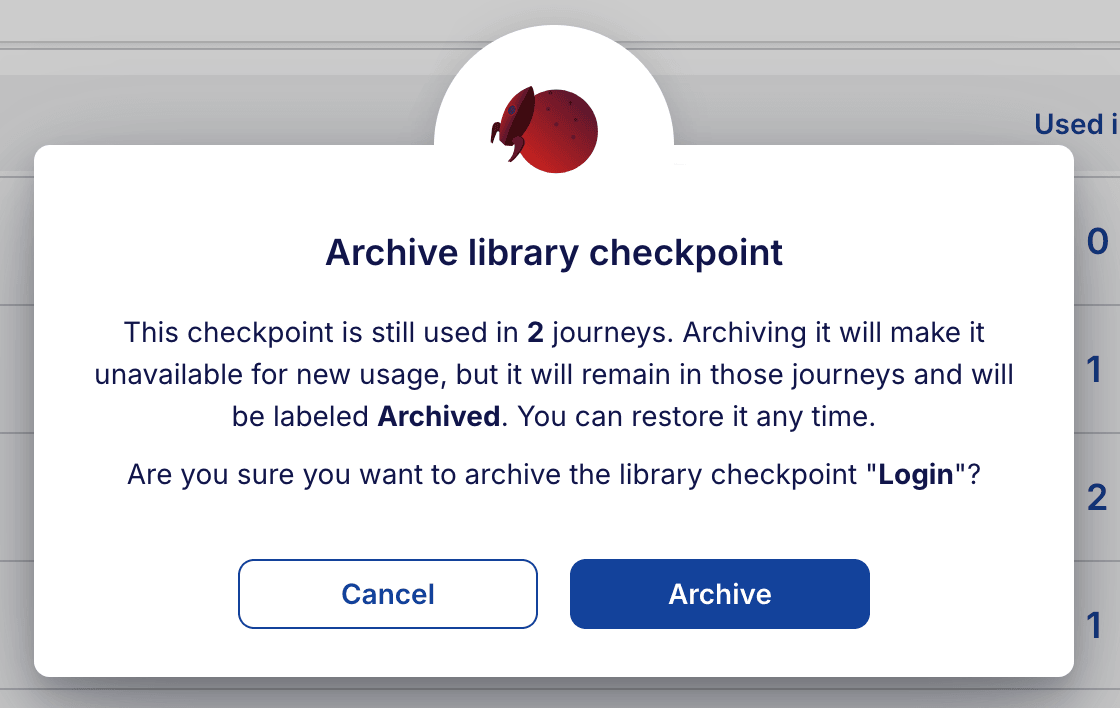
When a used library checkpoint is archived, it will have an Archived tag in the journey where it is used. This will help you spot old library checkpoints that you may want to replace or update.

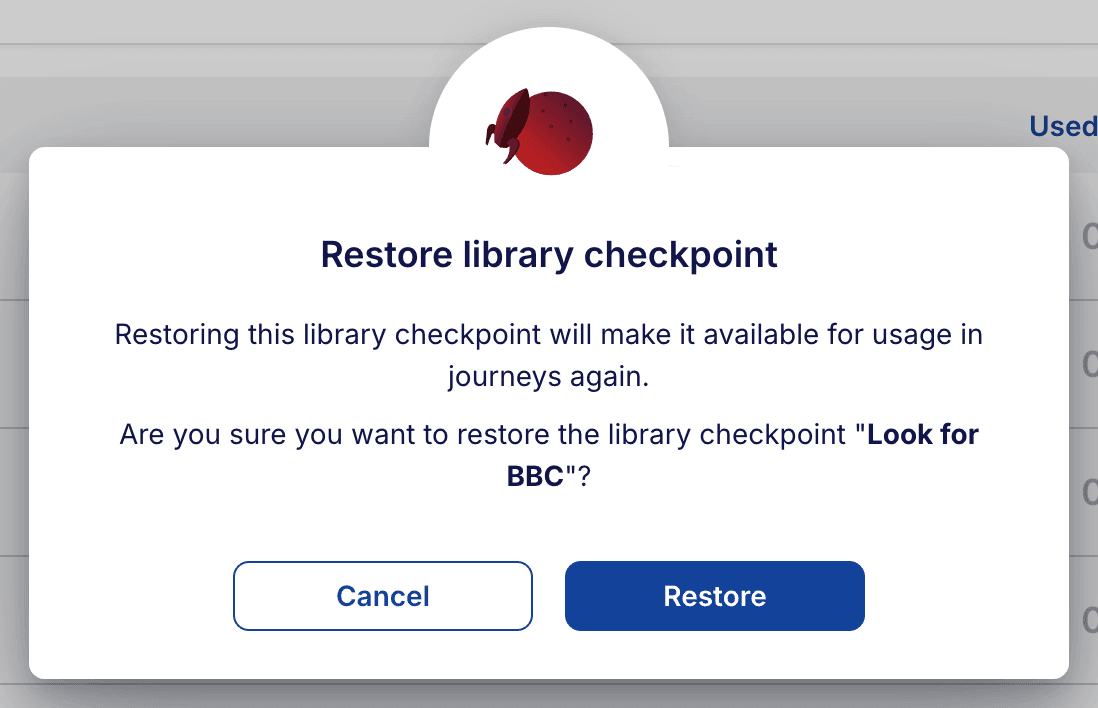
# Restoring library checkpoints
Analogously to archiving library checkpoints, you can restore library checkpoints that have been archived. Clicking on the Archived button to the left of the search box will show all archived library checkpoints. You can then restore a single library checkpoint by clicking on the restore icon to the right of each row.

To restore multiple library checkpoints, select them first with the checkbox at the left, and then click on the restore icon on the sticky horizontal bar at the top of the list.
Whenever you restore a library checkpoint, Virtuoso will ask you to confirm and inform you that your restored library checkpoints will be ready to be used again in your journeys.
WARNING
Be aware that you cannot have more than one active checkpoint with the same title. If you decide to restore a library checkpoint that has the same name as an active one, the restored library checkpoint will be renamed by adding a number suffix.
# Running journeys with library checkpoints
Your journeys run as normal with library checkpoints, and you do not need to do anything else to run journeys that contain them.
# Healing
As library checkpoints can be shared between different goals, automatic healing is not applied to library checkpoints. This is to prevent a journey running in one goal negatively impacting the other. Healing is still enabled for standalone checkpoints (unless it has been disabled for the steps).
# Making the most of library checkpoints
Maintaining a good library is the key to success with library checkpoints. We recommend keeping library checkpoints small so that they can be used more widely - the more specific a library checkpoint is, the less likely it will be useful in another journey.
Additionally, be sure to archive any checkpoints you are no longer using. Remember that archived goals will still keep the library checkpoints that were used when they were last run. You can have multiple archived copies with the same name (for instance, a library checkpoint that is iterated along with your goals and journeys).
When choosing to reuse a library checkpoint, be sure that it works for your purpose, and be considerate if you need to change it to meet your needs – if your changes alter the way the checkpoint runs elsewhere, this could cause issues. If you are uncertain, you can always detach the library checkpoint to ensure your changes do not impact anybody else. After detaching a checkpoint, you can add that version to the library when you are ready. This will make certain the changes will not impact the original users of the library checkpoint it is based on. You will need to modify its title, though.
In your journeys, you may make use of variables from test data or from the Store command. For example, you might generate a random username, store it in a variable, and then use it to sign up in your application, then log in.
Any variables defined before the library checkpoint will be available to it. Library checkpoints may also set variables,
too. This allows you to create library checkpoints that accept variables: for example, you can create a library
checkpoint that logs in using the variables $email and $password so you do not need to hard-code them in the
library checkpoint.
As your library belongs to your project and not just your goal, naming your library checkpoints carefully is important. Choose names that make it clear what effect the library checkpoint will have. For example, “Login to internal portal with test user credentials” makes it clear what application, page, and data the checkpoint uses.
If a library checkpoint that does what you need already exists, use it! If your library contains multiple checkpoints with similar names and steps, it will be hard for other users to make the right choice and be difficult to maintain. Consider using variables to make your library checkpoints more adaptable, but if you need multiple, similar alternatives, ensure they are named clearly.
The shared first checkpoint of the journey is automatically added by Virtuoso and cannot be made a library checkpoint. This is to ensure that your goal’s properties (like the starting URL) do not accidentally fall out of sync with the steps in your journey. If you would like to use a library checkpoint to start your journey, you can add it immediately after the first checkpoint; then use the New journey from here button to automatically populate new journeys with it.