# Timeline
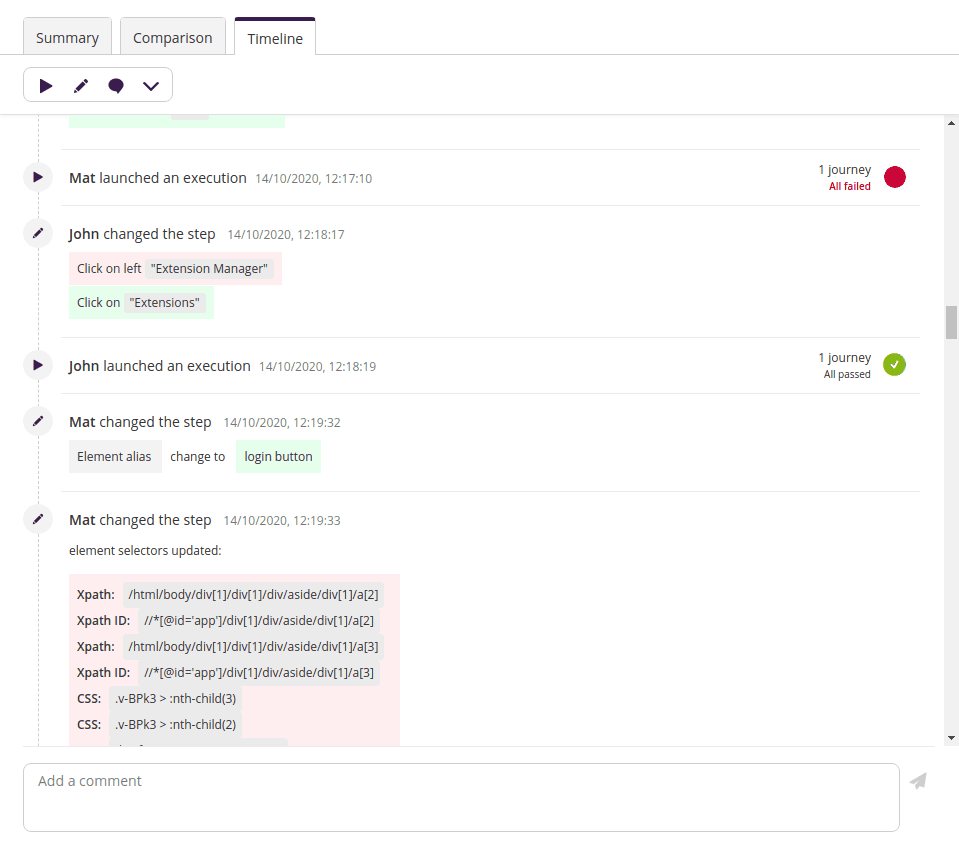
Every goal has its history of changes and jobs since the goal was created. You can inspect the history at different granularity levels: goal, journey, or test step. Each level shows only entries related to the same level or below. This means, if you are seeing the timeline for a specific journey, you see entries for this journey or any of its checkpoints and steps. You can also add comments to better communicate with your team. The timeline shows entries in the order they happened.
You can access the timeline anytime you are in the goal view by clicking on the Timeline tab present on the right-side panel. The granularity of the timeline will depend on what you are viewing and interacting with, that is, if you open it as soon as you enter the goal view you will see at goal granularity, after opening a journey then it will be limited to history connected to that journey, and finally if you have the test step properties open it will focus on that test step.
The timeline entries are divided into three types: jobs, changes, and comments. By default, you'll see the three types of entries, but you can use the filters to limit the results (e.g., show only changes).

# Jobs
Job entries represent a Virtuoso job. For example, if the user John executed a goal, the timeline shows an entry informing that John launched an execution followed by the date it was launched, and job status (failed, canceled, passed, etc.) which is a link to show the execution report in a new browser tab.
At the journey level, job entries refer to the journey itself rather than the whole goal (which may include more journeys). They show very similar information (user, date, outcome) and also allow you to click on the outcome to open the execution report, but in this case the outcome is for the specific journey.
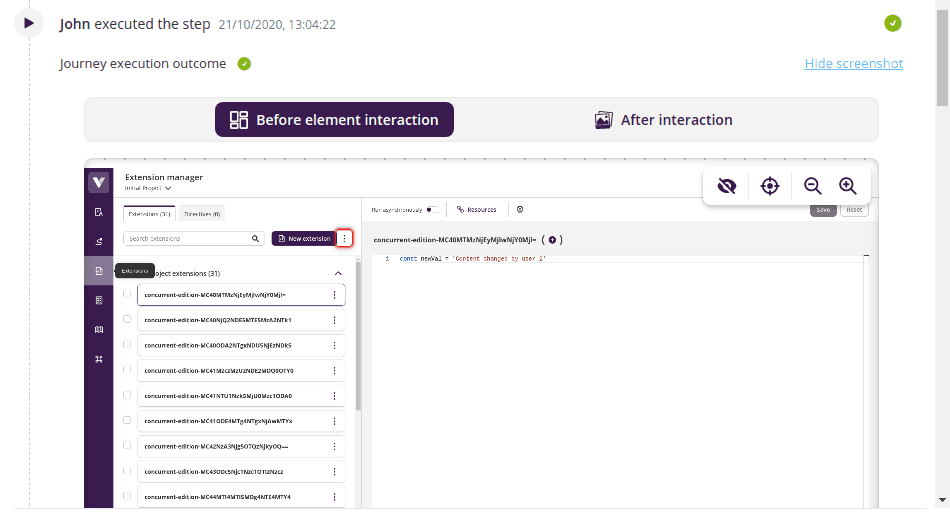
At step level, you see both the journey outcome and the step outcome, and it also includes the screenshot for that step (when available). If you click on the step outcome, the execution report will open for the journey to which this step belongs to and with this step selected.

If a job was launched via a plan, the entry shows Virtuoso as the user and the plan name as a link to the plan details page.
# Changes
A change is anything that makes your goal different from what it was before, even if the change is minimal. Here is an example:
Changes inside a library checkpoint are not registered in the timeline
Because library checkpoints exist outside the current version control system, as explained in the documentation about library checkpoints, changes inside library checkpoint, such as step added, removed or updated, are not registered in the timeline.
Other examples of changes that are shown in the timeline:
- Adding or deleting journeys, checkpoints, or test steps;
- Editing a test step property (value, variable, selectors, etc.);
- Changing the order of checkpoints or test steps;
- Renaming journeys or regular checkpoints;
- Merging or splitting a checkpoint;
- Updating the journey data table or the test step data attribute.
# Comments
Comment entries are notes from your team or yourself. You can add a comment by typing in the text area at the bottom of the timeline and pressing the send button.
This feature has Markdown support, so you can format your comments by writing:
[Virtuoso link](https://virtuoso.qa)will render Virtuoso link as a link;https://virtuoso.qawill be a link too but showing https://virtuoso.qa;**bold**will format anything between the**pair as bold. Alternatively, you can use__instead of**(e.g.,__bold__);*italic*will format as italic. Again, you can replace the*by_(e.g.,_italic_);- Prefix each line with a
-to create an itemized list; `highlight`willhighlightthe content.
Here is an example using an itemized list and a bold word:
Re. work next week, we need to do:
- Fix X
- Fix Y
- **important:** do some stuff
And it is rendered like this:
Multi-line comments
Pressing ENTER will send the comment. Pressing SHIFT - ENTER will add a new line rather than sending the comment.
You can also mention people using @username to notify people of your team. For example, if you write @john please review this for next week, then the user associated with the username @john receives an e-mail notification with this message. The interface suggests usernames while you type it, so you don't need to remember every username. You can also mention using someone's e-mail address instead of the username.