# Microsoft Azure AD
The following steps must be taken to integrate Virtuoso with Microsoft Azure AD.
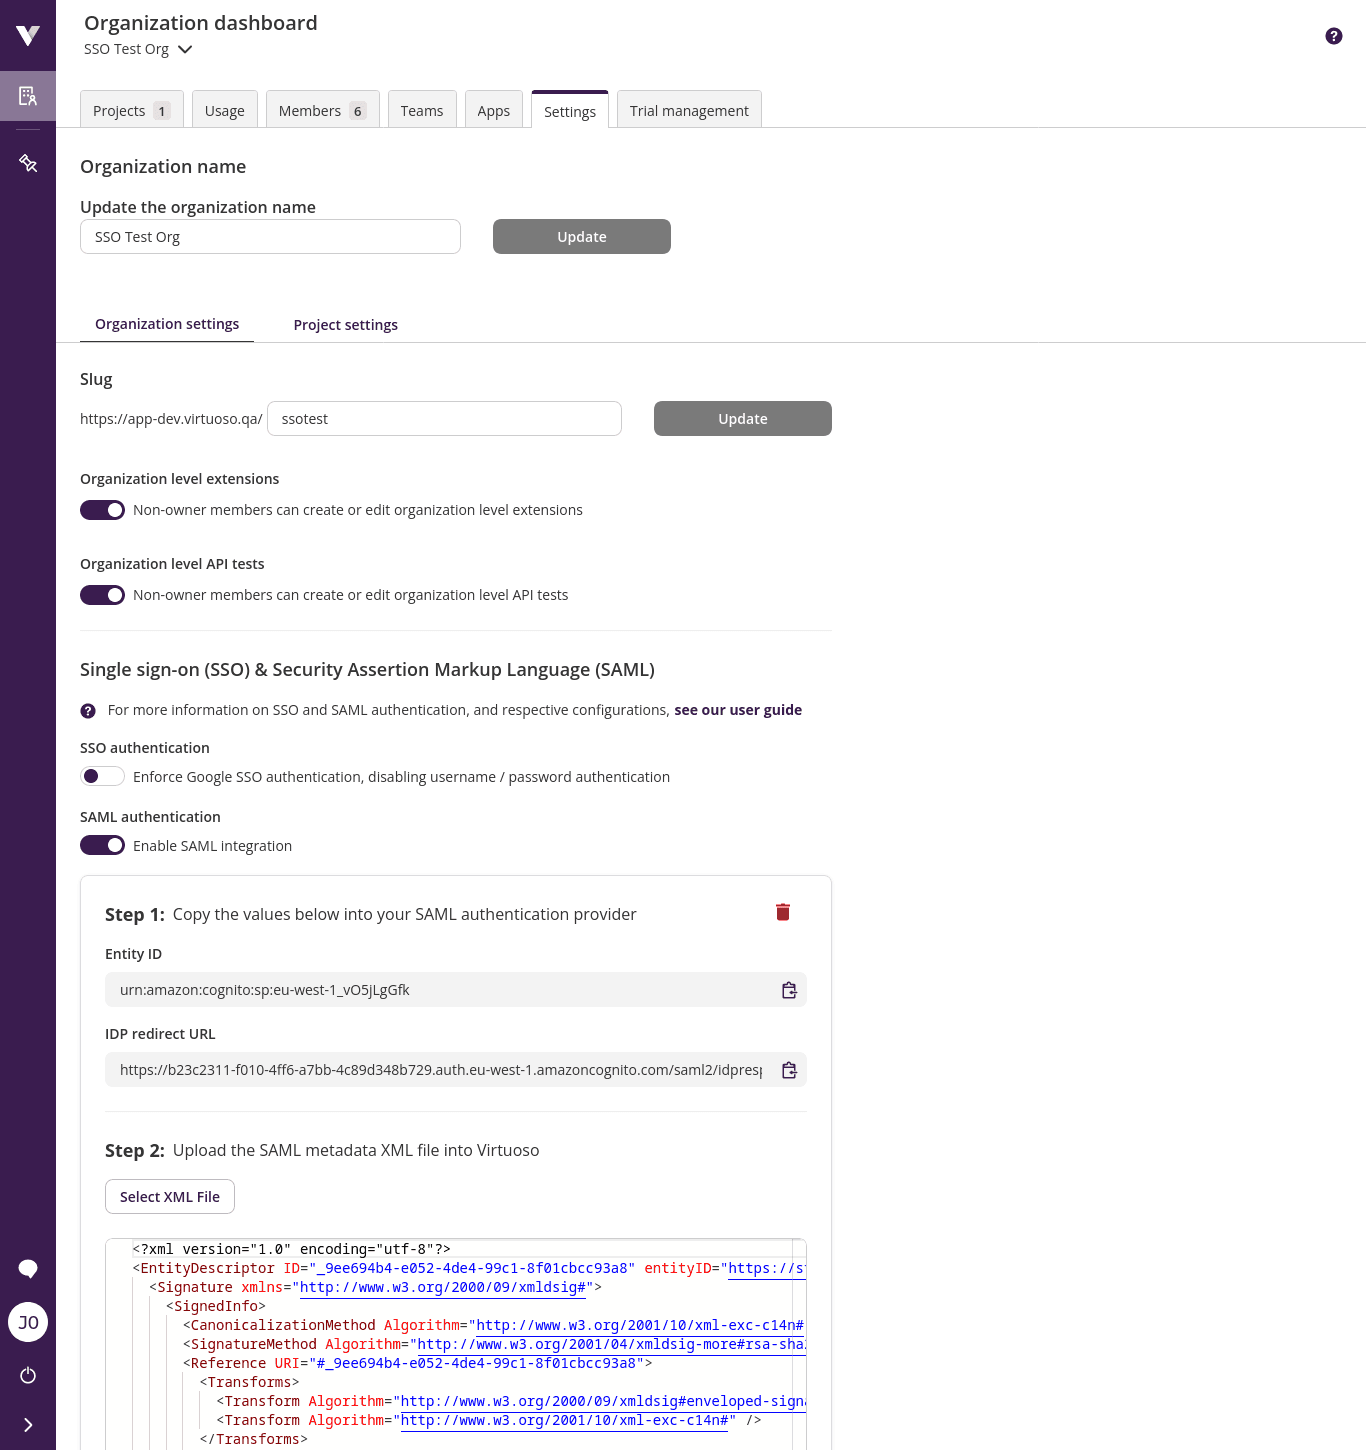
1. Start by enabling SAML authentication in Virtuoso by going to Organization settings and activating Enable SAML integration
TIP
Keep this window open since Entity ID and IDP redirect URL are going to be necessary to configure Azure AD.
2. Access your Azure Active Directory page in another window
3. Click Enterprise applications
4. Click New application
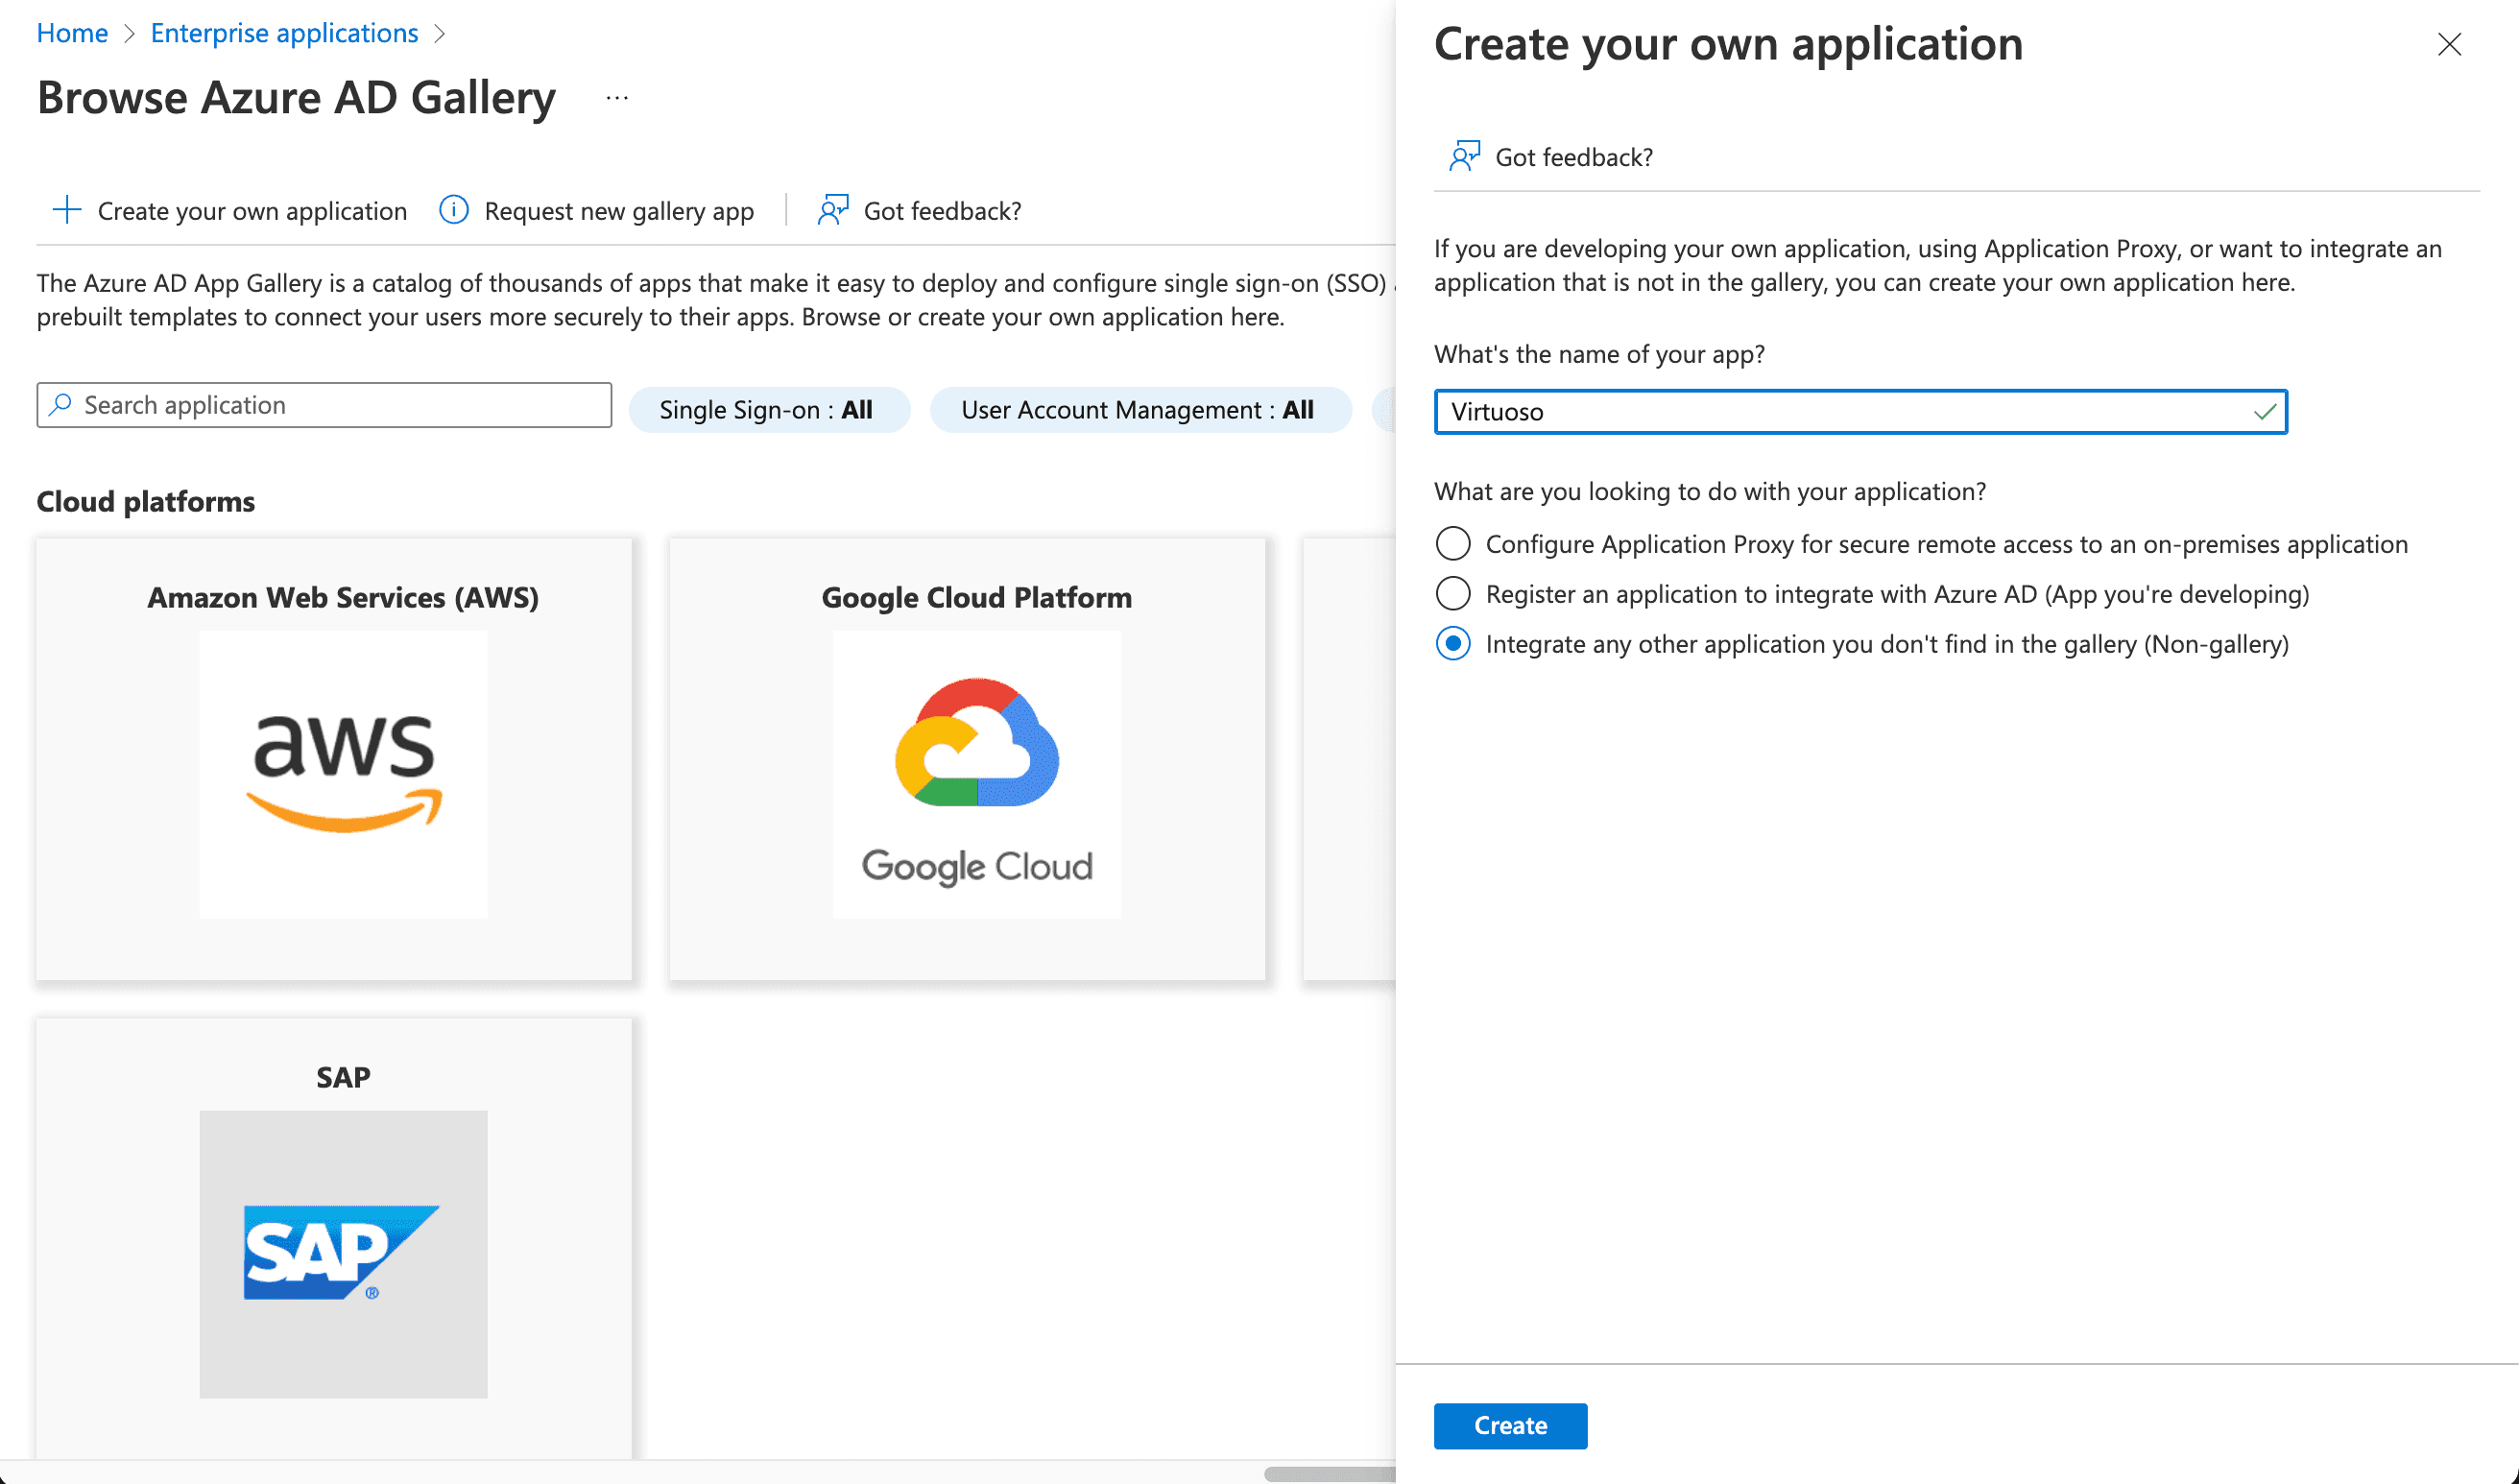
5. Click Create your own application
Give the application a meaningful name like Virtuoso and click on the Create button
WARNING
Ensure that the option Integrate any other application you don't find in the gallery (Non-gallery) is selected.
6. Click on the link Get started in the Set up single sign on box
7. Click SAML
8. Edit Basic SAML configuration
9. Copy Virtuoso Entity Id and Idp redirect URL to the Identifier (Entity ID) and Reply URL (Assertion Consumer Service URL) respectively in the Basic SAML configuration.
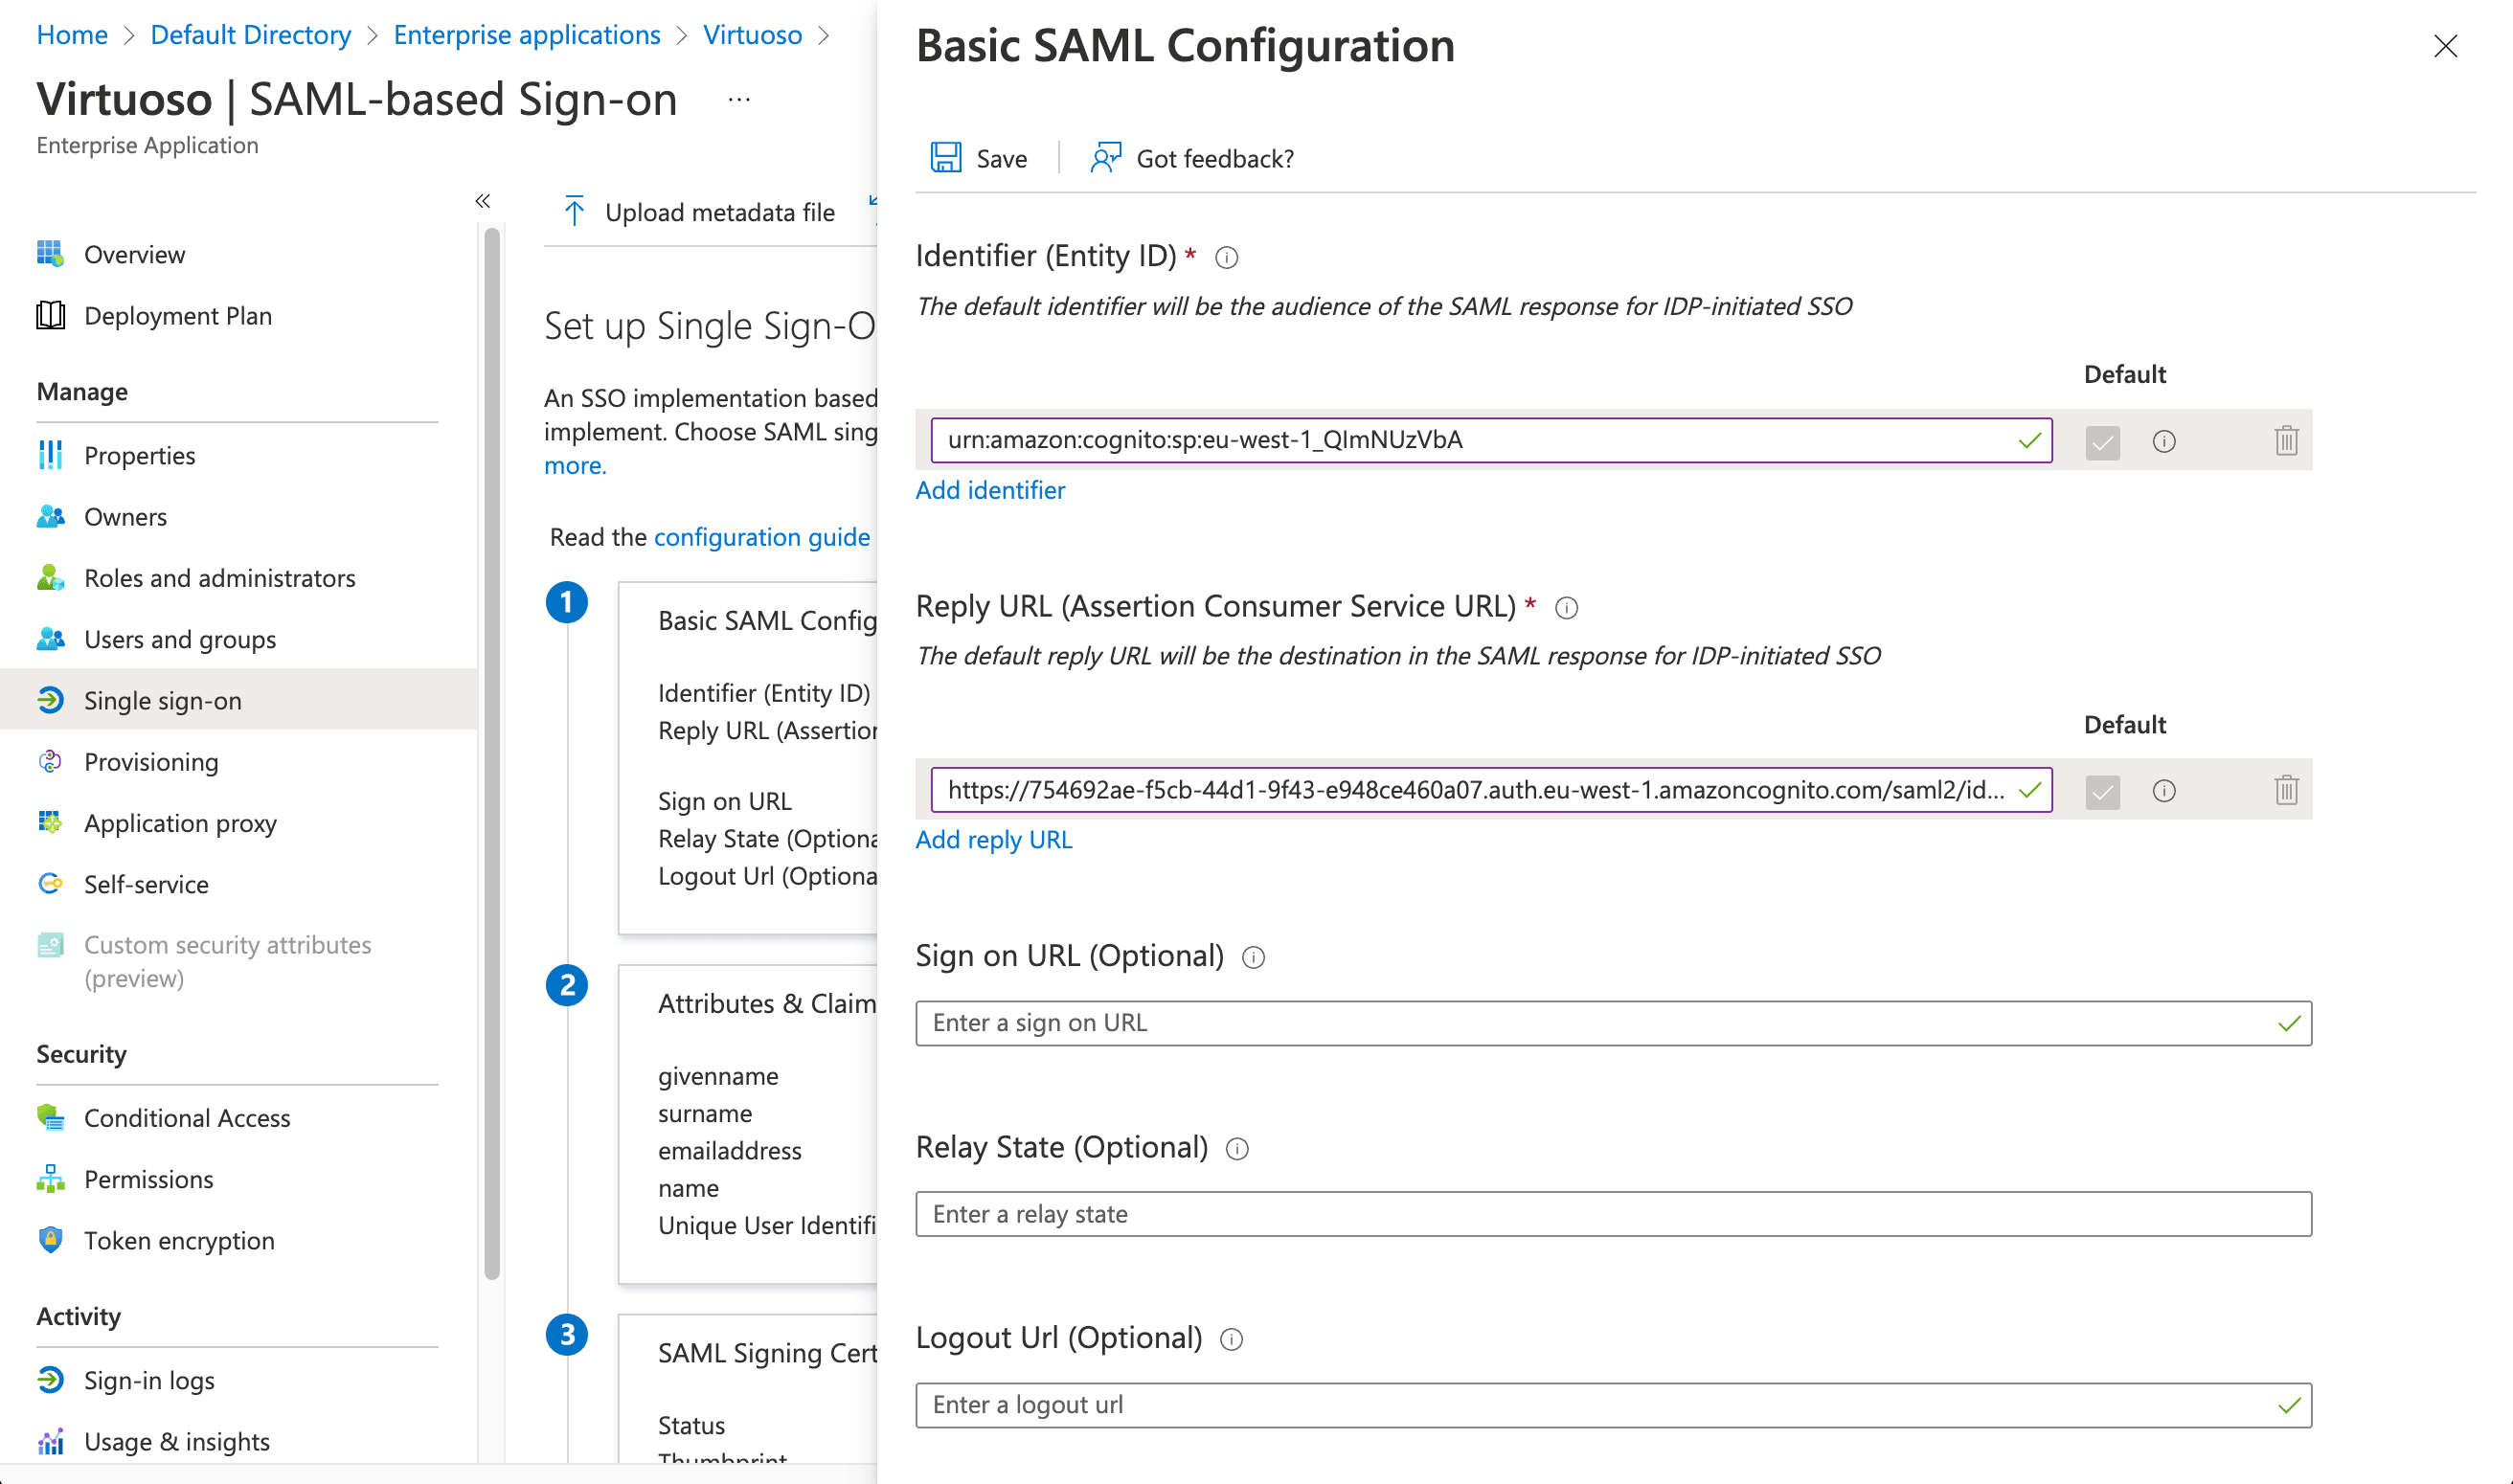
10. Click Save
11. Edit Attributes & Claims
11. Change Unique User Identifier (Name ID) attribute to user.email

12. Click Save
13. Download the App Federation Metadata Url
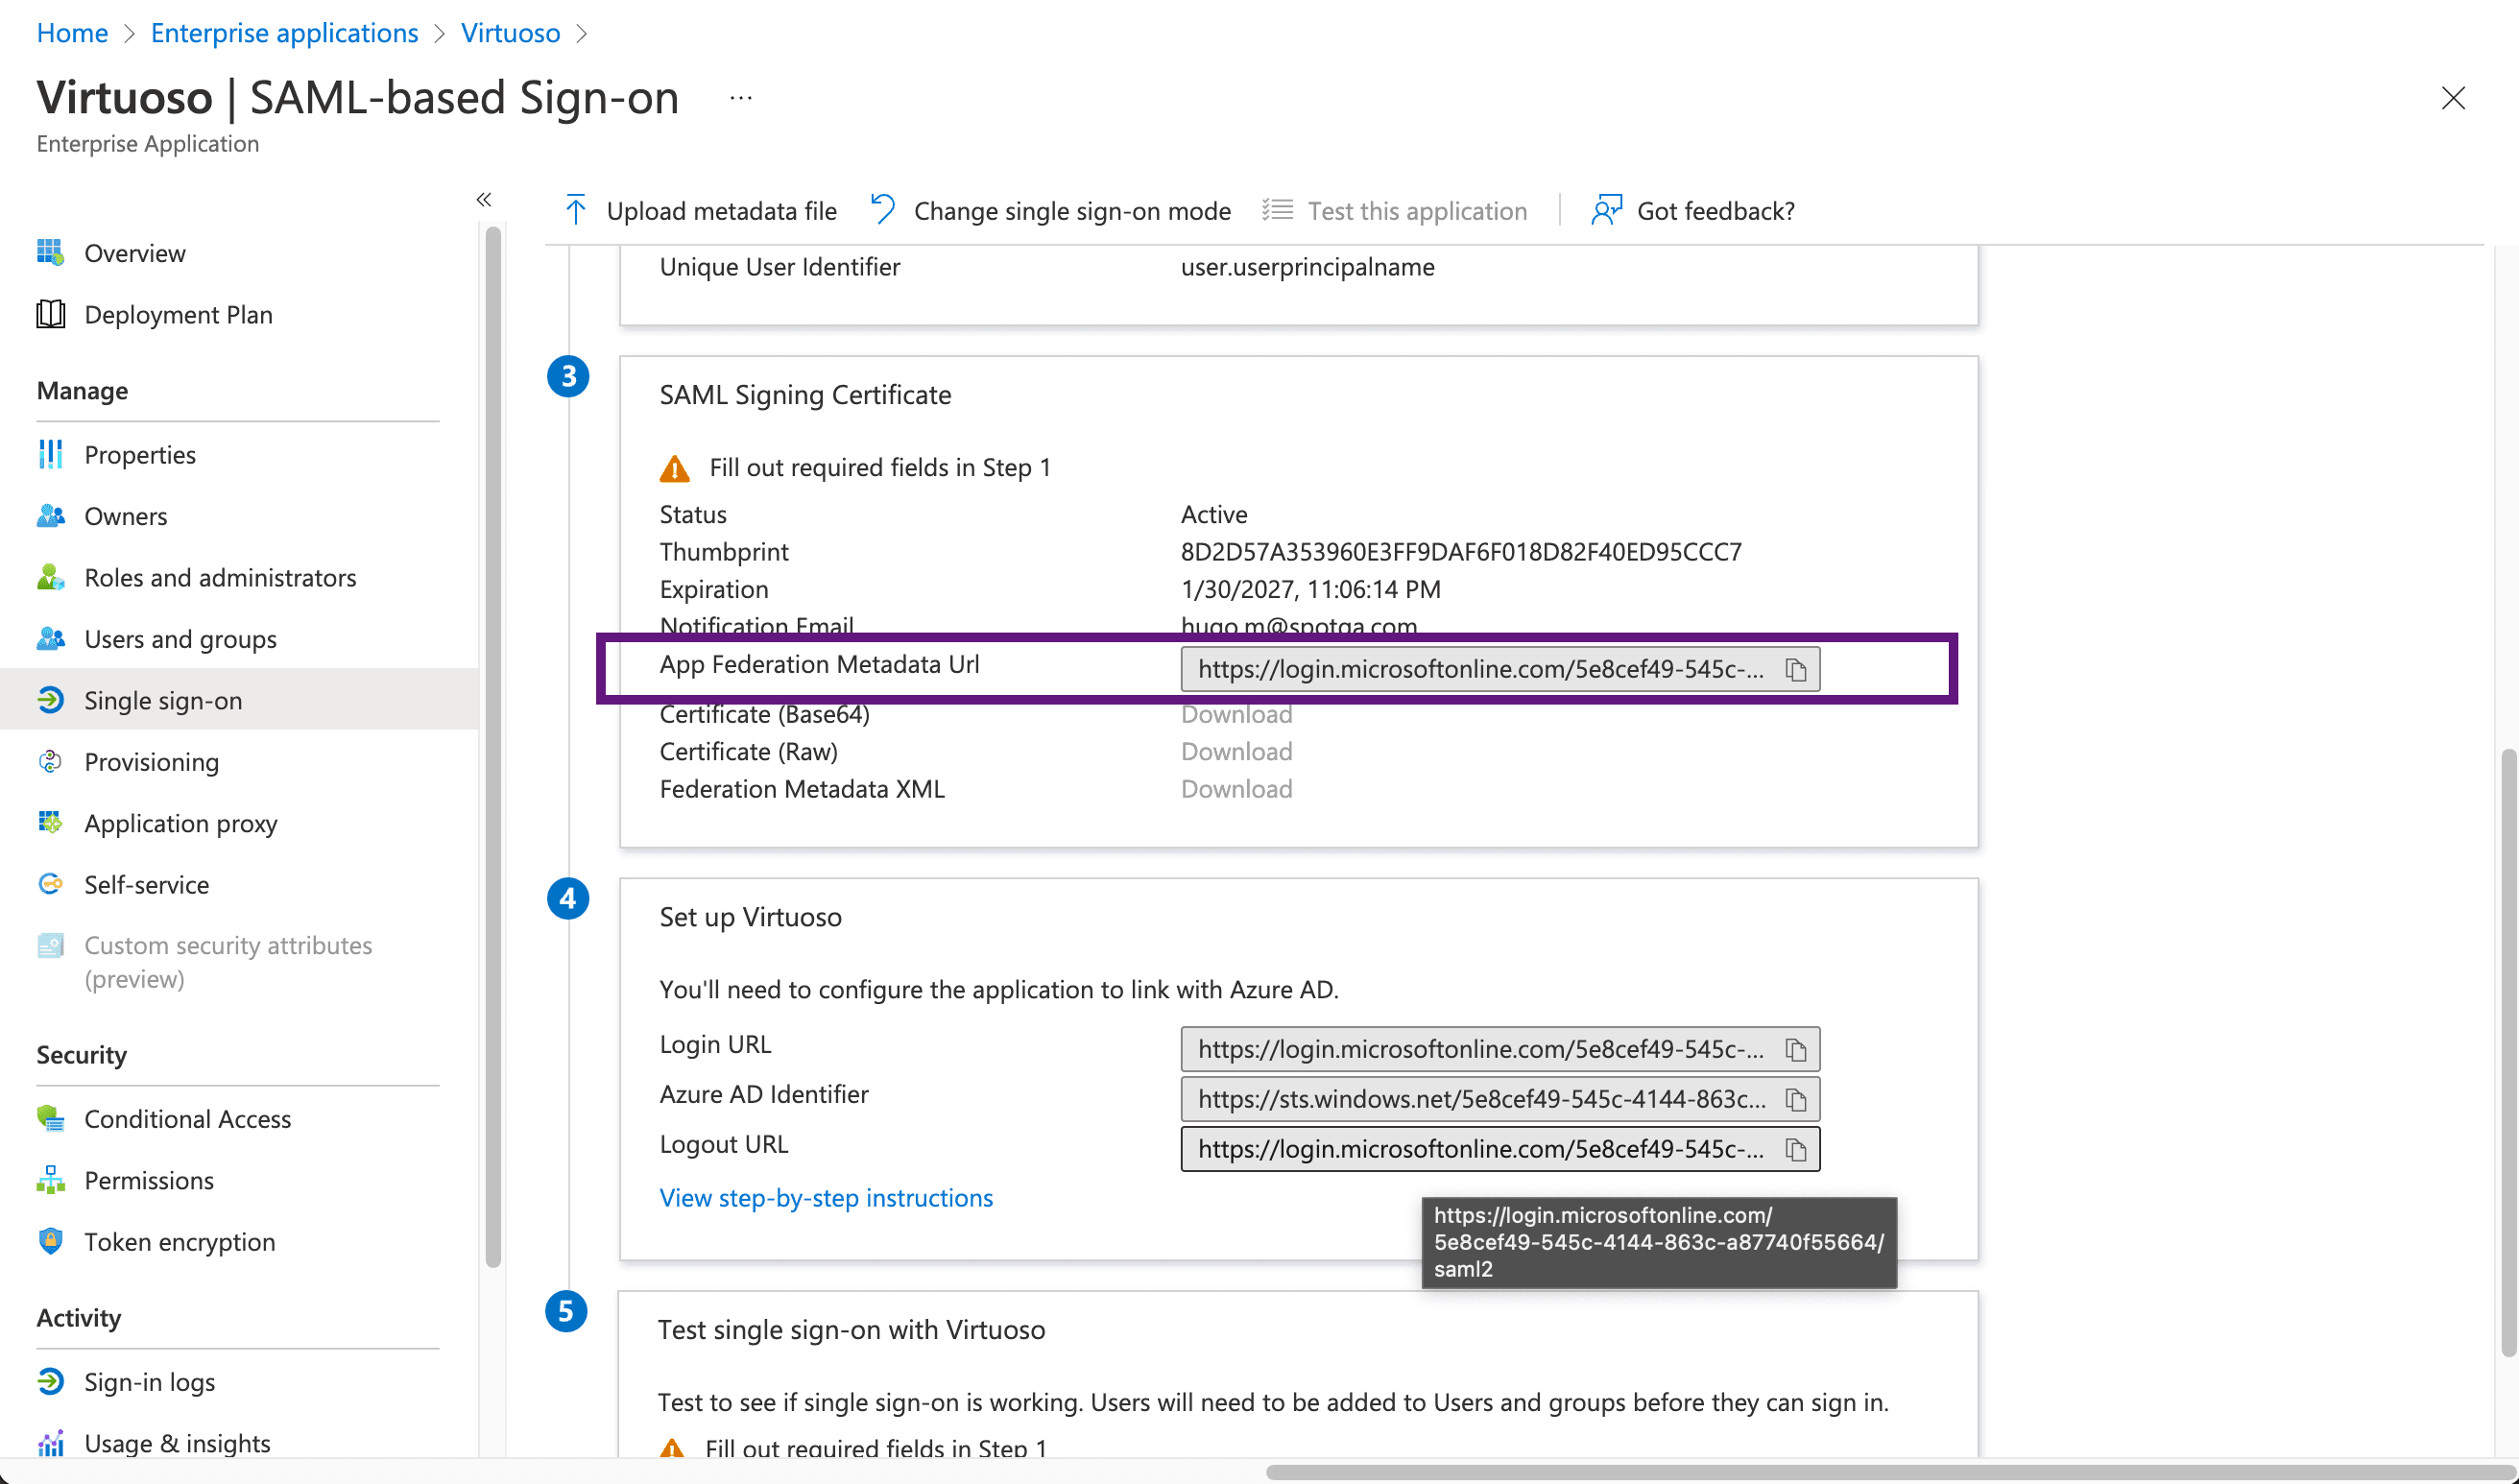
14. Upload into Virtuoso the metadata file
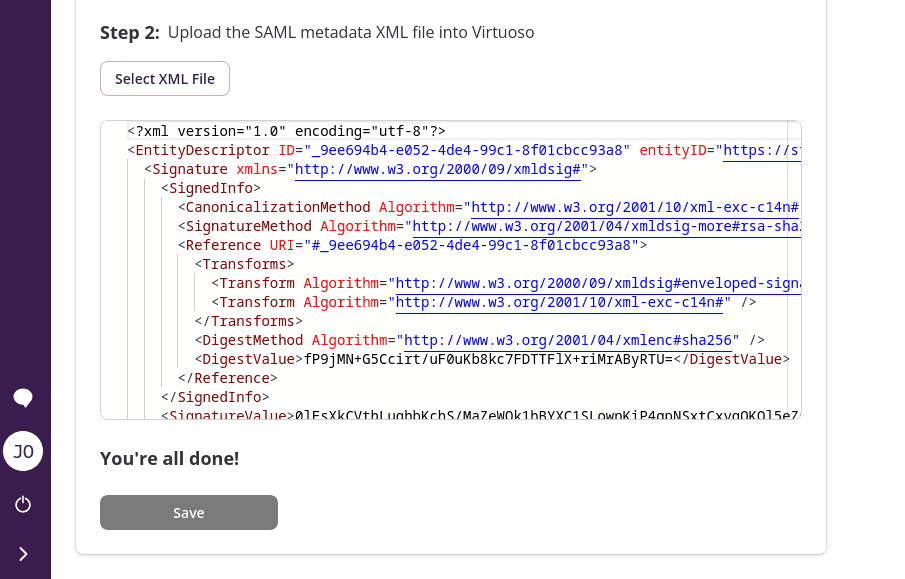
15. click Save and you're done!
WARNING
Don't forget to add users to the Azure application. Only users registered in the Azure application will be able to login in Virtuoso.